Last Updated on February 2, 2023 by Dee
Creative people, you have a new tool to master: layer opacity. If you’re wondering how to change the opacity of a layer in Procreate then this post will break down the process into easy steps you can follow.
Layer Opacity is one of the most powerful features in Procreate and it can be essential for your work. If you want to get the most out of this amazing design program, then learn how to change layer opacity!
Procreate is one of the most powerful iOS design programs and if you’re serious about art, then you’ll probably want to check out Procreate. It includes several features that are essential for creative people.
What is Layer Opacity?
Layer Opacity is the transparency of a layer. The opacity value ranges from 0 (fully transparent) to 100 (fully opaque).
How to Change the Opacity of a Layer in Procreate
How to lower Opacity on Procreate
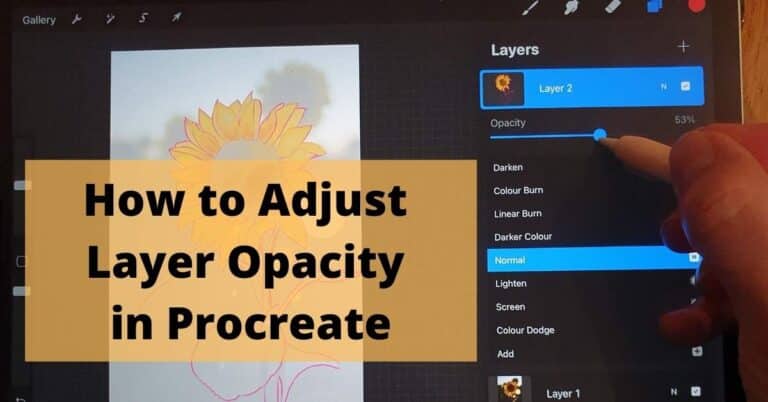
In Procreate, you can change the opacity of a layer (or how to change opacity of picture in procreate). To do this, open the Layers Panel and expand the settings of the layer you want to adjust.
You will see a slider on your screen that you can move. If you don’t see it, tap on a layer with two fingers and it will appear!
Layer opacity in Procreate is one of the most important features for me when it comes to designing. I can use it to change the look of my design by adding layers and altering light and shadows, or just making my colors more subtle.
If you are just starting out with Procreate, there are a few things that you need to know before you start working with layer opacity – including how to use an opacity slider in Procreate.
[Related article: 21 Procreate Coloring Pages to Help You De-stress and Relax]
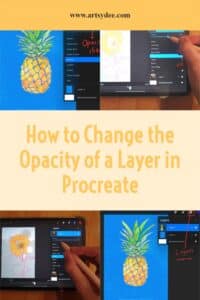
How to See Opacity in Procreate
In the newest update to Procreate, they removed the Opacity tool from the Adjustments tab, but you can still change it by tapping two fingers on your desired layers. When you do this, a slider will come up and you can adjust the opacity of your layer.
For aspiring digital artists who want to know how to change the opacity of a layer in Procreate, there are two ways, and I’ll break them down for you here:
1. Select your Layers Panel and double tap your chosen layer with two fingers.
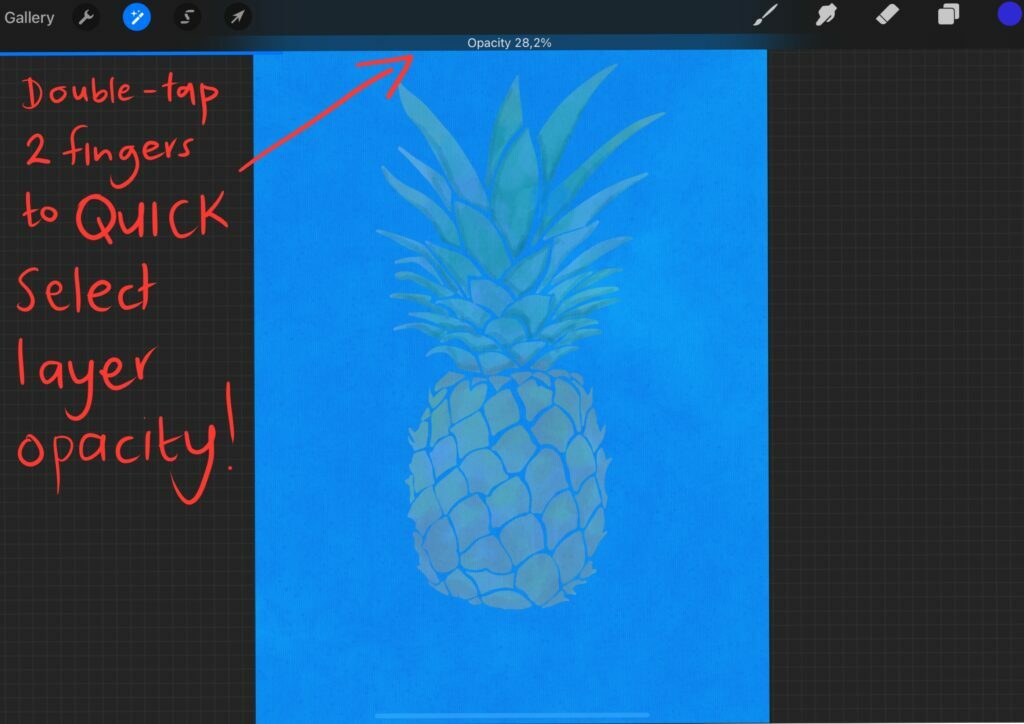
OR
2. Select the Layers tab in the menu and change opacity through this option.
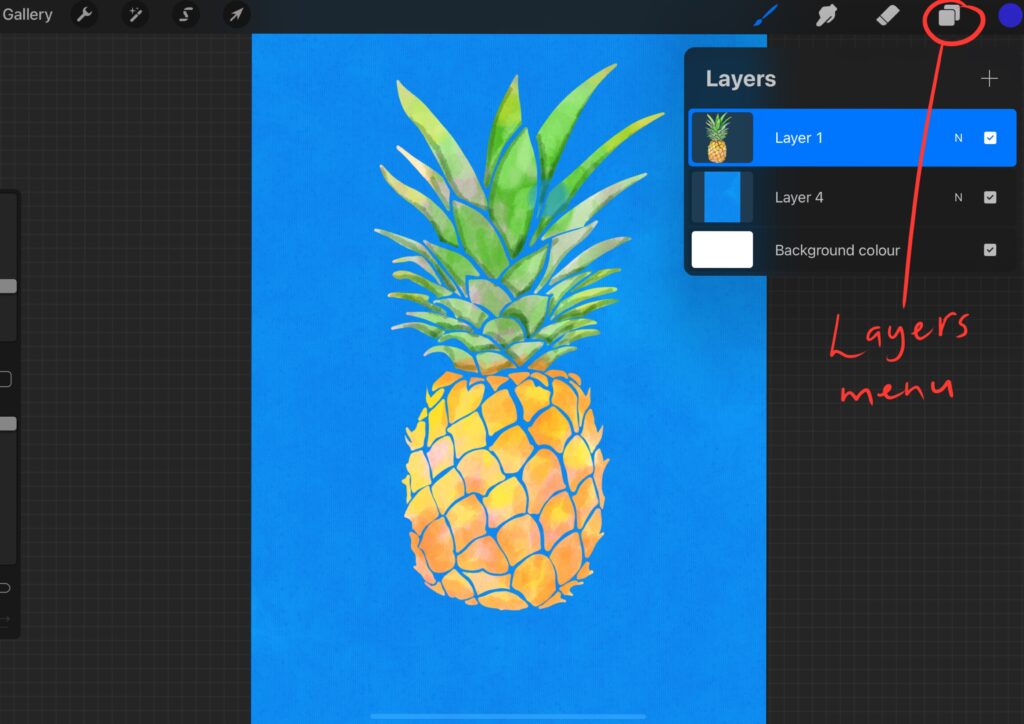
Once your layers tab is open, select the layer you want to work on.
3. Select “N” on your chosen layer.
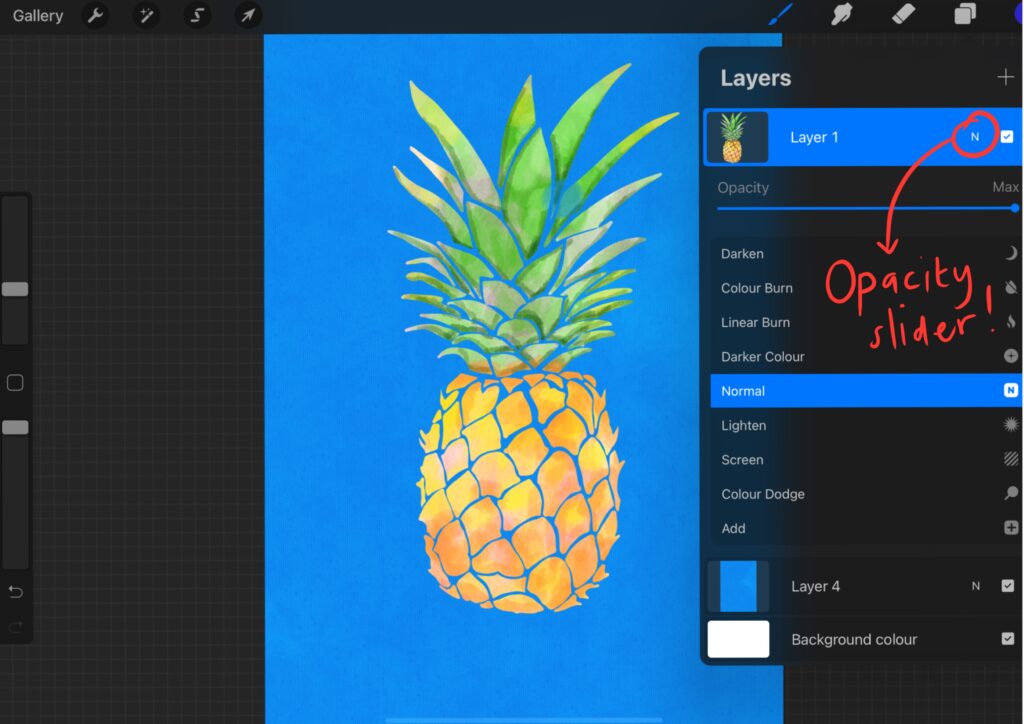
By clicking on the ‘N’ you will open up a menu with a whole lot of other options. Most importantly, you will see the opacity slider option at the top of this menu.
If you are wondering how to lower the opacity of a layer in Procreate (how to turn down opacity on Procreate) follow these steps. Whenever you work with layers, you will notice that Opacity always begins at 100%. This means that the colors are solid and you cannot see through the layer at all. Once you start adjusting or lowering the layer opacity, the layer beneath starts showing through.
In my experience, adjusting the opacity of a layer in Procreate can be complicated. There are specific ways you can adjust layer opacity in Procreate. Remember that you can only see and adjust the opacity of one layer at a time.
And of course, I must mention that Procreate only works on an iPad – that means now is the time to get your first iPad or upgrade your old one.
For aspiring digital artists and creative people, if you’re considering investing in an iPad for Procreate, here are some reasons why you should…
- It has many features and tools for people looking for more than just basic sketching on the go.
- You can create all sorts of art with it like painting, drawing, collage, and the joy of working digitally means you can work on your art right away instead of having to wait until later when you get home, or when your art is dry!
There are a huge amount of helpful tutorials available on YouTube made by the creators themselves which will teach you how to get started with Procreate!
Check out my quick Procreate Opacity tutorial!
Essential Tools Required for Digital Art Creation on Procreate
An Apple Pencil is an essential tool that goes along with owning an iPad – especially if you intend to create digital artwork on Procreate. You can also use the Logitech Crayon. This also produces good results. Be careful of using other styluses – sometimes they just don’t do what you need them to!
The Apple Pencil is cool. It feels like a real pencil when I draw on my iPad! Other styluses are hard to use and not very precise. The Apple Pencil doesn’t have this issue, so you should get one if you want to start drawing digitally!
I would like to mention that I use a Paperlike screen protector on my iPad pro. This gives me a very real drawing experience when I am working on Procreate.
How to Control Opacity in Procreate
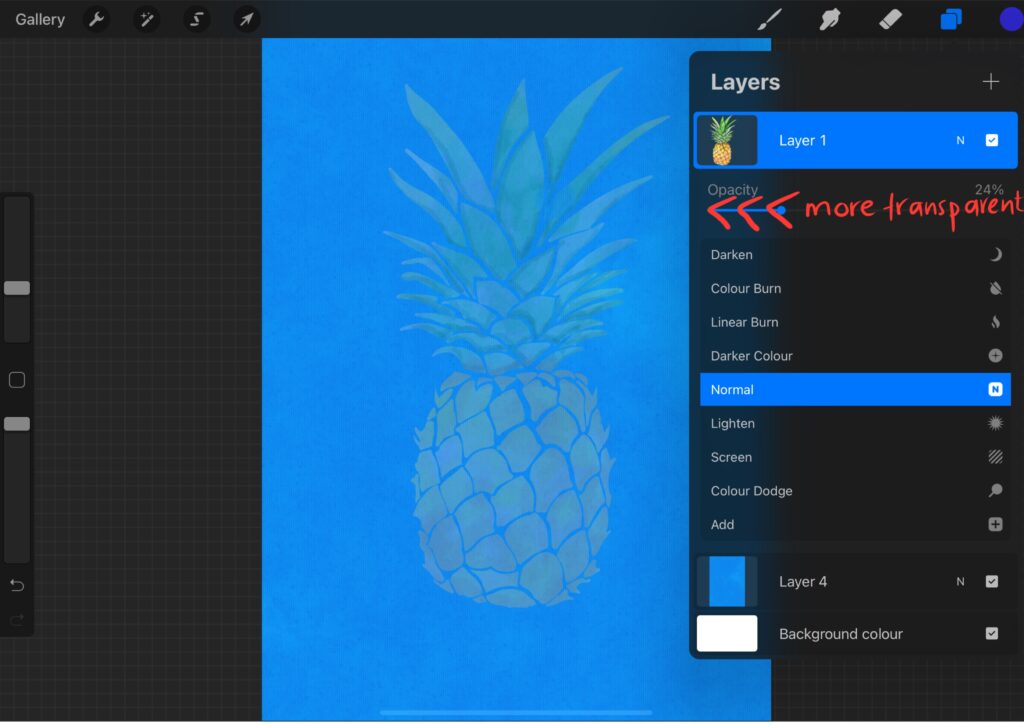
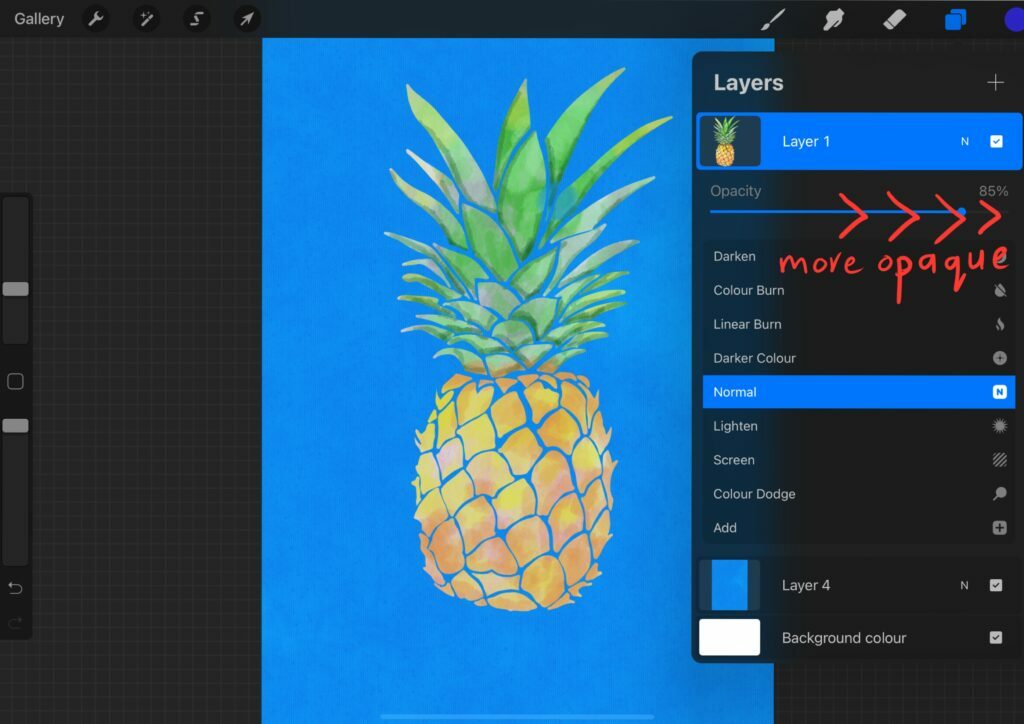
You may have noticed that Procreate 5 no longer has the Opacity tool in the Adjustments tab. Instead, you need to change a layer’s opacity by using two fingers to tap on your selected layer. This will bring up the opacity slider, but you can also click on the “N” on your layer to pull up the opacity slider within your layer.
- With two fingers tap on your chosen layer to bring up the opacity slider.
- Selecting N does the same thing but with fewer steps.
- When adjusting a layer’s opacity, be sure not to go too far because it will look pixelated or blurry afterward.
- Select Layers > Fill > Pattern Overlay > if you want to have a layer with a pattern instead!
1. Select your Chosen Layer
On the top of the screen, you will find a menu. You can find the Layers menu there. It looks like a group of boxes on top of each other.
Open the layer panel. Then choose the layer you want to change the opacity of.
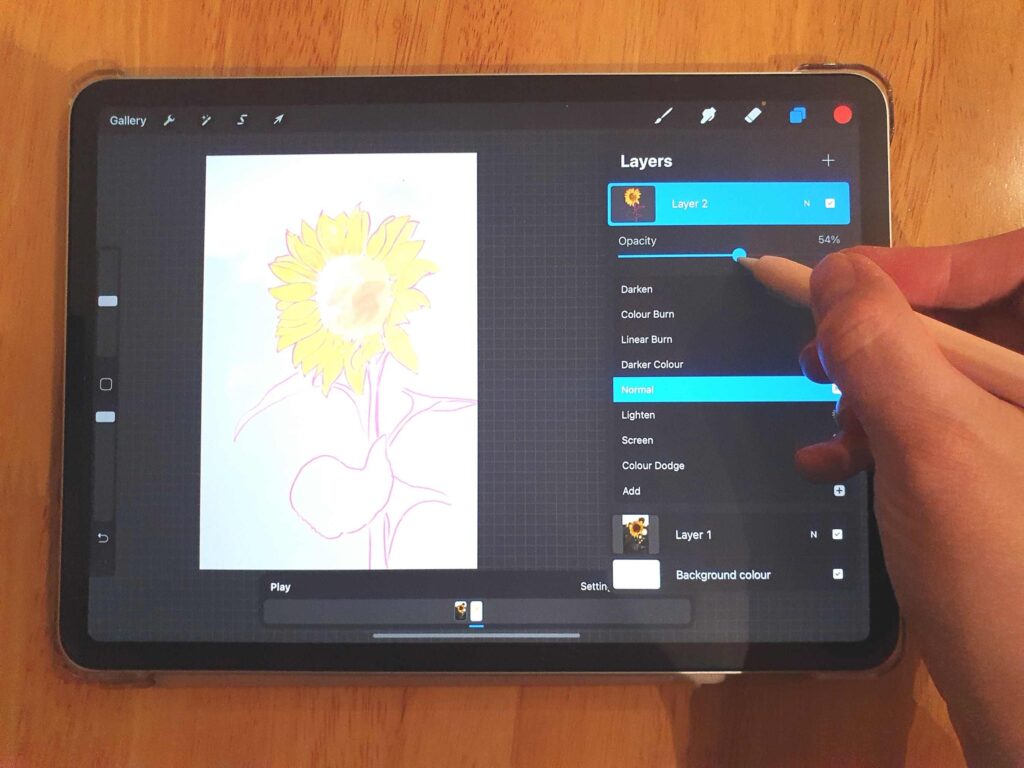
In the “Layers” panel, tap on your layer using two fingers. The opacity slider will then appear.
To work the opacity slider, slide your finger to the right to increase the opacity and the left to decrease it.
2. Select the Layers tab in the top menu.
Choose the layer you want to alter the opacity of. Select the “N” symbol that appears in the layer’s tab. It’s located to the right of the layer.
When you click the “N,” a new menu of choices appears, with an opacity slider at the top. Simply slide the opacity of the layer you want to use.
If you have been wondering how to lower layer opacity in Procreate, changing opacity is easy. Just open up the layer you want to adjust, tap the opacity button in the bottom left corner of the screen, and slide your finger to change it. So simple! As you get more used to working in Procreate you can play with which technique works best for you!
Check out My YouTube Channel for more great Procreate Tips!
How to Control the Opacity of a Layer in Procreate Pocket
- Adjusting opacity in Procreate Pocket is easy! This is how: select the “Modify” option at the top of the screen and choose the magic wand symbol.
- Choose “Opacity” and adjust the opacity using your finger.
- The Procreate Pocket app is the same as the Procreate app, except it can only be used on an iPhone.
To summarize:
To control the opacity in Procreate Pocket, click the “Modify” tab at the top of the screen and click the magic wand symbol. Click “Opacity” and use your finger to increase and decrease the opacity of your layer.
*This page may contain affiliate links to products I have used or recommend. If you purchase something from this page, I may receive a small percentage of the sale at no extra cost to you.**
Important things to remember about Layer Opacity in Procreate
Layer Opacity is a lot of fun! You need to remember some rules so you don’t get frustrated.
1) You can only change the opacity while you are on the layer. If you are not on that layer, it will not change anything.
2) If you want to make something more transparent, use 0% or less than 100%.
3) When making something more opaque, use 100% or more than 0%.
4) If you think your layer has disappeared…check your opacity!
5) If you haven’t already got the Apple Pencil then I suggest you think about getting one. They make a huge difference to the very “real” drawing feeling you get from using one with Procreate. Nothing else quite compares!
When do digital artists use Layer Opacity?
Layer Opacity is a very important tool for digital artists because it allows them to make parts of their drawings transparent. This can be used effectively to create shadows, bring attention to certain elements, and even make characters look like they are merging with other objects or material!
[Related Article: How to Trace on Procreate]
There are many creative ways to use this tool.
Although it may seem difficult at first, Layer Opacity is actually very easy to control!
As long as you know what opacity levels look like, you can play around with your images until you get the desired results. Procreate has so many fun tools to offer and Layer Opacity is certainly one of them!
Grab 21 FREE PROCREATE COLORING PAGES below!
Conclusion
The potential for depth and creativity is only limited by your imagination. I hope this post on how to change the opacity of a layer in Procreate was helpful in your creative journey!
Unlock the power of Procreate with a little bit of time to get used to these settings, and you’ll be making amazing art in no time!
Go forth and create great things that will live on forever 🙂
Other Posts You May Enjoy…
How to Blur in Procreate | 3 Easy Techniques
How to Erase on Procreate: A Comprehensive Guide
How to Undo on Procreate: Easy Tips to Redo & Undo
How to Shade in Procreate | 10 Top Tips
Looking for the Best iPad for Procreate?
How to Copy and Paste in Procreate
Wonderful your website…
Thank you kindly 🙂
Thanks for the tutorial dear. I really thankful to you. And wish you all the very best.