Last Updated on July 21, 2026 by Dee
👉 See our complete collection: Best Free Junk Journal Printables (90+ Pages, Tags & Ephemera)
There’s something quietly radical about writing a real letter in 2026. The kind that gets folded, sealed, stamped, carried across the country in a canvas sack, and dropped through a stranger’s letterbox. Snail mail isn’t just back — it’s on Pinterest Predicts’ number-one DIY trend list for the year, and pen-pal communities are growing faster than at any point since the early 2000s. Turns out a generation raised on instant messaging is quietly craving the opposite: slow, tactile, thoughtful correspondence.
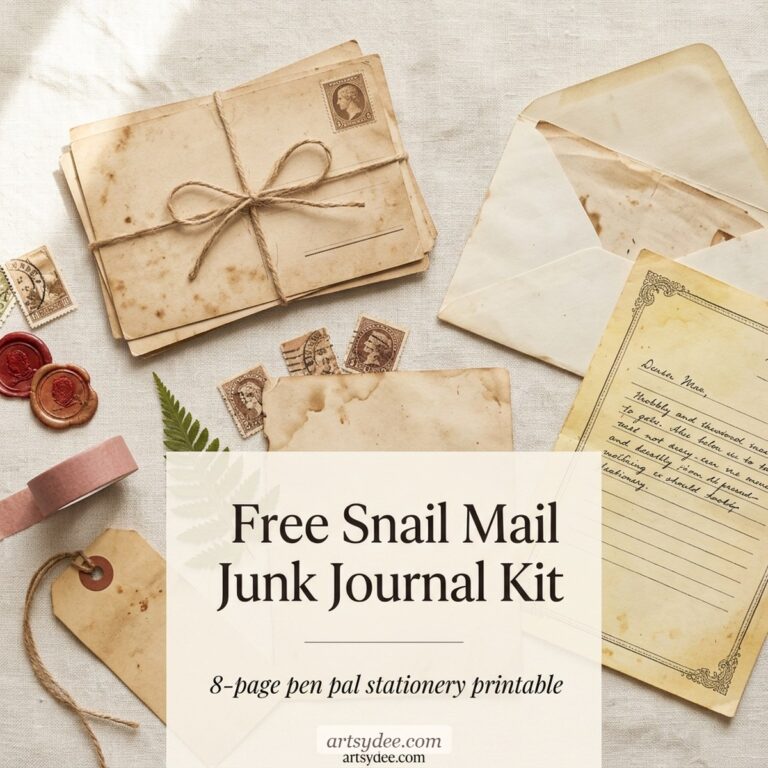
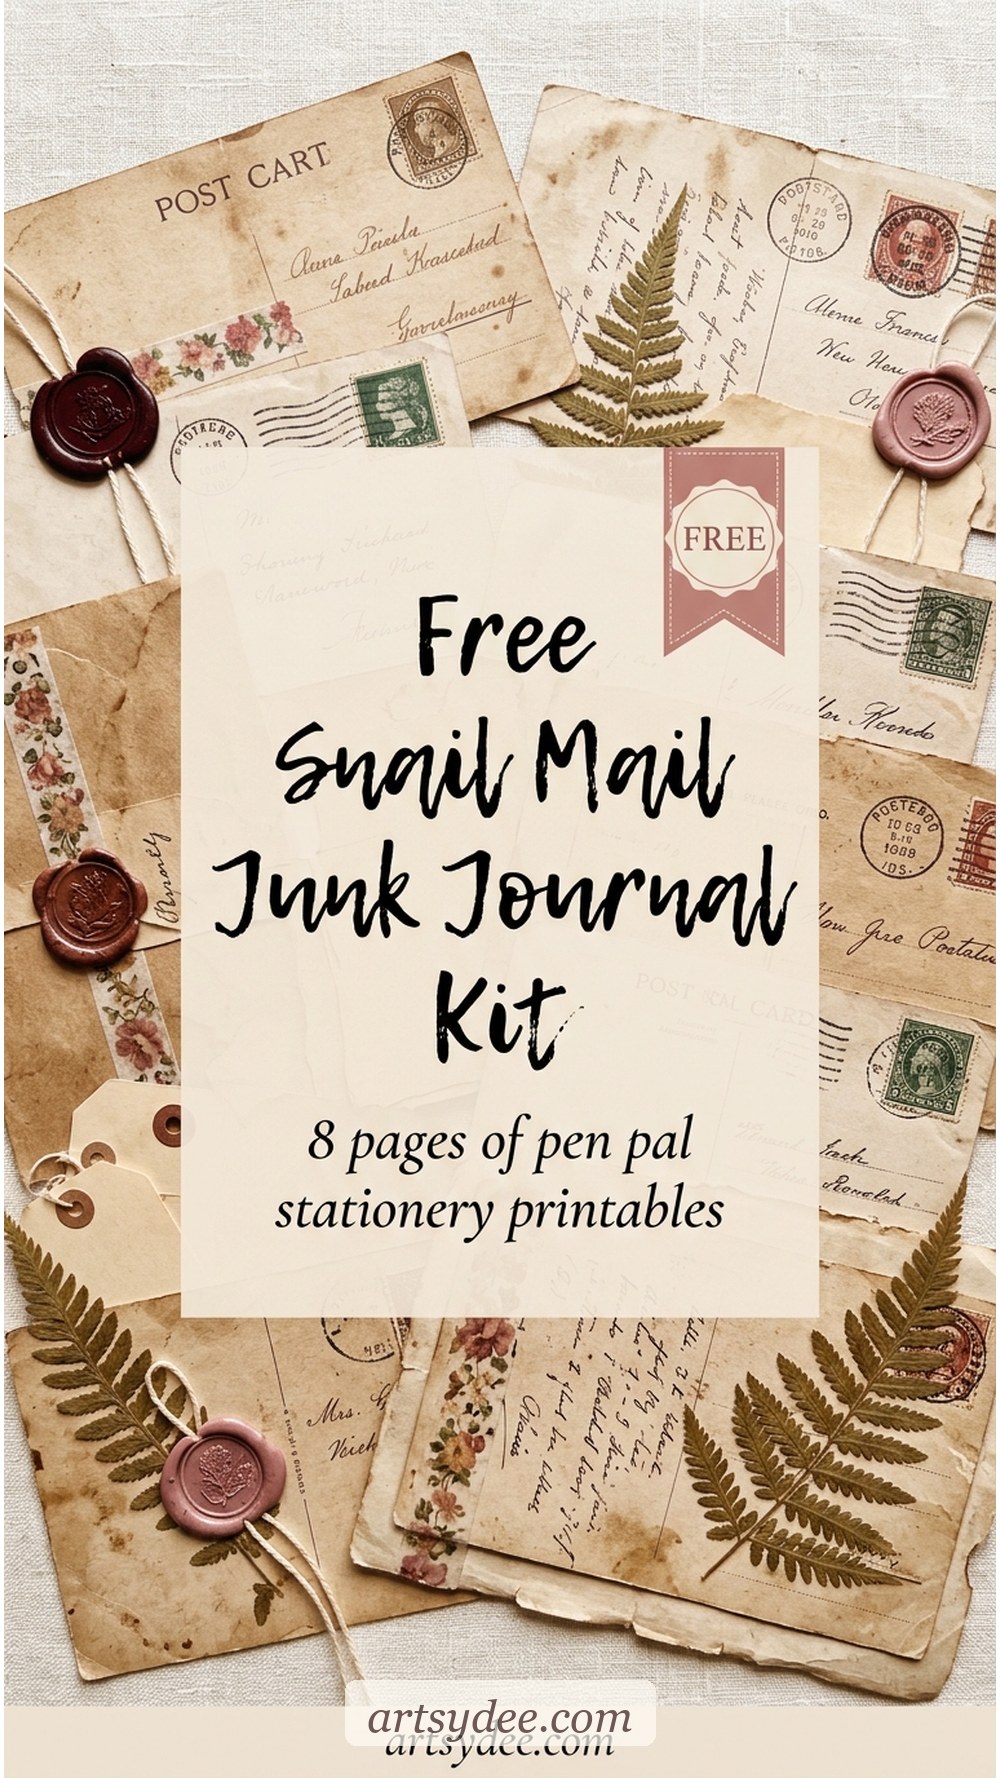
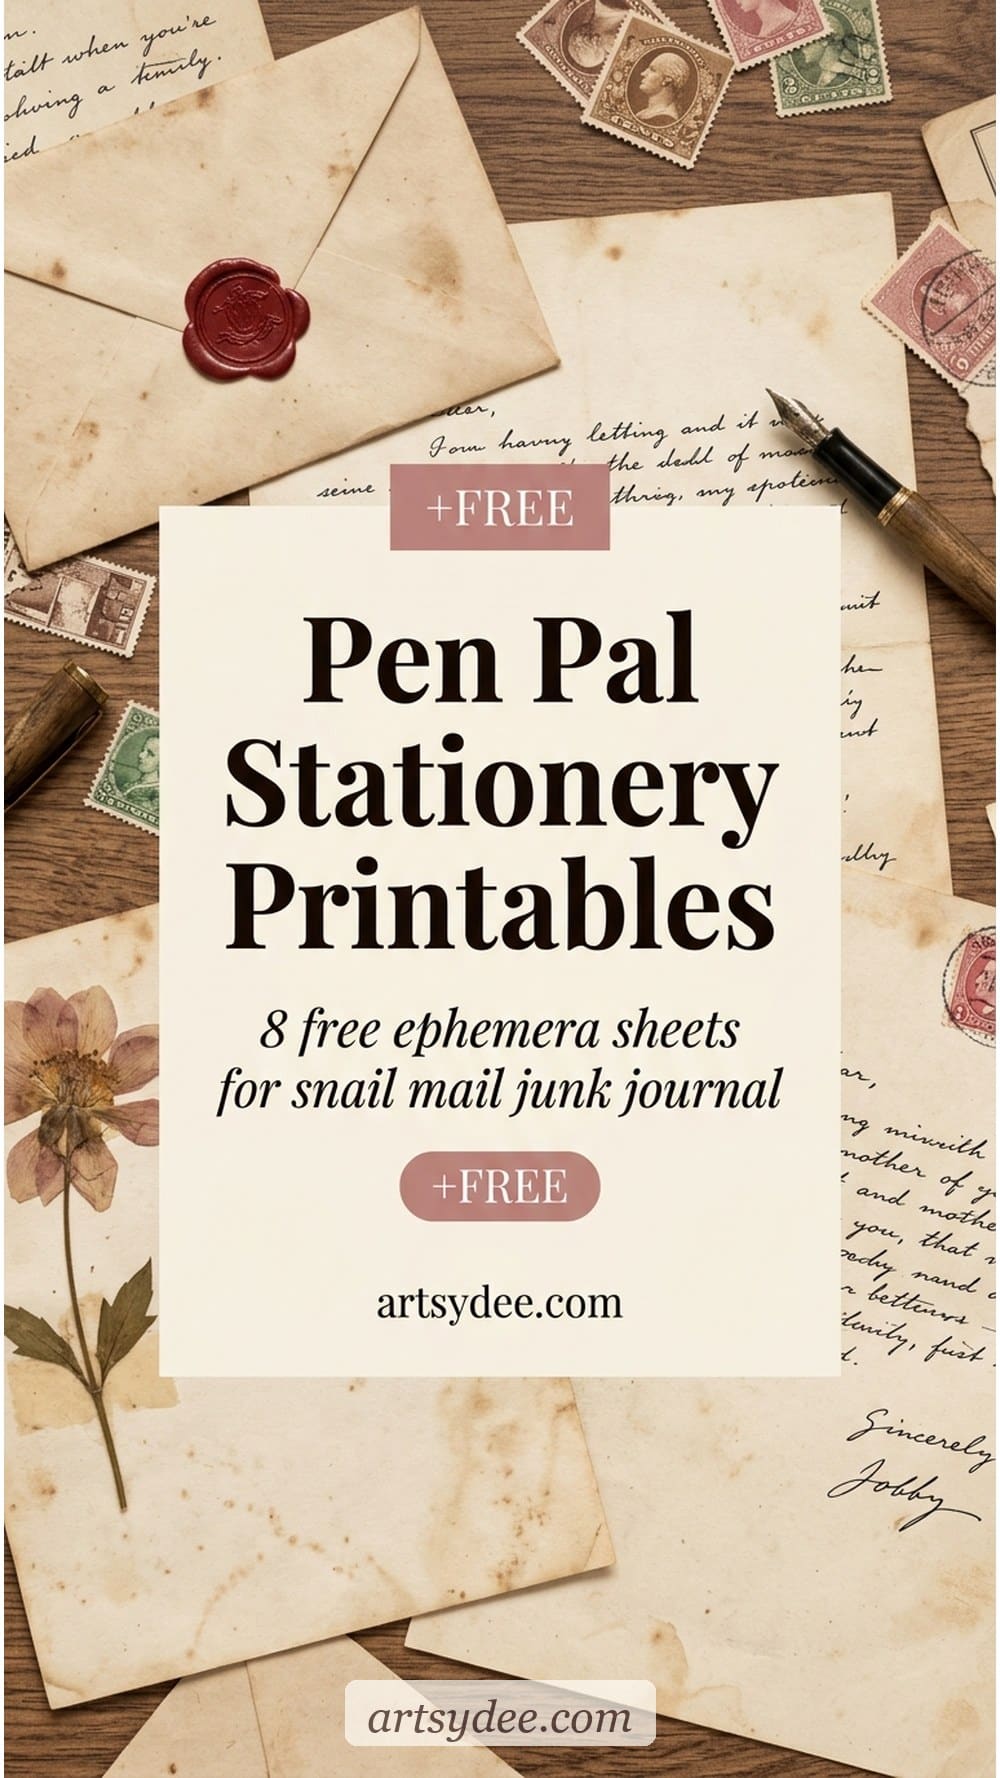
✉️ Your free 8-page Snail Mail Junk Journal Kit is waiting — pop your address in, hit the button, and the kit lands in your inbox in a minute or two. Eight themed ephemera pages, print-ready on A4, yours to keep.
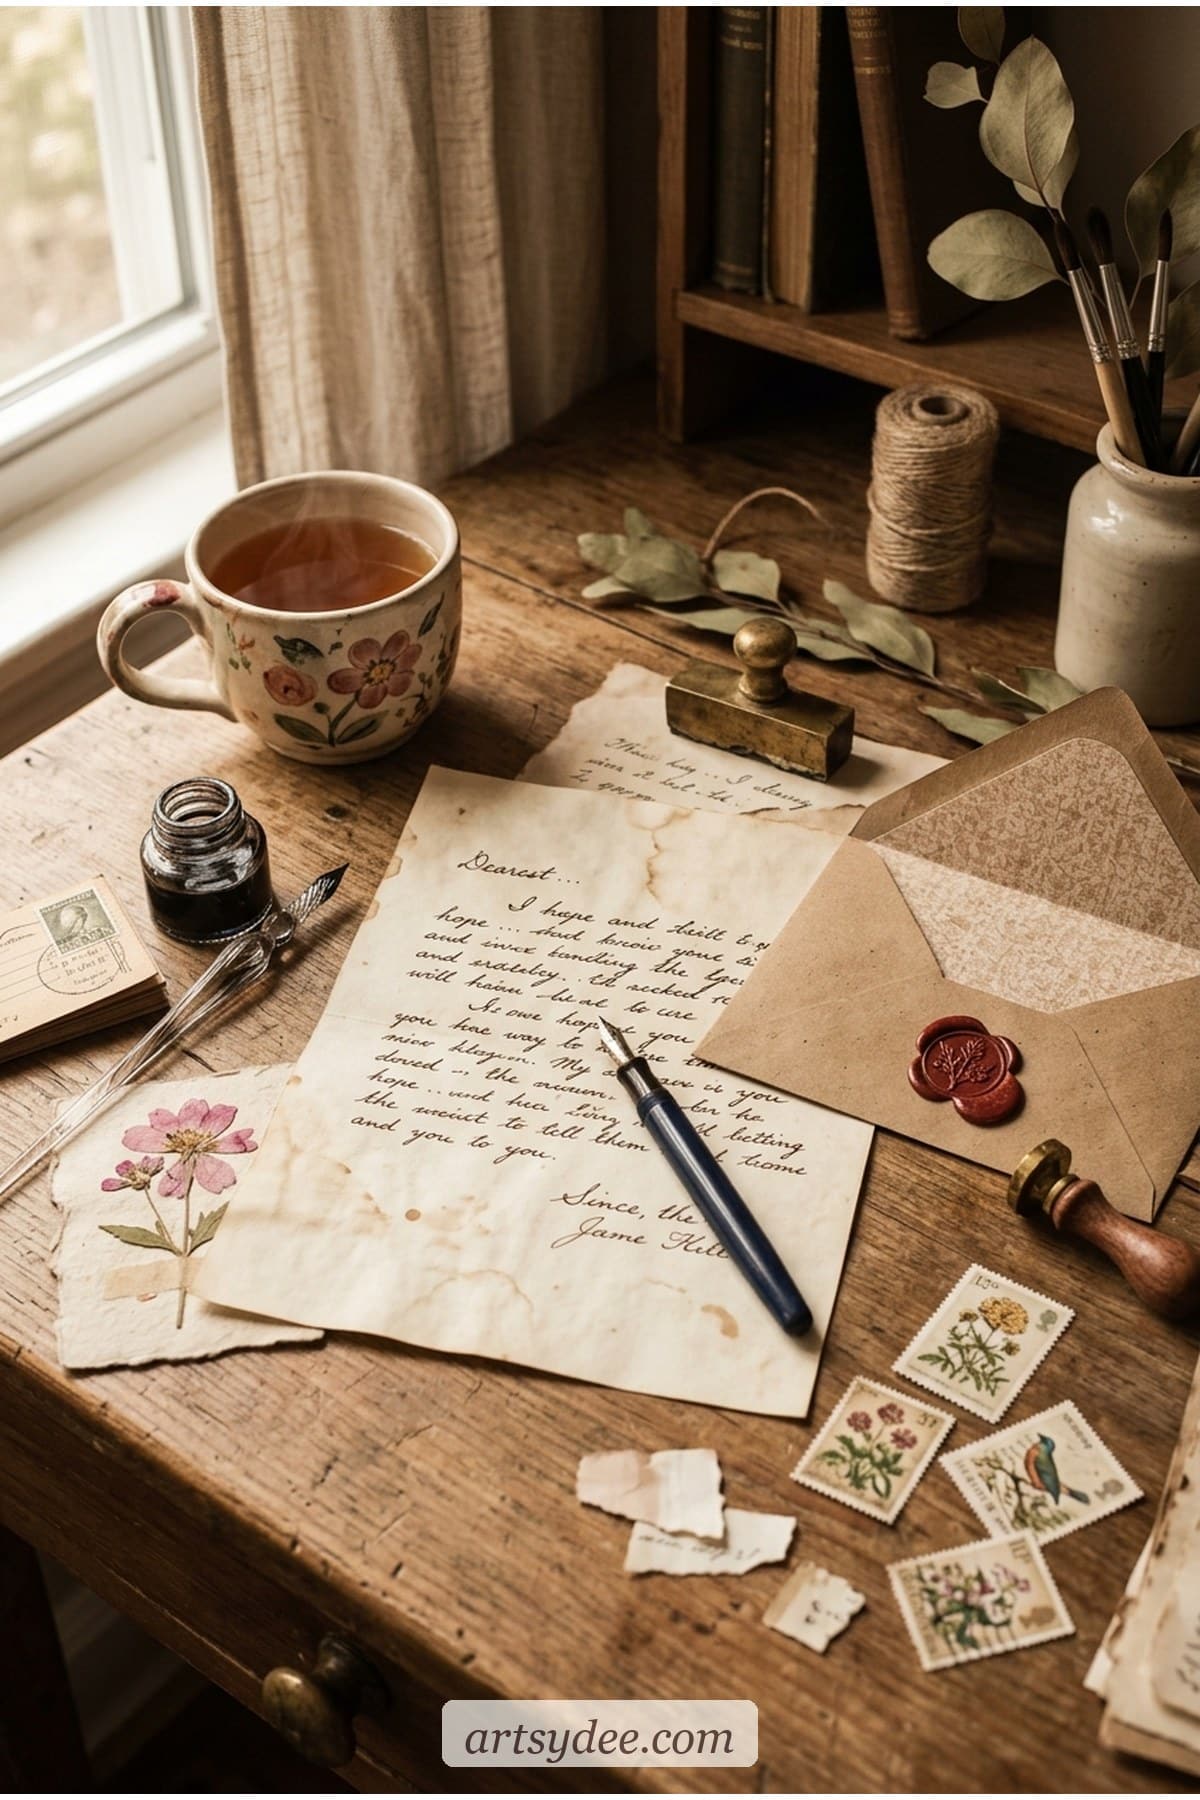
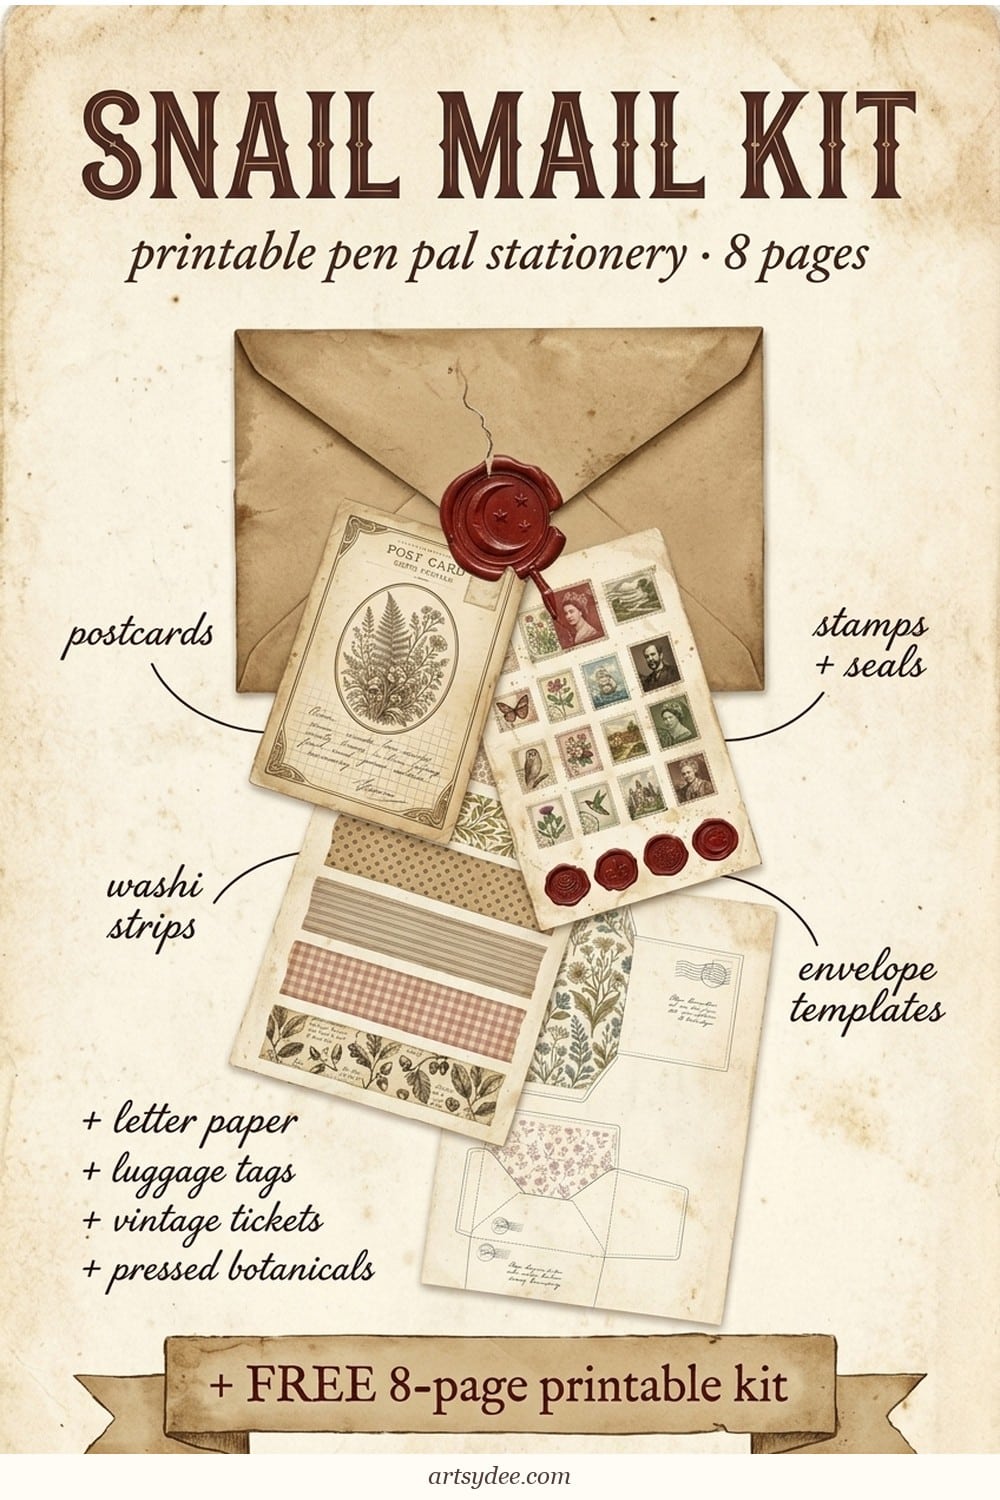
This post is your starter kit. A free 8-page snail mail junk journal kit — vintage postcards, aged letter paper, postage stamps, wax seals, washi tape strips, luggage tags, envelope templates, tickets, pressed botanicals — everything you need to layer a letter that feels like it was pulled out of a 1920s writing desk. Whether you’re building a junk journal spread, sending your first pen-pal letter, or just want your correspondence to feel a little more you, the kit slots straight in.
I’ll walk you through what’s in the kit, how to use each sheet in a junk journal spread, how to actually find (or become) a pen pal in 2026, and the small supply list you’ll want beside you as you build your first letter.
🎬 Prefer watching? Subscribe to my YouTube channel — I drop junk journal flip-throughs and ephemera kit walkthroughs most weeks.
Table of Contents
What’s inside a good snail mail junk journal kit?
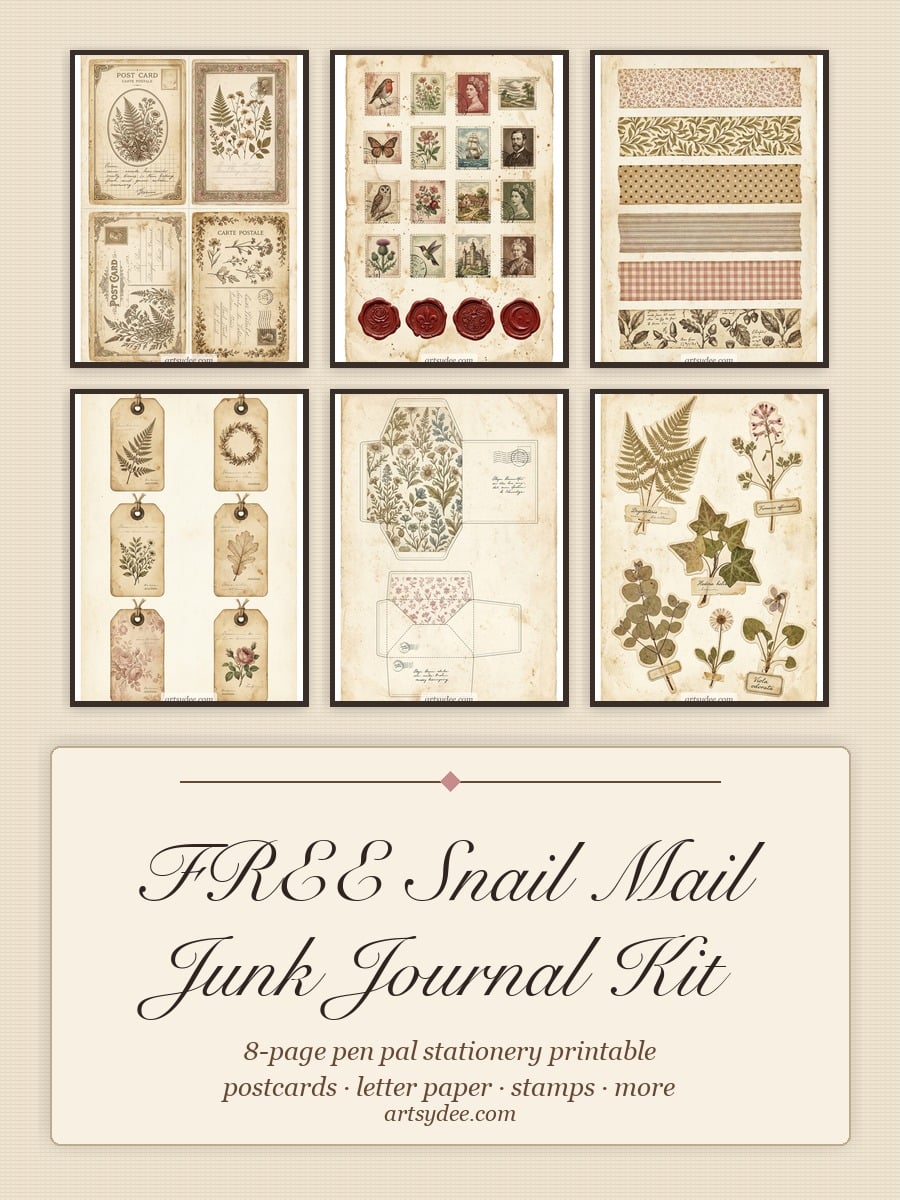
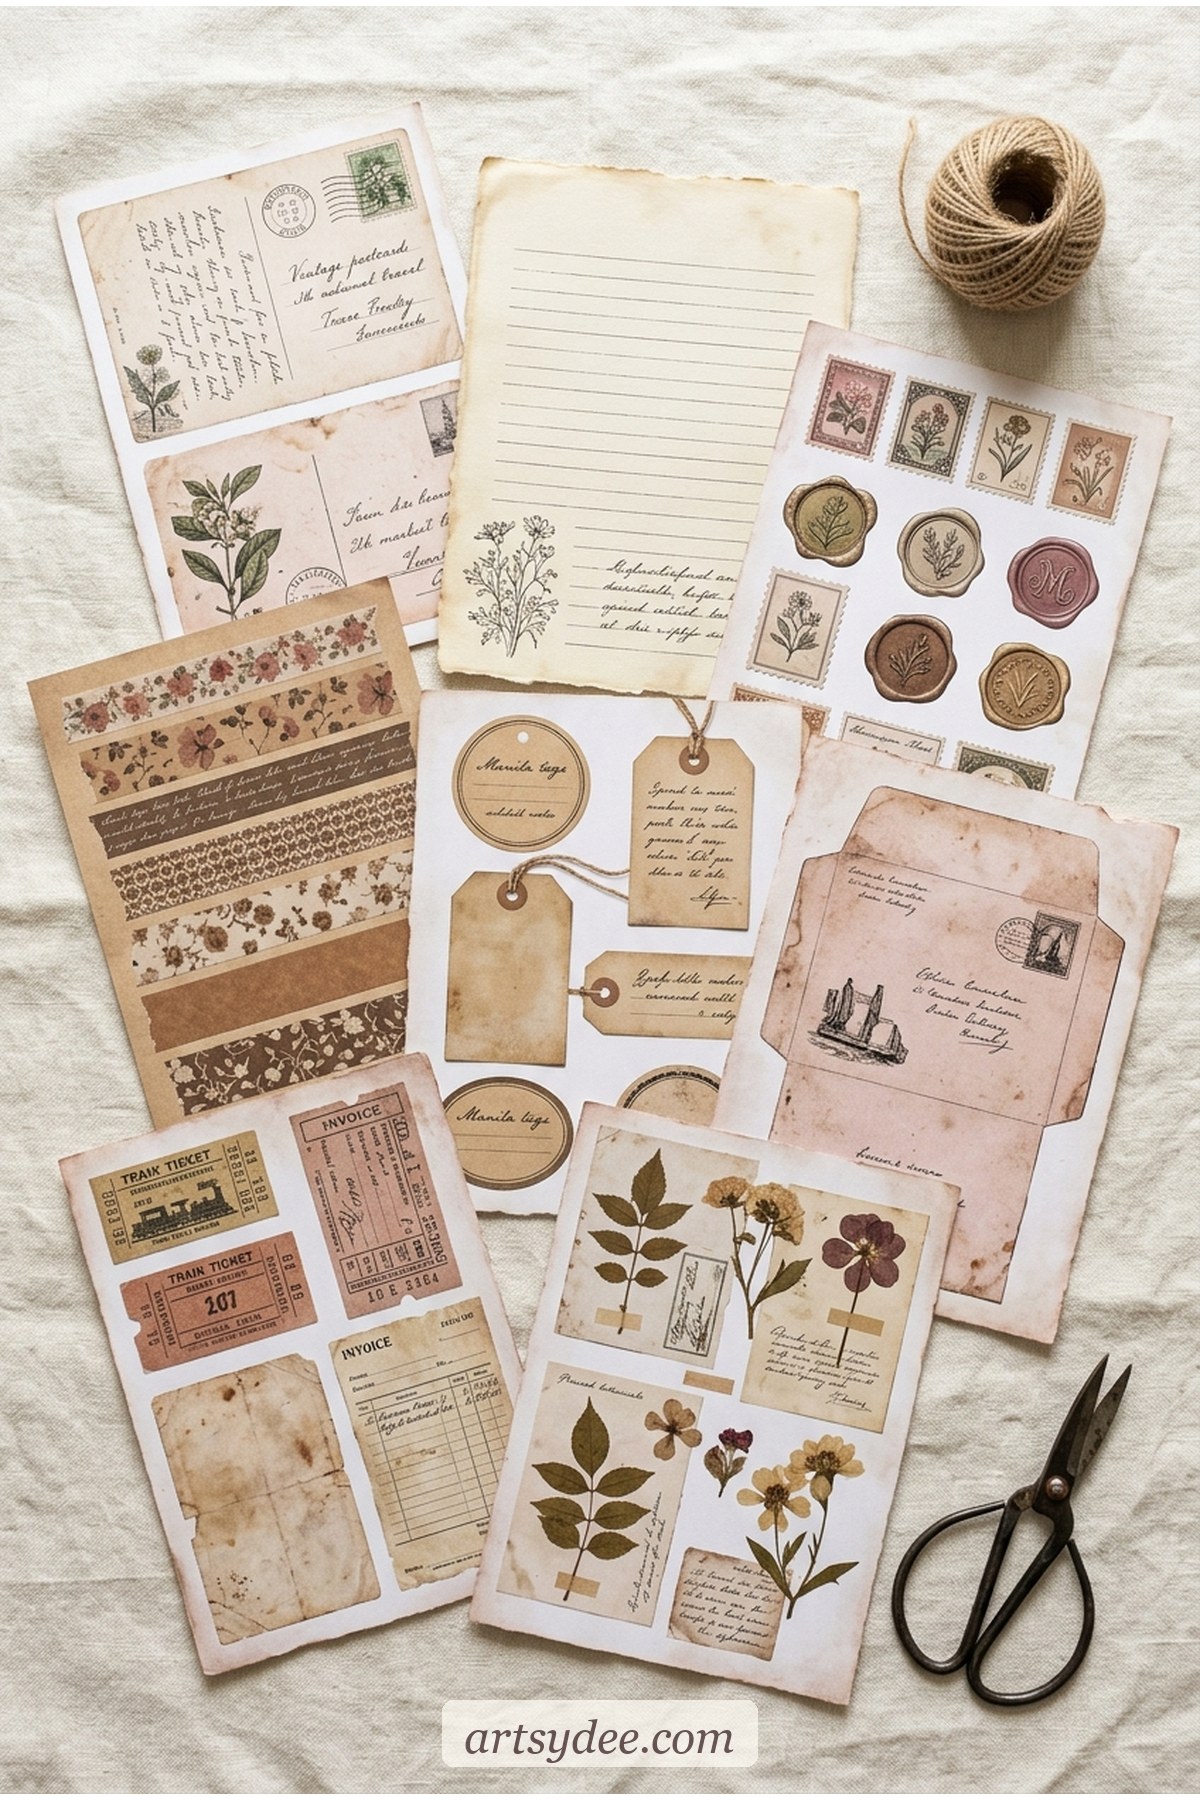
Quick answer: A good snail mail junk journal kit layers multiple types of ephemera on every page — not just letter paper. The free kit below includes 8 printable A4 sheets: vintage postcards, aged letter paper, postage stamps and wax seals, washi tape strips, luggage tags, envelope templates, mixed tickets and receipts, and pressed botanicals. Each page is dense with cut-out-ready elements so one print gives you a dozen usable pieces.
The secret to a snail mail spread that feels like it has soul is variety. One type of ephemera — just postcards, or just washi tape — reads as flat. Mix four or five types on a single page and suddenly the letter looks layered, lived-in, like the writer actually cared. That’s why this kit breaks down the way it does:
- Page 1 — Vintage postcards. Four postcards per A4 sheet. Use them as message carriers, spread backgrounds, or layered focal points.
- Page 2 — Aged letter paper. One full-sheet template plus a half-sheet, both with faint decorative borders. The backbone of any written letter.
- Page 3 — Postage stamps + wax seals. Twelve small stamps and four red wax seal impressions. Decorative, but they genuinely sell the vintage feel.
- Page 4 — Washi tape strips. Six horizontal strips in varied patterns — florals, botanicals, dots, stripes. Cut them, stick them, done.
- Page 5 — Luggage and gift tags. Six manila-style tags with space to handwrite short notes or titles.
- Page 6 — Envelopes. Two templates ready to cut and fold, with vintage pattern lining on the inside flaps.
- Page 7 — Tickets and receipts. Train tickets, café receipts, theatre stubs, a library card — for pockets and tucked-in details.
- Page 8 — Pressed botanicals. Victorian herbarium-style pressed ferns, wildflowers, ivy, eucalyptus — cut-out ready.
Print the lot, grab a pair of sharp paper scissors, and you’ve got a pen-pal toolkit that cost less than a coffee.
Enjoying this snail mail kit? There are hundreds more printable papers, tags and ephemera waiting inside the Creations Club.
See what’s inside the Club →Grab Your Free 8-Page Snail Mail Kit
Here’s the pack. Eight print-ready pages, each one dense with multiple cut-out ephemera elements — so in total you’re getting well over fifty usable pieces per print. All A4, 300dpi, designed to photocopy or reprint as many times as you like.
Drop your email into the box below and the kit will land in your inbox in a minute or two. Yours to keep, print, reprint, snip, tuck, stamp, seal.
Want access to 400+ printables?
If this kit lands well, you’d absolutely love the Artsydee Creations Club. Every week I add new printables — junk journal kits, ephemera packs, planners, stickers, colouring pages, wall art, the lot. You also get instant access to a vault of 400+ printables the moment you join, with hundreds of pages of junk-journal-specific material (seasonal kits, pocket templates, writing paper collections, full themed bundles).
👉 Check out the Creations Club here — it’s £8/month (cancel anytime), and it’s the easiest way to keep your junk-journal supply stocked with fresh material without hunting for the next pack every week.
How to use the kit in a junk journal spread
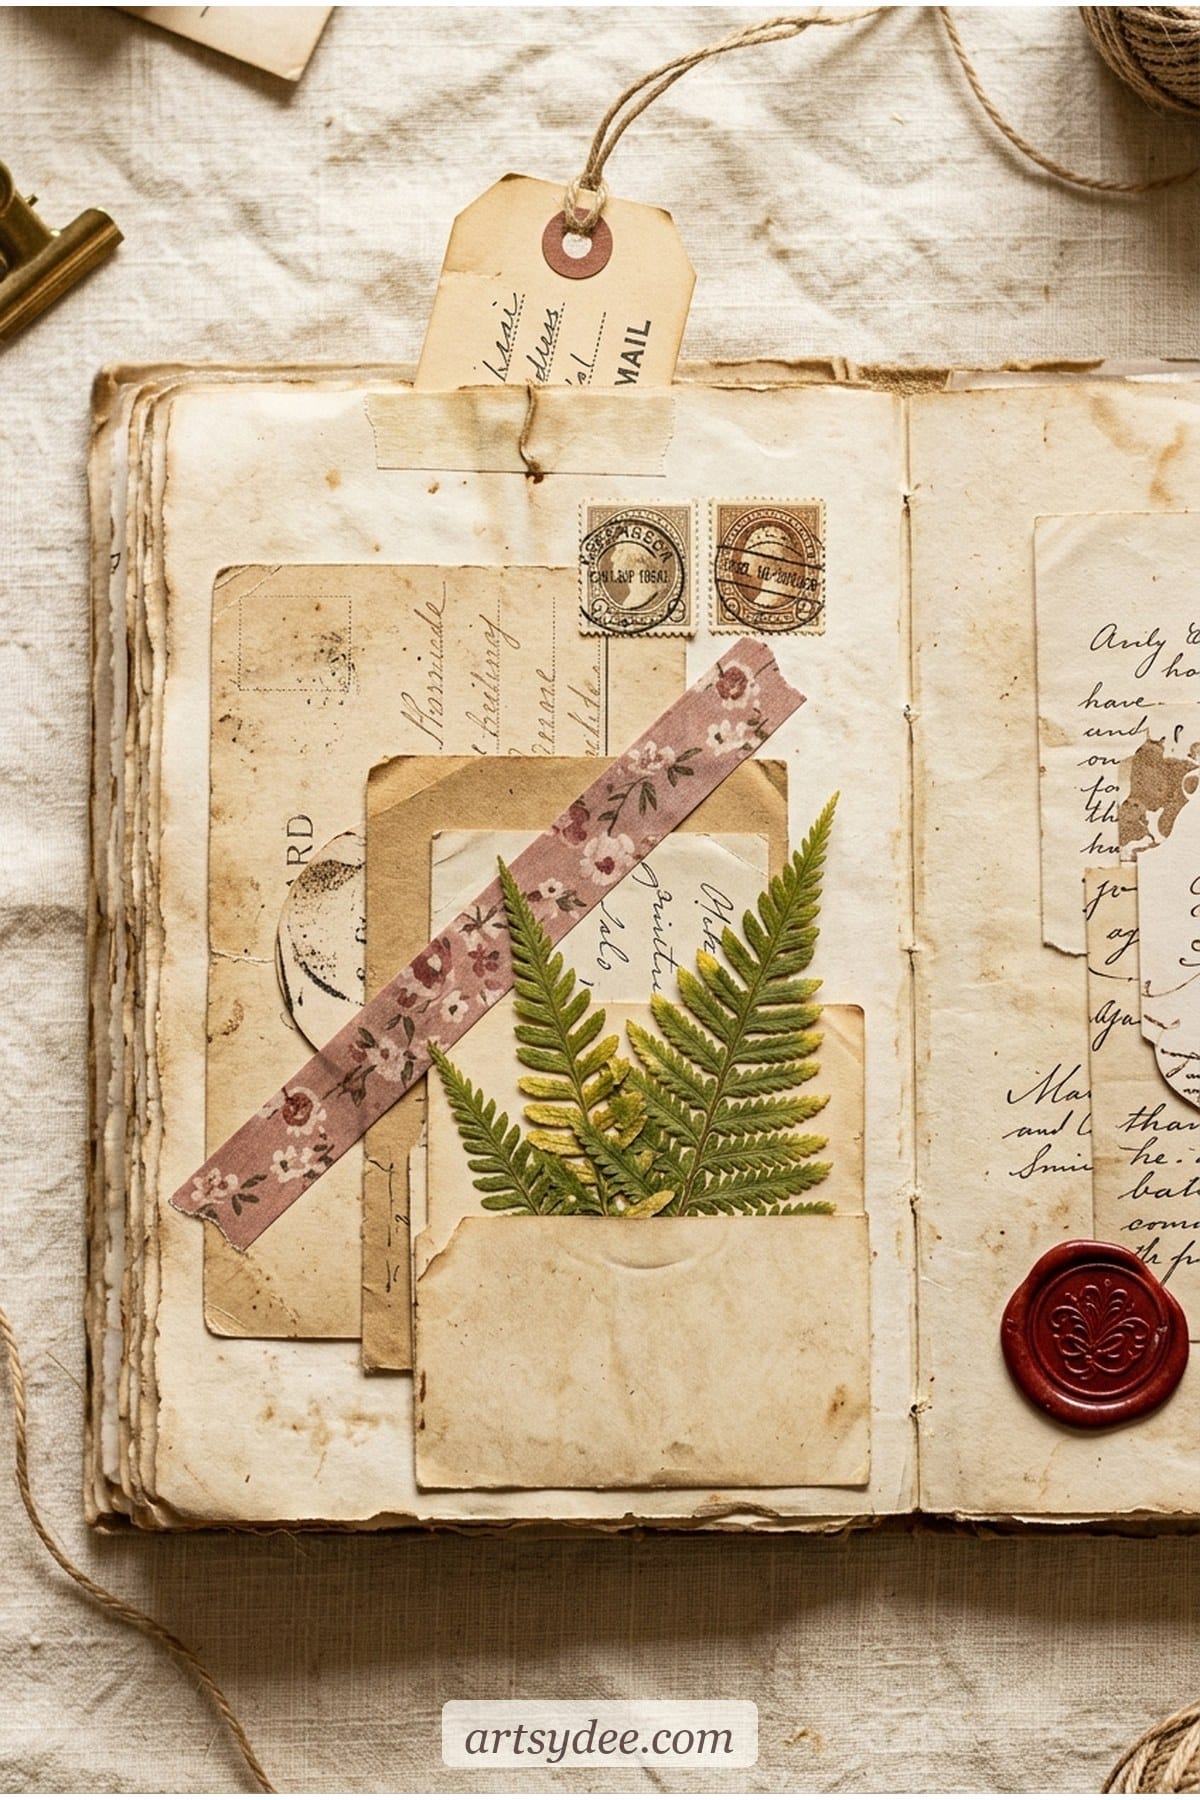
Quick answer: Build your snail mail junk journal spread in five layers — aged paper base, ephemera focal point, mixed background pieces, a cut-out element that breaks the grid, and a tactile finish (wax seal, washi, twine). Each layer adds depth without crowding.
- Step 1 — Lay the base. Print the letter paper sheet (page 2) on cream cardstock and trim one of the two templates to slightly smaller than your journal page. This is your foundation — it signals “this is a letter” before a single word is written.
- Step 2 — Anchor with a focal ephemera piece. Cut one of the four postcards from page 1 and glue it slightly off-centre on your base. Offsetting is everything — dead-centred focal points look flat; a 60/40 composition instantly feels curated.
- Step 3 — Layer three or four supporting pieces. A luggage tag from page 5 hanging over the edge. Two or three postage stamps from page 3 arranged in a tight row. A ticket from page 7 tucked partway under the postcard. Don’t stick yet — just arrange.
- Step 4 — Break the grid. Add one diagonal element: a strip of washi from page 4 running across the corner, or a pressed fern from page 8 angled out of the top. Diagonals are what make a spread feel alive.
- Step 5 — Add one tactile, tiny finish. A red wax seal from page 3 in a bare spot. A tiny length of natural twine around the luggage tag. These “three-dimensional” details are what photograph beautifully and what your reader’s fingers will linger on.
Stick everything down with a Tombow Mono dot-runner or a plain glue stick — the dot-runner is worth it for anything you want to keep flat and wrinkle-free. If you want more spread structure ideas, my junk journal ideas post has 40+ layout references you can steal wholesale.
Finding (or starting) a pen pal
Quick answer: The easiest way to find a pen pal in 2026 is through an established pen-pal community — Postcrossing (global postcard exchange, 800k+ members), the r/penpals subreddit, Letter Exchange, or a local letter-writing group on Geneva or Discord. If you’d rather start small, ask one friend you’d normally text to swap a letter with you for a month. That’s all it takes.
A few places that actually work, sorted by how easy they are to start:
- Postcrossing (postcrossing.com). Free. You sign up, get assigned a random address in another country, send a postcard, then receive one from someone else. Low commitment, global, genuinely lovely. The postcards in page 1 of your kit work perfectly for this.
- Letter Exchange (letter-exchange.com). A curated correspondence community. Slower, more considered, more likely to lead to an ongoing pen pal.
- Reddit r/penpals. Post a short intro with your age range and interests. Plenty of active members. Easy first step if you’re shy about writing.
- A letter-writing circle. Search “letter writing” on Meetup, Geneva, or local Discord servers. Some cities have analog-letter meet-ups where you write together in a café.
- The one-friend method. Pick a friend you already message a lot. Ask them to swap a letter with you once a month for six months. Low stakes, high charm — often becomes a tradition.
For safety, the standard advice: use a PO box or a trusted return address, don’t share identifying info in your first letter, and trust your instincts. Most pen-pal communities have clear etiquette guides built in.
Stationery supplies you actually need
You can genuinely start with what’s in your house. But if you want your letters to feel properly special, here’s the very short list I reach for every time I sit down to write:
- Matte cream cardstock, 250gsm+. The single biggest upgrade. I use Neenah Classic Crest cardstock — cream, 250gsm, takes ink beautifully. Printing your letter paper (page 2) on this instead of plain printer paper is the difference between “quick note” and “keepsake”.
- Vintage-style washi tape. Even with page 4 of the printable kit, a roll or two of real washi — I like mt vintage floral washi tape — gives you infinite flexibility. Florals, checks, and naturalist botanical prints layer beautifully with the kit.
- A Tombow Mono dot-runner. Already mentioned. The Tombow Mono permanent adhesive runner is genuinely what makes cut-out ephemera lie flat — once you’ve used one, glue sticks feel archaic.
- Bone folder. For the envelope templates on page 6. Scores the fold lines crisply. A cheap plastic bone folder will last a lifetime.
- Sharp paper scissors. Don’t cut printables with kitchen scissors. A pair of Fiskars paper scissors cuts cleanly and keeps its edge.
- Optional: a real wax seal kit. If you want to graduate from the printable seals on page 3. Genuinely impressive, absurdly easy. Pair with red or sage wax for the palette this kit uses.
If you want a ready-made bundle of vintage junk-journal ephemera to go alongside this kit, my Payhip shop has themed seasonal packs and larger ephemera collections you can buy once and print forever.
This post contains affiliate links, which means I may earn a small commission at no extra cost to you if you buy through them. I only recommend supplies I actually use.
How to make your junk journal feel like a letter
Quick answer: A junk journal spread reads as a letter when you write your entry in the first person as if you’re addressing someone specific, include physical ephemera that feels like it travelled (ticket stubs, pressed flowers, postage), and finish with a sign-off line. “With love, me,” at the bottom of a spread instantly recasts the whole page as correspondence.
- Write to a specific reader. Even if it’s your future self, or a fictional character. “Dear M,” at the top of a spread changes everything.
- Use the postcards as diary entries. Cut out a postcard from page 1, write a short handwritten thought on it, and glue it into the spread. Instant intimacy.
- Include something from the day. A real ticket stub, a pressed petal, a receipt from the café you wrote in. The kit’s printed versions are beautiful, but one real object on a spread does heavy lifting.
- Sign off. “Yours,” “with love,” “till next time” — the small ritual of ending a page like a letter makes the entire journal feel like sustained correspondence with yourself.
- Use a consistent handwriting style. Letters feel personal because the hand is consistent. Find one pen you like and stick with it for a whole journal.
Treat the journal like a letter you never send. Or like one you’ll send to yourself in twenty years.
Snail mail junk journal kit FAQ
Is the snail mail junk journal kit actually free?
Yes — the full 8-page kit is free when you pop your email in the box above. You’ll get a single PDF with all eight themed ephemera sheets, print-ready on A4 at 300dpi. It’s yours to keep, reprint, and use for personal projects (junk journals, pen-pal letters, scrapbooks, art journals). Commercial use and resale aren’t permitted — for commercial licensing, the Artsydee Creations Club has options.
What paper should I print junk journal ephemera on?
For ephemera you want to cut and layer, matte cream cardstock between 180-250gsm works best. It’s sturdy enough to cut cleanly and won’t curl when you glue it down, but not so thick that it adds bulk to a journal spread. For the envelope and tag pages specifically, go to 250gsm for proper structure. Plain printer paper works in a pinch but tears easily. Avoid glossy photo paper — it fights the vintage aesthetic and won’t take ink or glue well.
Can I use the snail mail kit for sending real letters?
Absolutely — it’s designed for exactly that. The letter paper sheet (page 2) is sized to fold into the envelope templates (page 6). The postcards (page 1) fit standard postal rates when printed on cardstock. The postage stamp illustrations on page 3 are decorative (you’ll still need real stamps for mailing), but the wax seals work as real envelope decoration. Washi tape strips, tags, and pressed botanicals are perfect for decorating the letter before you tuck it in.
How do I fold the printable envelope templates?
Print page 6 on 250gsm cardstock, then cut around the outer solid line. The dotted lines inside are fold guides — score along each with a bone folder or the back of a butter knife before folding. Fold the side flaps in first, then the bottom flap up and glue along its sides, then the top flap down as the closure. A small dot of glue or a washi-tape strip seals the top once your letter’s inside. If you want a more detailed fold walkthrough, my junk journal pockets tutorial covers similar fold-and-paste techniques.
Do I need to be good at junk journaling to use this kit?
Not at all. The kit does most of the heavy design lifting — the aesthetic, the aged feel, the decorative details are all baked in. Your job is just to cut, arrange, glue. If you’re brand new to junk journaling, start with two pages from the kit (the letter paper + the postcards) and a single spread in a blank notebook. Build confidence with the basics before adding more elements. The pen-pal aesthetic actually favours “less, but thoughtful” over maximalist layering.
What other junk journal printables go well with this kit?
The snail mail kit pairs beautifully with any vintage or cottagecore-themed ephemera. If you want to expand your supply, my Artsydee Creations Club has junk-journal-specific bundles including seasonal kits (spring, autumn, Christmas), pressed flower collections, apothecary-style labels, vintage ticket and receipt packs, and full themed spreads. New material drops weekly, and everything matches the aged-paper aesthetic of this kit.
Final thoughts
Snail mail is one of those quiet creative practices that gives back way more than it takes. Fifteen minutes, a printed page, a cup of tea, and a letter is born. Print the kit tonight. Cut one postcard. Write one sentence on it. See how the rest of the evening opens up.
If you’d like the rest of the junk-journal universe that this kit lives in, the Artsydee Creations Club is where the full vault lives — hundreds of pages of ephemera, seasonal drops, and themed bundles to keep your letters (and your journal) in permanent supply.
And if you want more of this sort of thing as it lands, the Artsydee Pinterest feed and the Artsydee YouTube channel are where I share flip-throughs, how-to videos, and new freebie drops every week.
You might also like
- 40+ Junk Journal Ideas: Prompts, Themes & Layouts That Actually Work
- Junk Journal Pockets DIY: 6 Easy Templates & Tutorials
- Free Watercolor Sketchbook Templates
- 70+ Aesthetic Things to Draw: Creative Sketchbook Inspiration
- Loose Watercolor Flowers: Easy Tutorial (+ Free Templates)
Pin this for later!

If this free pen-pal stationery got you writing, imagine a whole library of it. The Creations Club gives you new printable journal kits and ephemera every month for just £8/mo (~$10).
Join the Creations Club →
You post these great images that are so very useful but looking for the download prompt is a nightmare. I spend too much time looking for it. I’m unsubscribing.