Last Updated on May 11, 2023 by Dee
Few things in this world are as enchanting as a mermaid. Her ethereal beauty captures our imaginations, and her swishy tail entices us to explore the deep sea. There is something mysterious about a drawing of a mermaid tail.

If you’ve ever wanted to learn how to draw a mermaid tail, you’re in luck! In this tutorial, we’ll walk you through the steps required to create your very own mermaid tail masterpiece. So grab some paper and a pencil (or your iPad), and let’s get started!
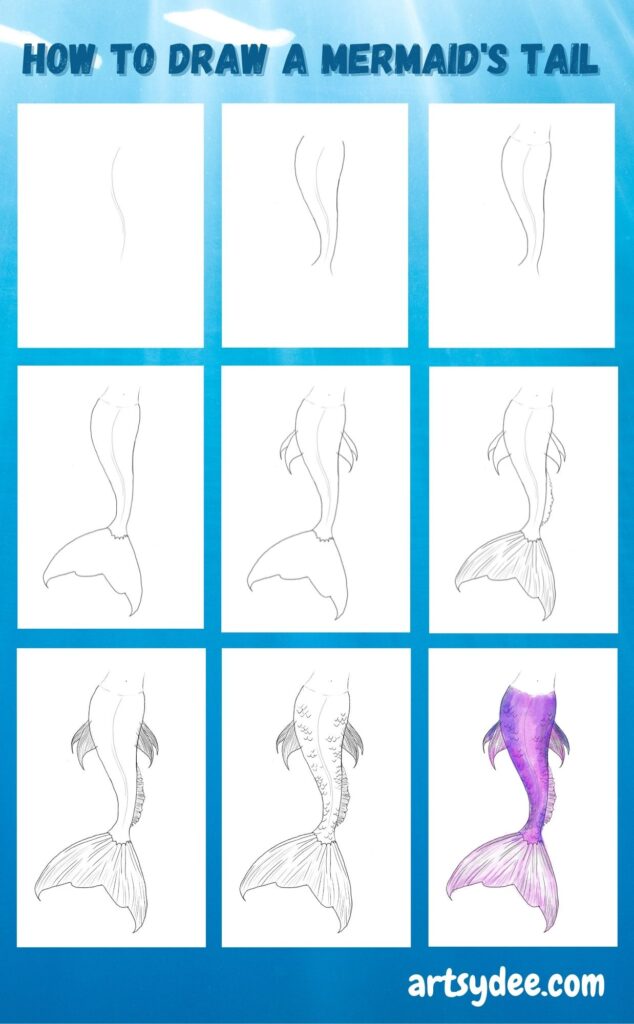
How To Draw A Mermaid Tail Step By Step
The first thing you’ll want to do is gather all your materials. For the purposes of this tutorial, we suggest using pencils and paper. If you’re looking for a more advanced mermaid tail drawing, an iPad is also a great way to showcase your work! The awesome thing about drawing is that you can do it traditionally with a pencil on paper, or you can try your hand at some digital drawing. I enjoy working on Procreate on my iPad. If you are interested in trying this out check out my article on choosing the best iPad for Procreate and have a look at some of my Digital drawing tips & tricks.
Mermaid Tail Drawing Step-by-Step
Mermaid tails are a popular design choice for tattoos, but they can also be used in other forms of art, such as drawings and digital illustrations. In this tutorial, we will show you how to draw a mermaid tail in 15 easy steps. We’ll start with the basics and work our way up to more advanced techniques. So grab your pencils and paper (or your digital drawing tablet) and let’s get started!
[Related: 121 Easy Objects to Draw]
Step 1: Draw the curve of the tail

Start off your mermaid tail by drawing a curved “s” shape line in the middle of your page (or digital canvas if you are working on Procreate). For my simple mermaid tail drawing, I used the Procreate Pencil for sketching.
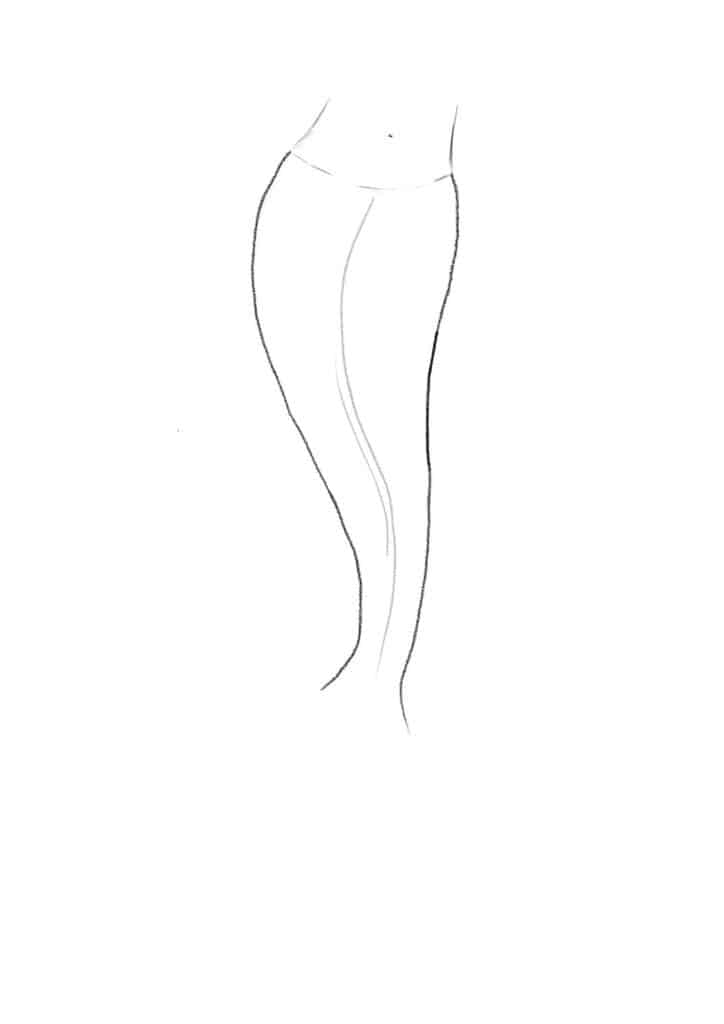
Step 2: Draw the outline of the mermaid tail

Draw the outline of the mermaid tail. You will see the curves of each side are slightly different. By making one side curve more, you give a more realistic effect to the mermaid tail at the end!
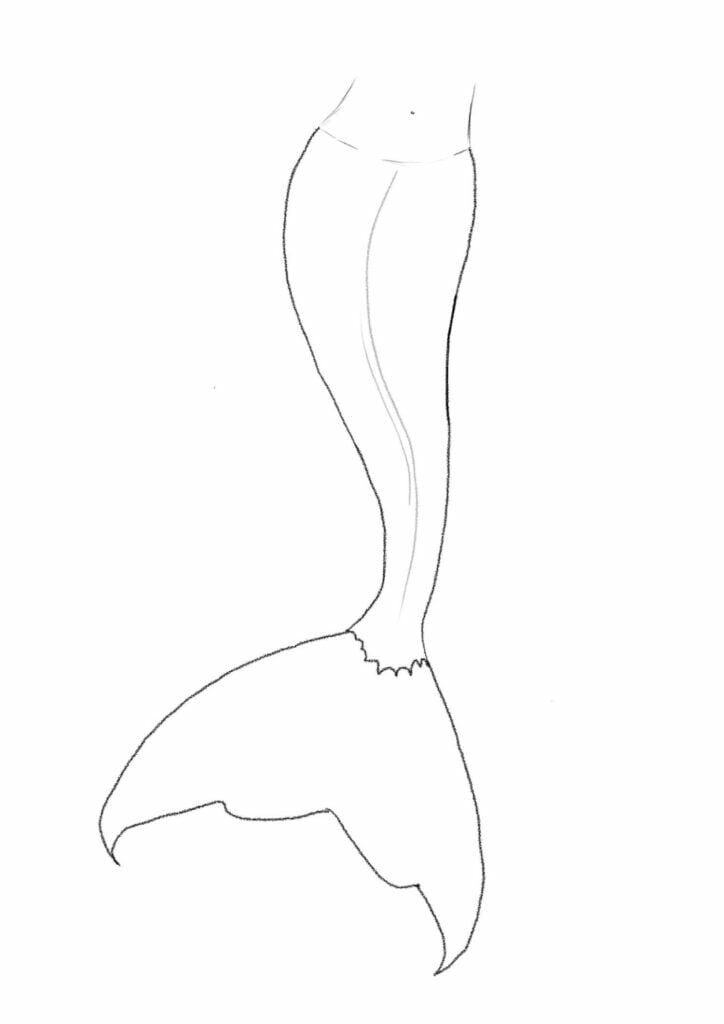
Step 3: Drawing the end of the tail
Draw the two sides of the end of the tail. Instead of drawing a perfect triangle, I made the lines more wavy and organic. This will give it a nice mermaid tail effect at the end.
Step 4: Draw the mermaid’s tummy and belly button
Lightly sketch in the sides of the mermaid’s tummy and sketch a small curved line to represent her belly button.
[Related article: Drawing Ideas for Adults]
Step 5: Draw the first set of fins on the sides of the tail

Step 6: Draw the second set of fins on the sides of the tail

Step 7: Draw a single mermaid fin along the side of the tail

Draw a rippling elongated fin alongside the tail. This is how your drawing should be looking so far. You can see how all of the different mermaid’s fins are adding to her magical look.
Step 8: Add shading to the end of the tail
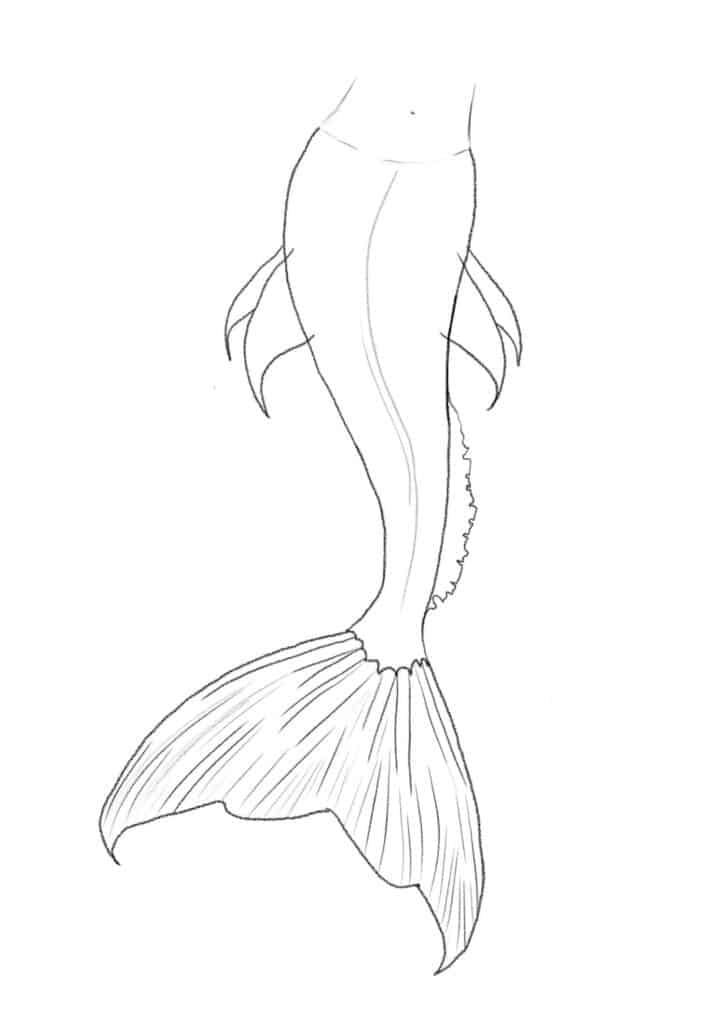
Using lines following the shape of the end of the tail create a kind of fin -texture on the end. These lines help to shade the end of the tail.
Step 9: Add shading to the side fins

Shade in the fins on the side using repetitive line work.
Step 10: Shade the side fins
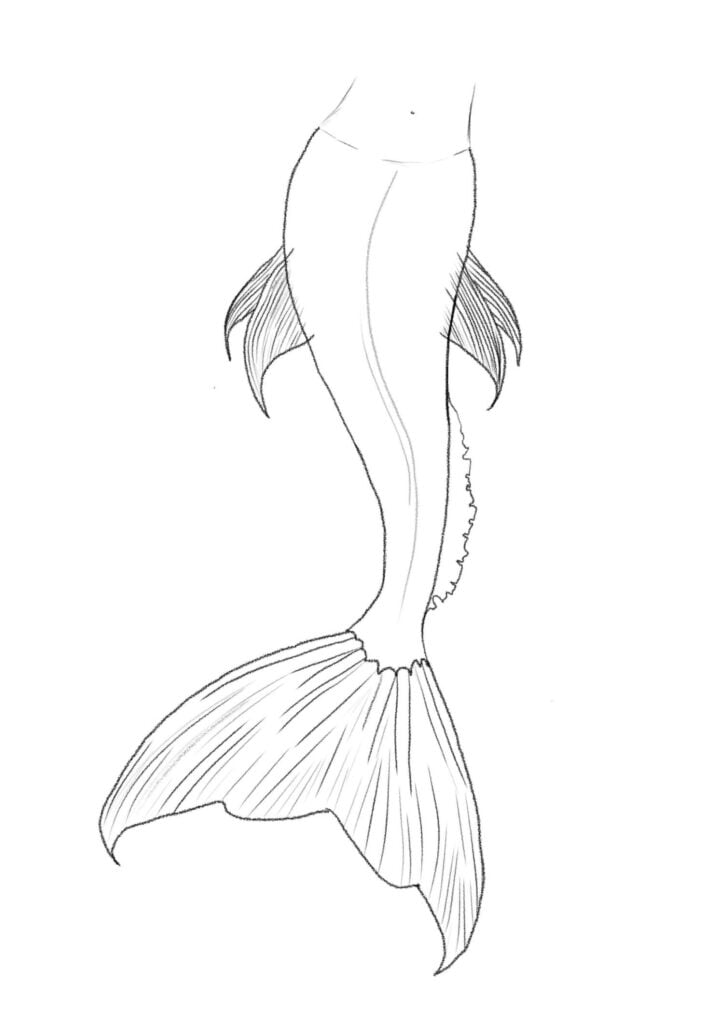
Shade the second set of fins using repetitive line work and shading.
Step 11: Shade the long side fin
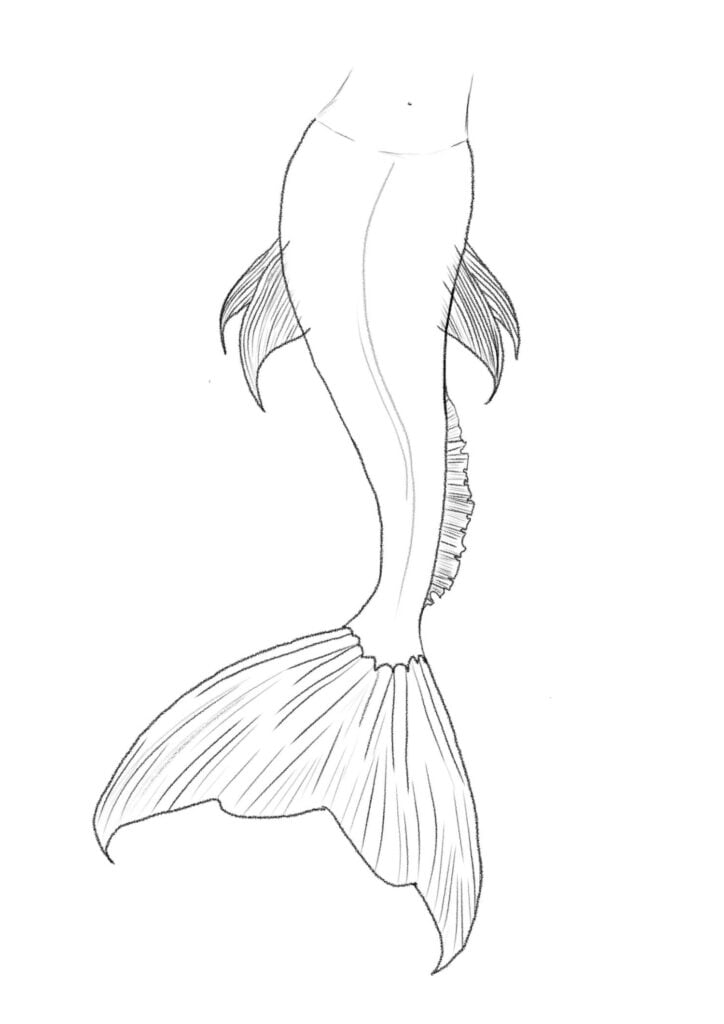
To shade the long side fin add more line work and shadow to the receding folds. You can add some curved lines to the mermaid’s tail.
Step 12: Mermaid scales

You can add mermaid scales to your mermaid. I have added a pattern of mermaid scales across the midsection of the tail, and along the inside of the curves to create a great sense of shadow.
Step 13: Add color
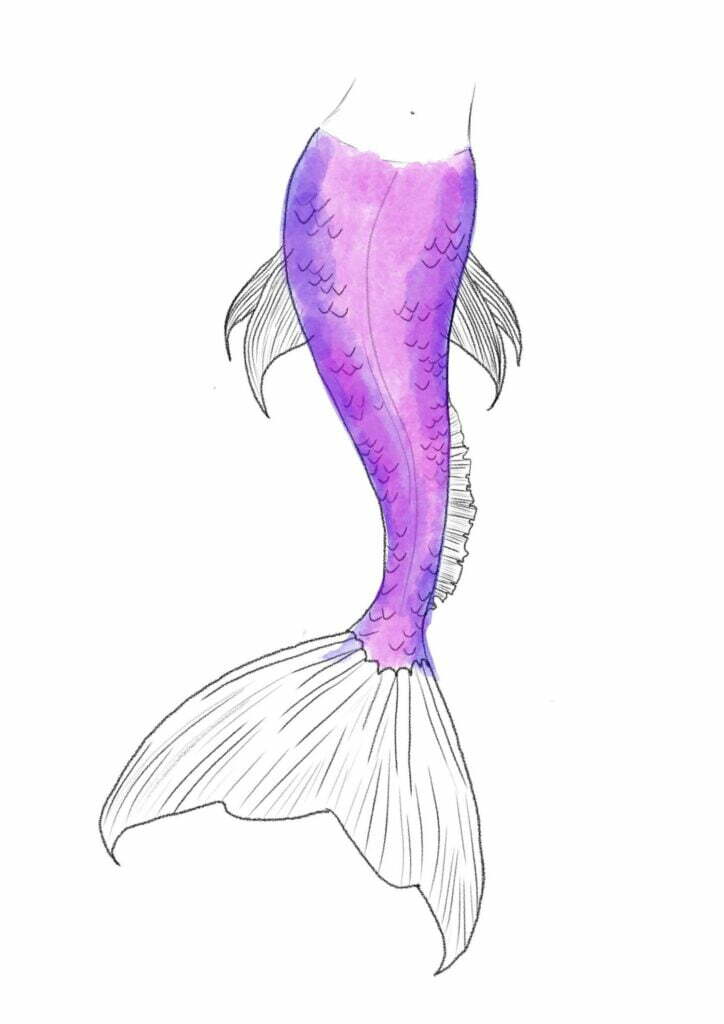
You can add color to your mermaid tail using a variety of different mediums such as colored pencils, watercolor pencils, watercolor paint, watercolor brush pens or digitally coloring your image on Procreate. For this drawing, I have used watercolor brushes on Procreate and have experimented with purples and pinks.
Step 14: Color the fins

I wanted the fins to remain quite translucent so I added a pink color to the fins.
Step 15: Add highlights and shadows

To create the shadows I have added green color to the mermaid tail. I have added darker shadows to the inside of the fins and lighter shadows to the outside. I have also added some blue color to the receding areas of the tail, similar to how you would paint clouds in a landscape painting.
Check out this great video on painting mermaid scales in watercolor.
Conclusion
If you’re not a mermaid yourself, maybe your little one is. They will love the ocean-themed activity of creating their very own mermaid tail drawing with this easy-to-follow tutorial! It’s never too early to introduce them to art and creativity. If you have been wondering how to draw a mermaid tail, with this step-by-step guide, you can have fun creating something beautiful. Have you tried any other awesome arts and crafts tutorials? Let me know in the comments below or on social media. I’d love to hear from you!

Other articles you may enjoy…
[Looking for things to draw on your hand? 50 Easy drawing ideas for 2022]
