


Last Updated on March 16, 2026 by Dee
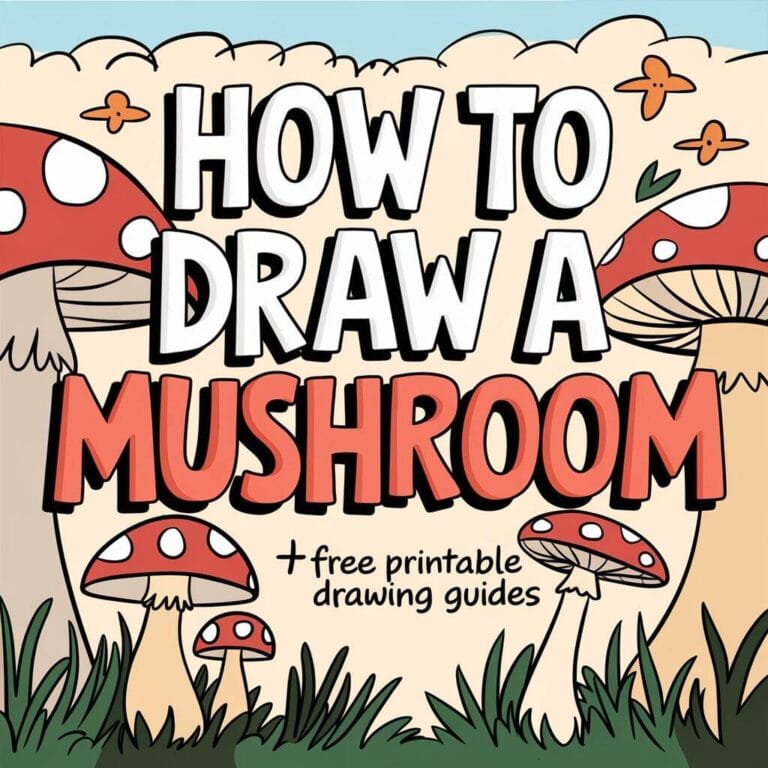
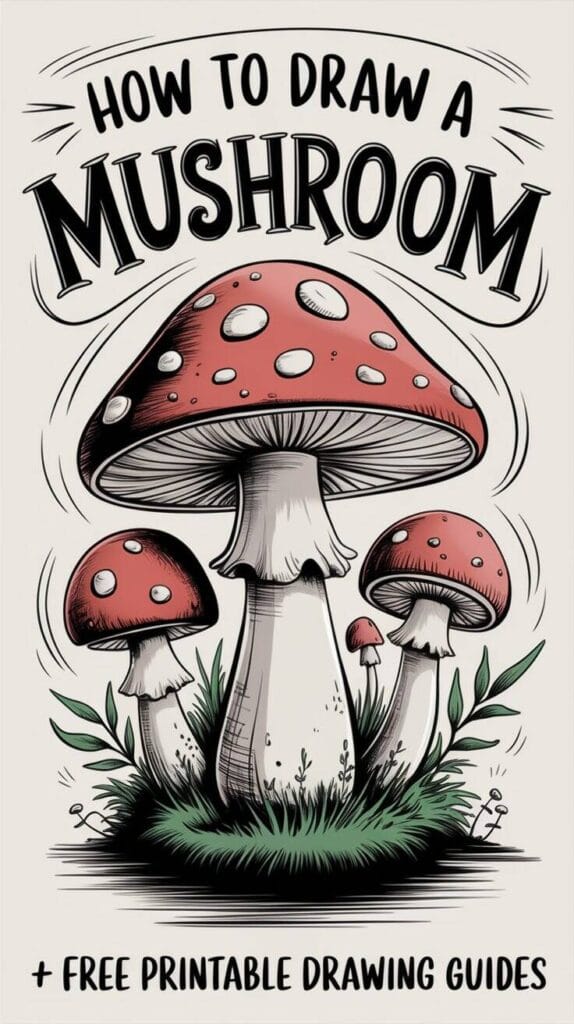
Learning how to draw a mushroom can be a simple and rewarding experience, perfect for beginners and seasoned artists alike. In this tutorial, I’ll walk you through drawing a mushroom using easy-to-follow steps that focus on basic shapes and adding realistic details. Let’s dive in and create a charming mushroom illustration together! Grab our FREE Printable Mushroom Drawing Guide & Templates at the end of this post!
Art Supplies for Your Mushroom Drawing
To begin your mushroom drawings, here are some art supplies that we at Artsydee have personally used and can vouch for their quality:
*This page may contain affiliate links to products I have used or recommend. If you purchase something from this page, I may receive a small percentage of the sale at no extra cost to you.**
- Graphite Pencils: This set of Prismacolor graphite pencils are fabulous to use. They feel lovely on paper and whether you’re sketching out a new concept or adding depth and detail to a drawing, these pencils will help you bring your vision to life.
- Paper: Strathmore Series Bristol Board, which offers a smooth surface that’s perfect for color pencil work.
- Color Pencils: Faber-Castell Polychromos provide a range of vibrant colors and are known for their high-quality pigments and smooth application.
- Blending Pencils: Derwent Blender and Burnisher Pencil Set can help you achieve a variety of textures and finishes, from smooth blends to a polished sheen.
- Pencil Sharpener: A good sharpener is crucial for maintaining fine points on your pencils. The Prismacolor Premier Pencil Sharpener is designed to minimize breakage.
- Erasers: For precision erasing, the Faber-Castell Perfection Eraser Pencil allows you to correct small details without disturbing the surrounding areas.
- Fixative: To protect your finished artwork, use a fixative spray like the Krylon Fixatif. It prevents smudging and preserves your drawing.
- Kneaded Eraser: The Prismacolor Kneaded Rubber Eraser is flexible and can be shaped for precision erasing, creating highlights, or lightening your color pencil work.
- Markers: We use the Ohuhu alcohol markers which have a fantastic range of colors and are lovely to use.
- Colorless Blender Marker: For a different blending approach, the Tombow Dual Brush Pen Colorless Blender can soften and blend colors without the need for additional pencils.
- Colored Pencil Set: For a wide spectrum of colors, consider the Prismacolor Premier Colored Pencils, which are soft yet durable and offer rich pigmentation.
- Metallic and Fluorescent Pencils: To add some unique effects to your artwork, Caran d’Ache has a range of metallic and fluorescent pencils that can bring a special touch to your drawings.
- Art Stumps and Tortillons: For more controlled blending, especially in smaller areas, art stumps and tortillons made of compressed paper can be very useful.
- Pencil Extenders: As pencils get shorter, a pencil extender can help you hold onto them comfortably and use them until the very end. This Pencil Extender Set is a great option.
- Micron Pens & Pitt Pens are essential for long-lasting, intricate pen and ink drawing.
- Storage Case: Keep your pencils organized and protected with a durable case.
- Each of these products has been a part of our artistic process at Artsydee, contributing to the creation of beautiful and lasting artwork. By investing in quality materials, you ensure that each stroke of your pencil is as rewarding as the last. Happy drawing!
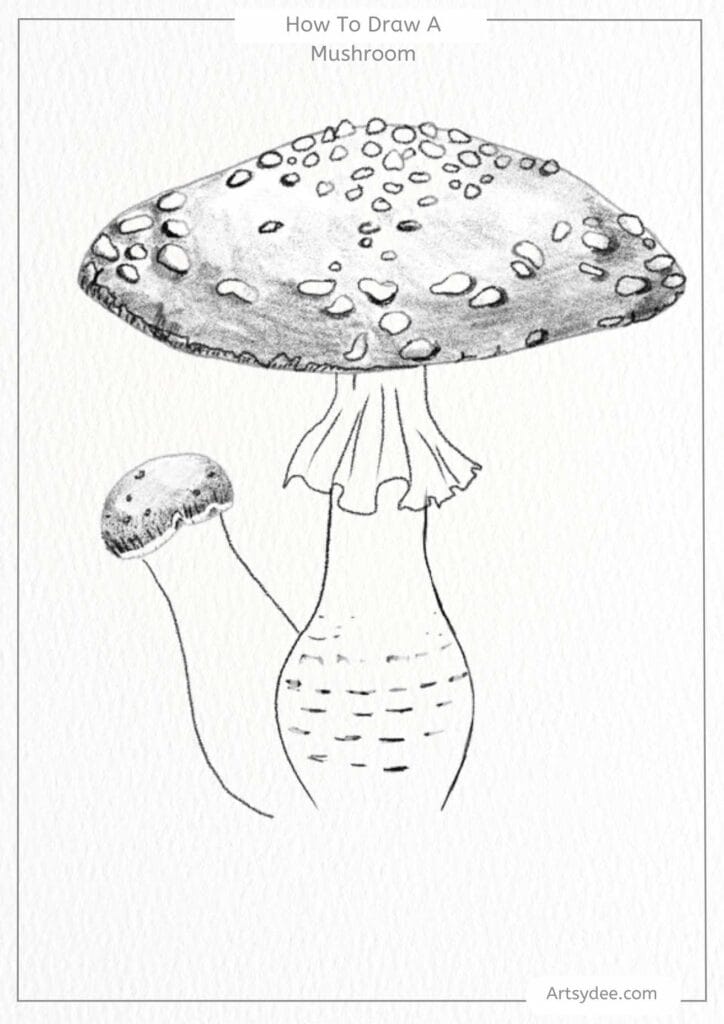
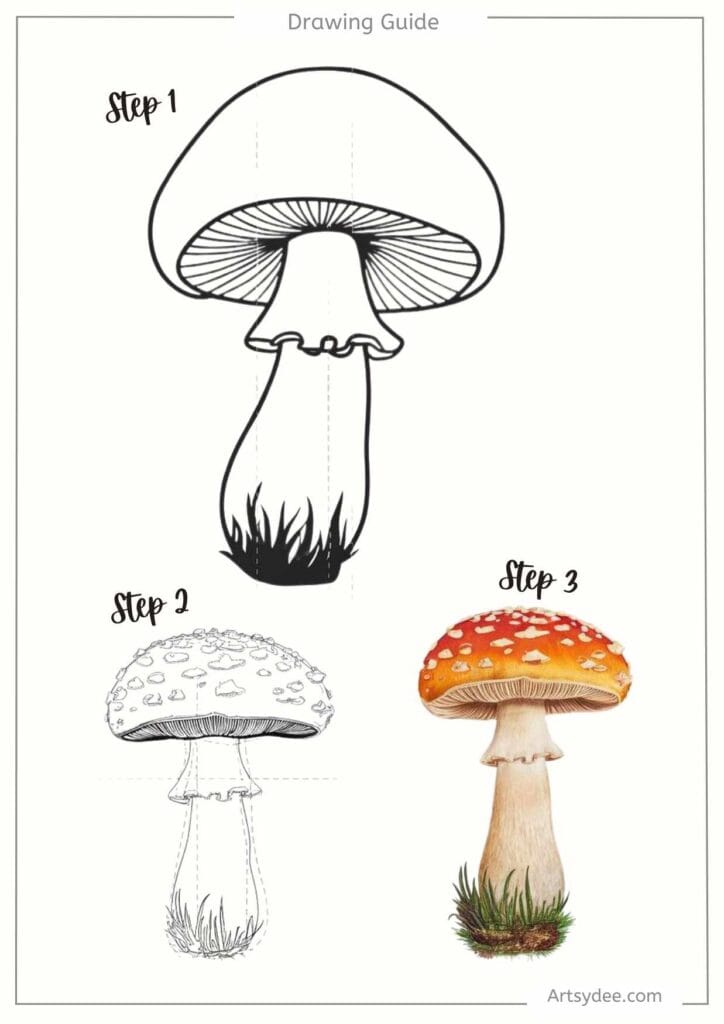
Step by step instructions for how to draw a mushroom
Step 1: Sketch the Basic Shapes
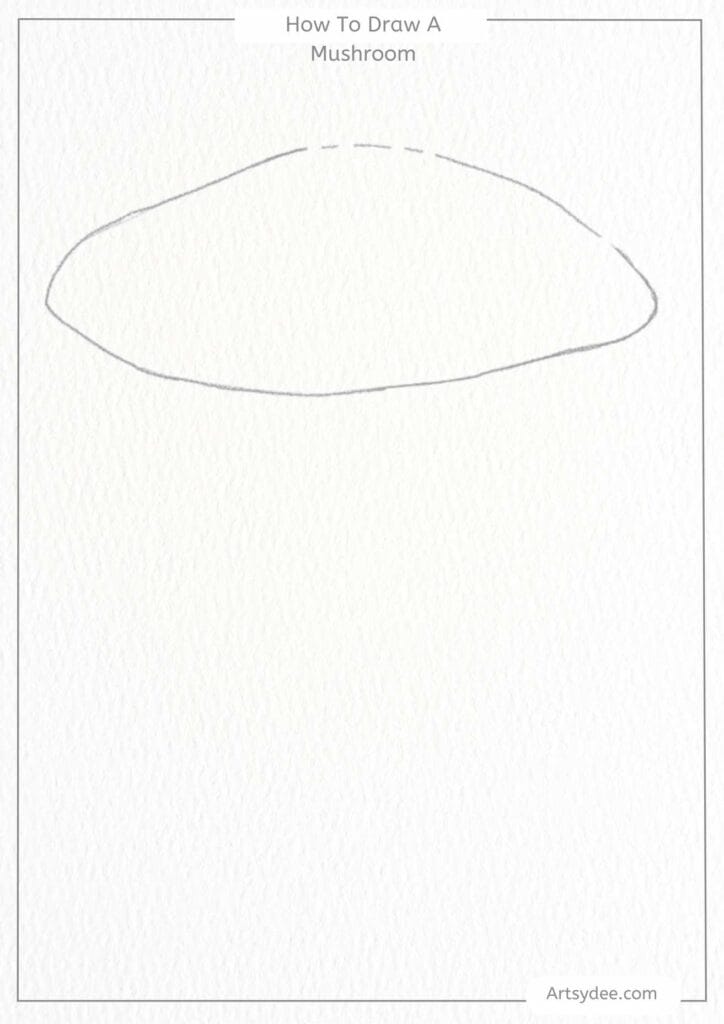
Begin by lightly sketching the main shapes of the mushroom. Keep your lines light so that they’re easy to adjust as you refine your drawing.
- Draw the Cap: Start with a large, rounded dome shape for the mushroom cap. You can make it slightly irregular for a natural look.
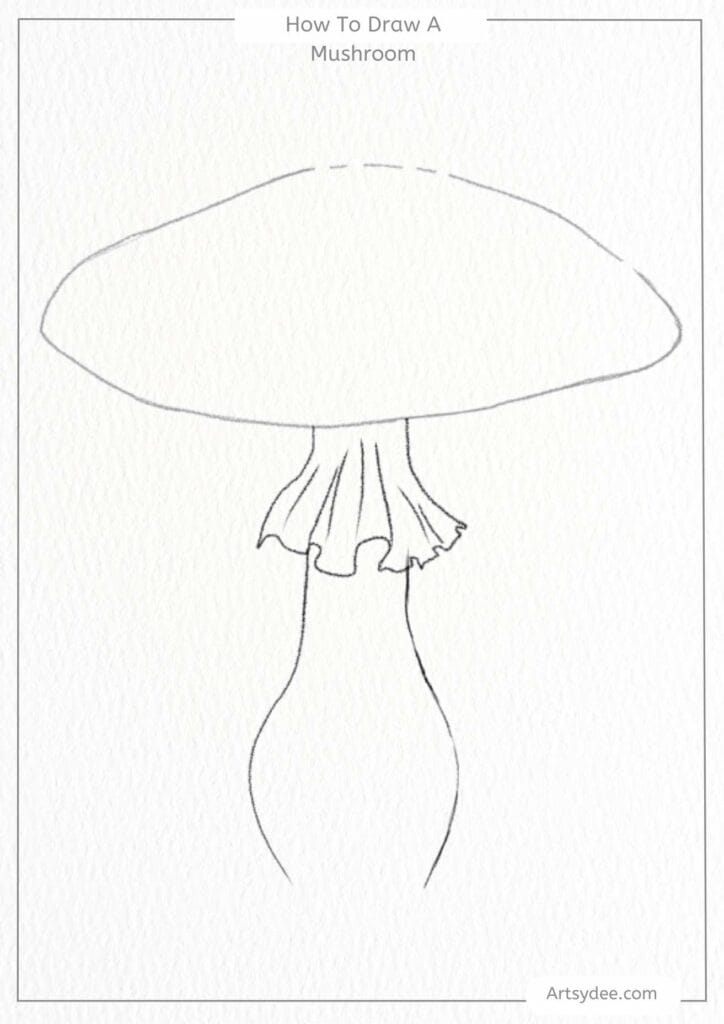
- Add the Stem: Below the cap, sketch a long, narrow rectangle or oval shape to create the stem. Make it slightly wider at the top where it meets the cap.
Tip: Don’t worry about perfection here. Natural shapes often have slight irregularities that add character!
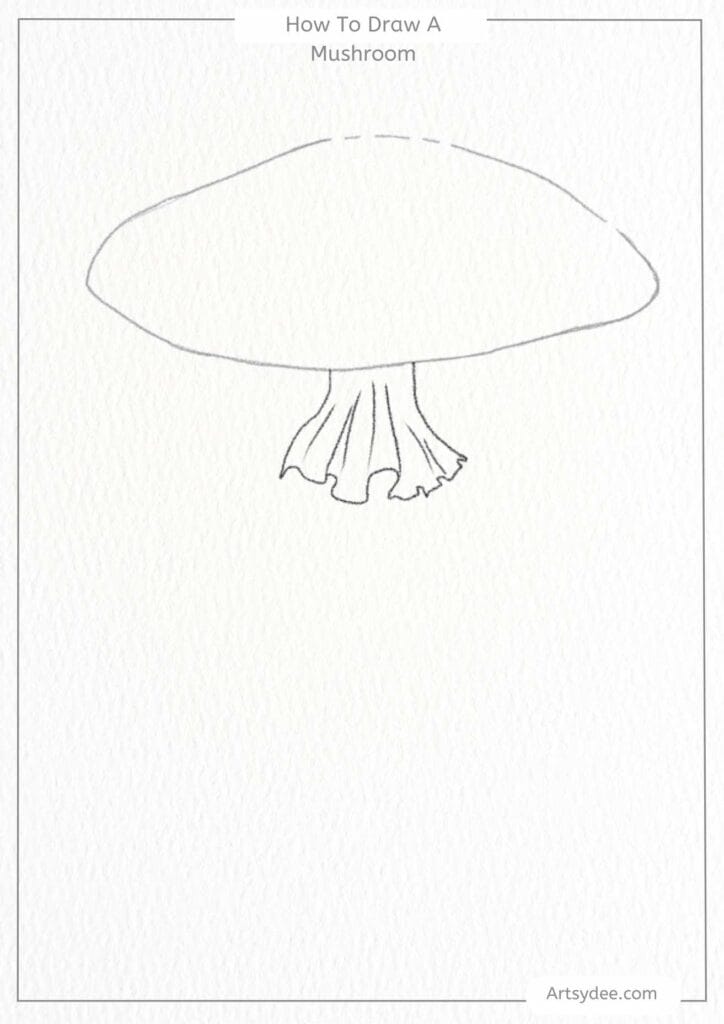
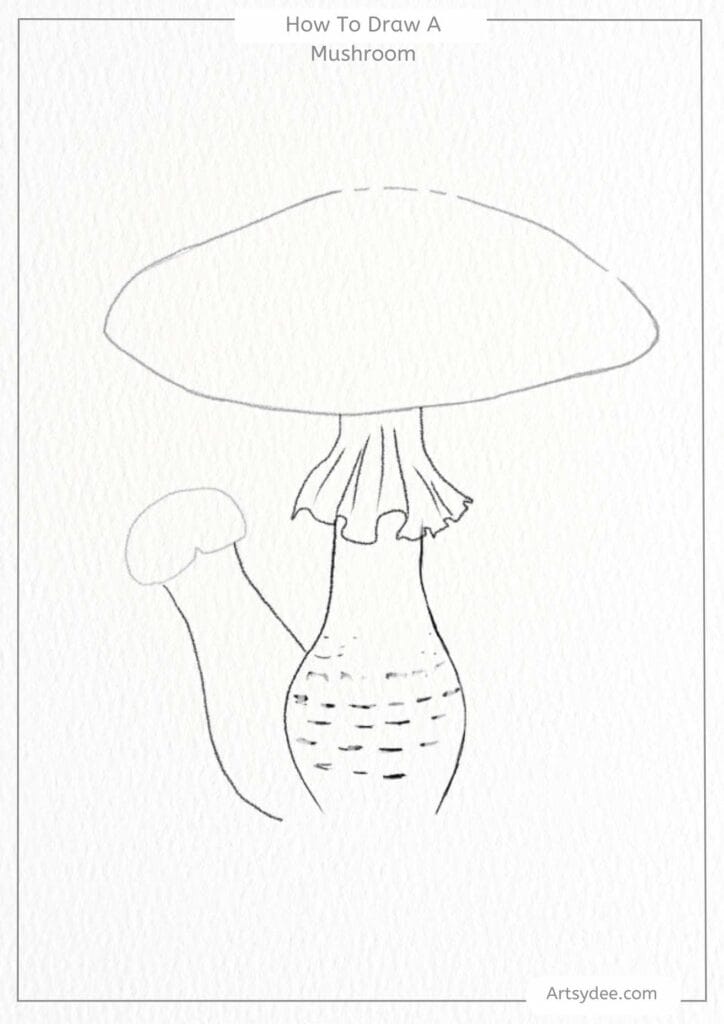
Step 2: Refine the Shapes and Add Details
Now that you have your basic outline, begin refining the shapes to make your mushroom look more realistic.
- Shape the Cap: Refine the cap by making the edges wavy or slightly uneven, adding a natural texture. You can also add a few small spots or bumps to give it character.
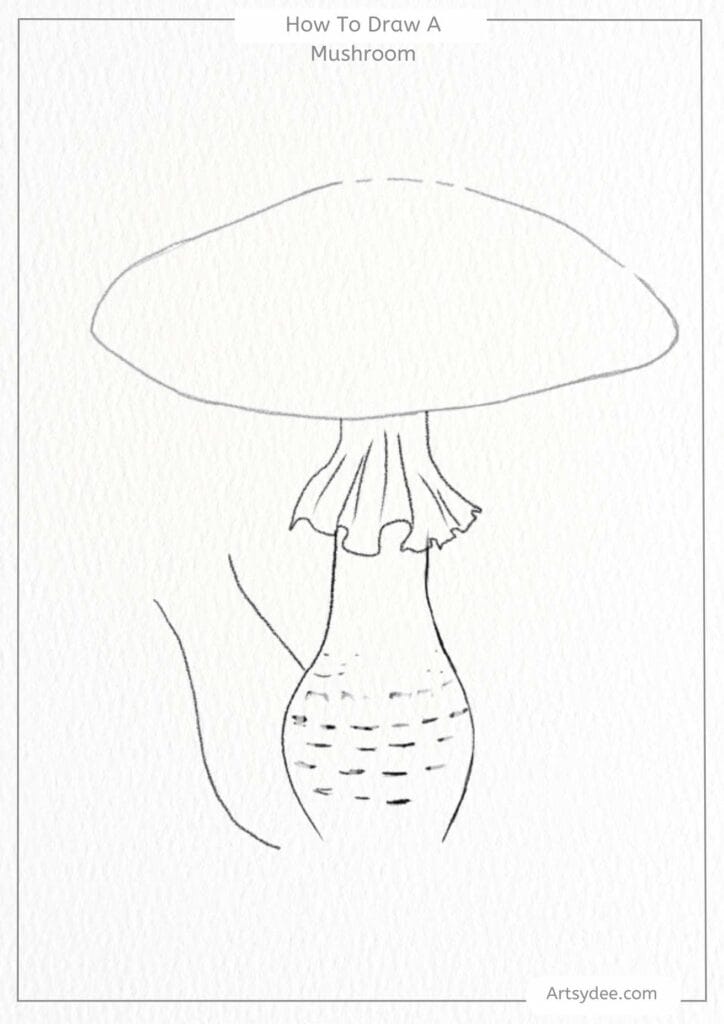
- Detail the Stem: Adjust the width and shape of the stem to make it look organic. Add some slight curves or lines along the stem to represent texture and natural ridges.
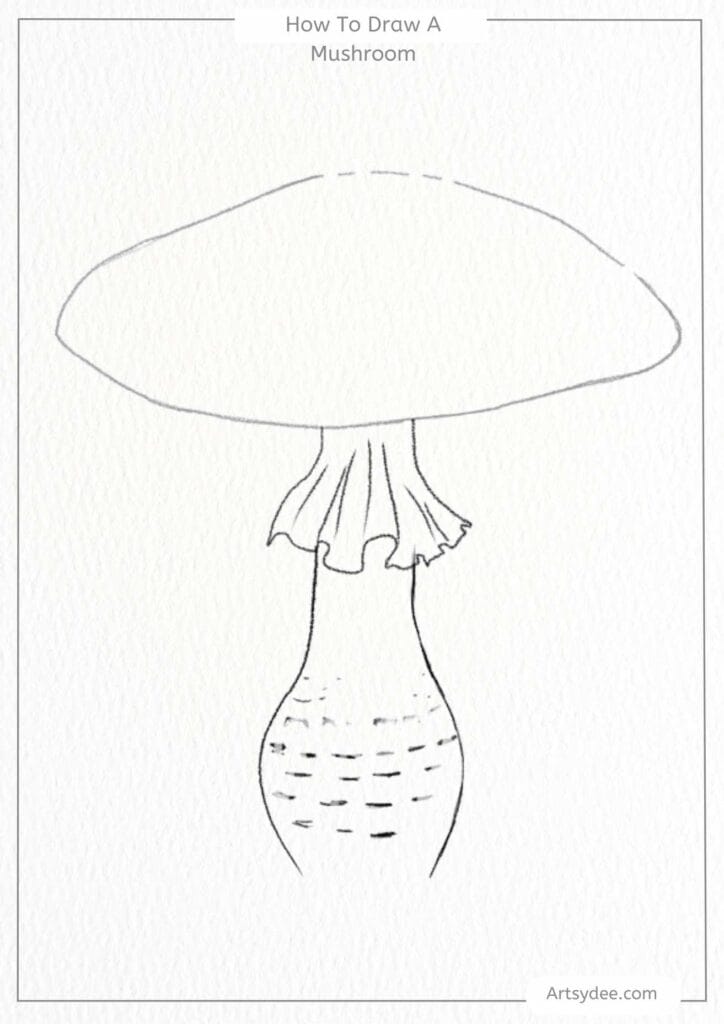
- Draw the Gills: Under the cap, draw curved lines that extend from the stem outward to represent the mushroom’s gills. This step adds depth and realism to your drawing.
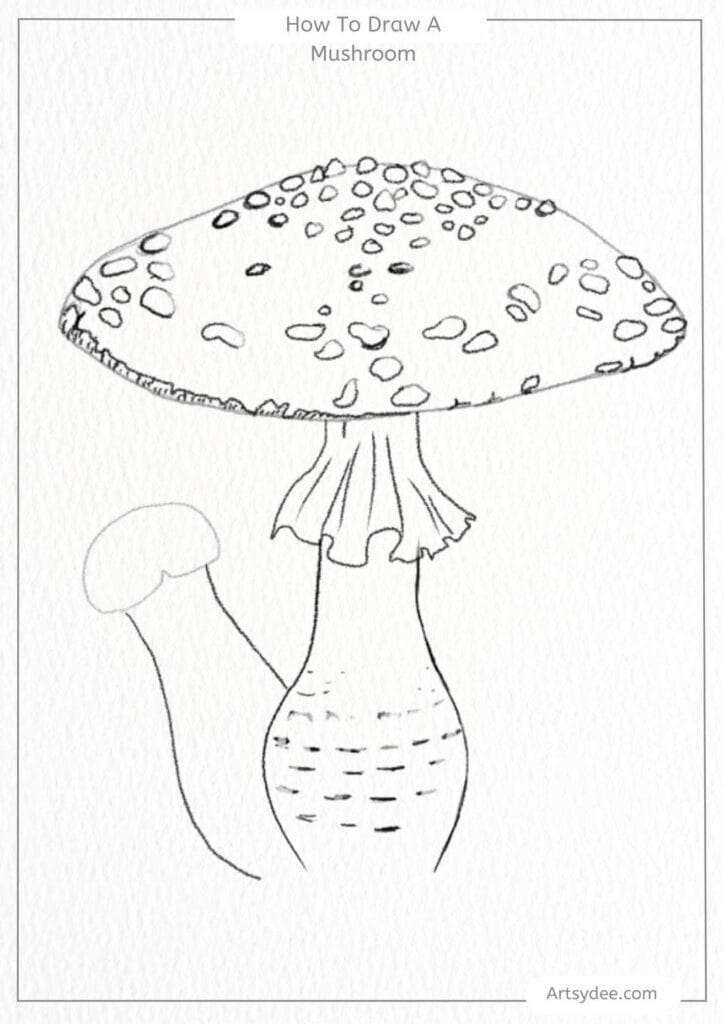
Step 3: Outline and Clean Up
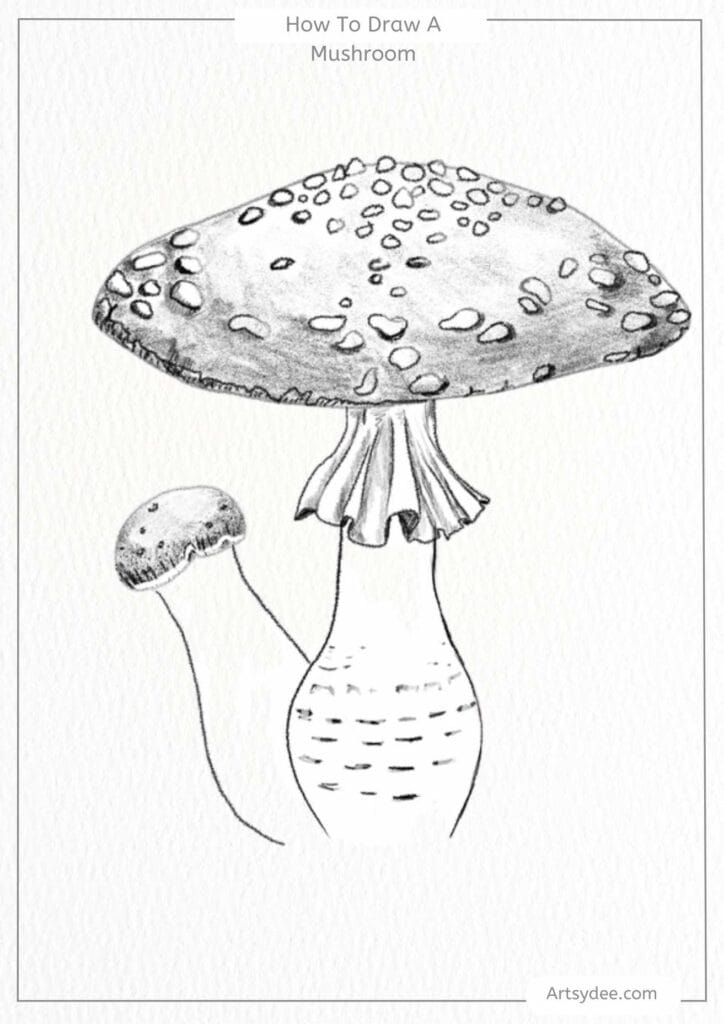
With your details in place, go over your drawing with a fine liner or a darker pencil to outline the mushroom’s final shape.
- Trace the Outline: Carefully trace over the cap, stem, and gills to solidify your lines.
- Erase Extra Lines: Gently erase any remaining sketch lines, leaving you with a clean outline of your mushroom.
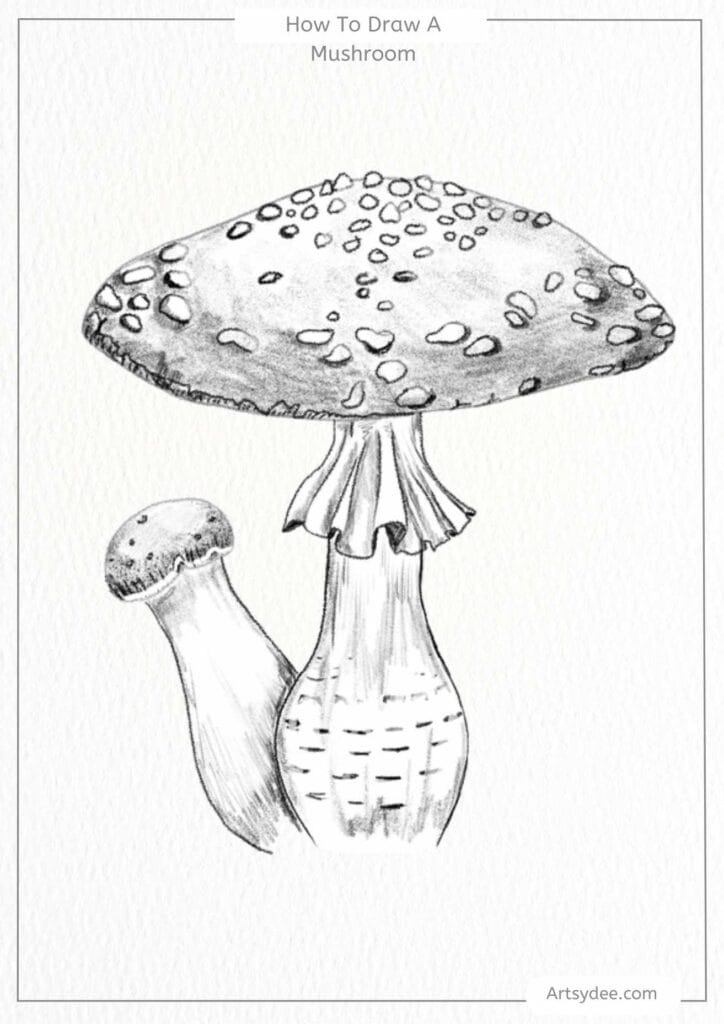
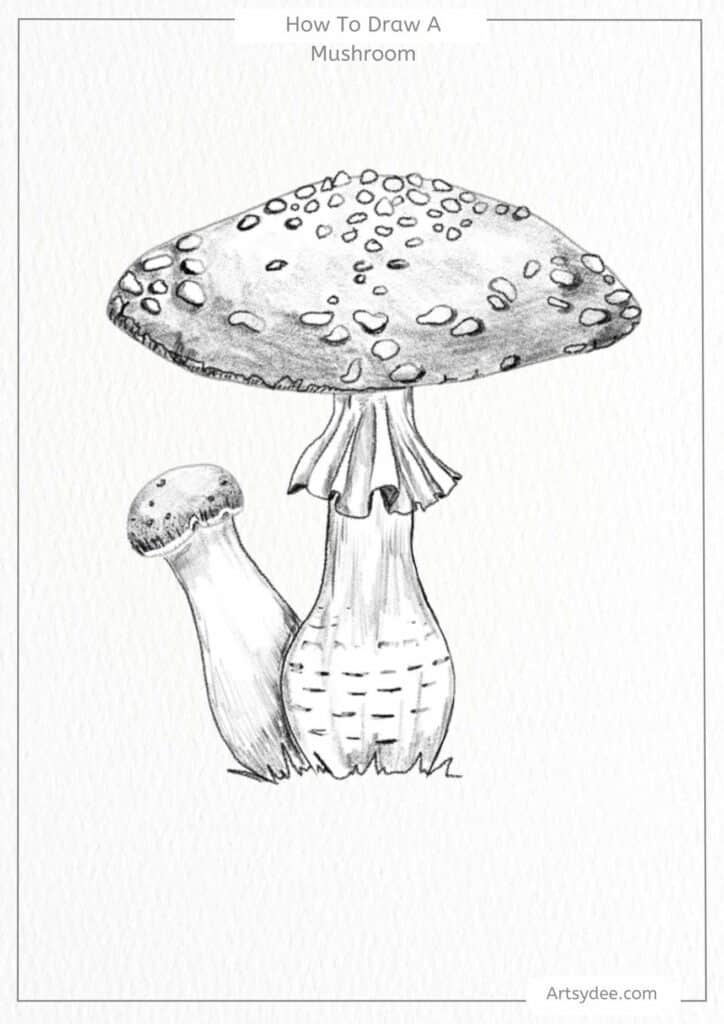
Step 4: Add Color and Shading
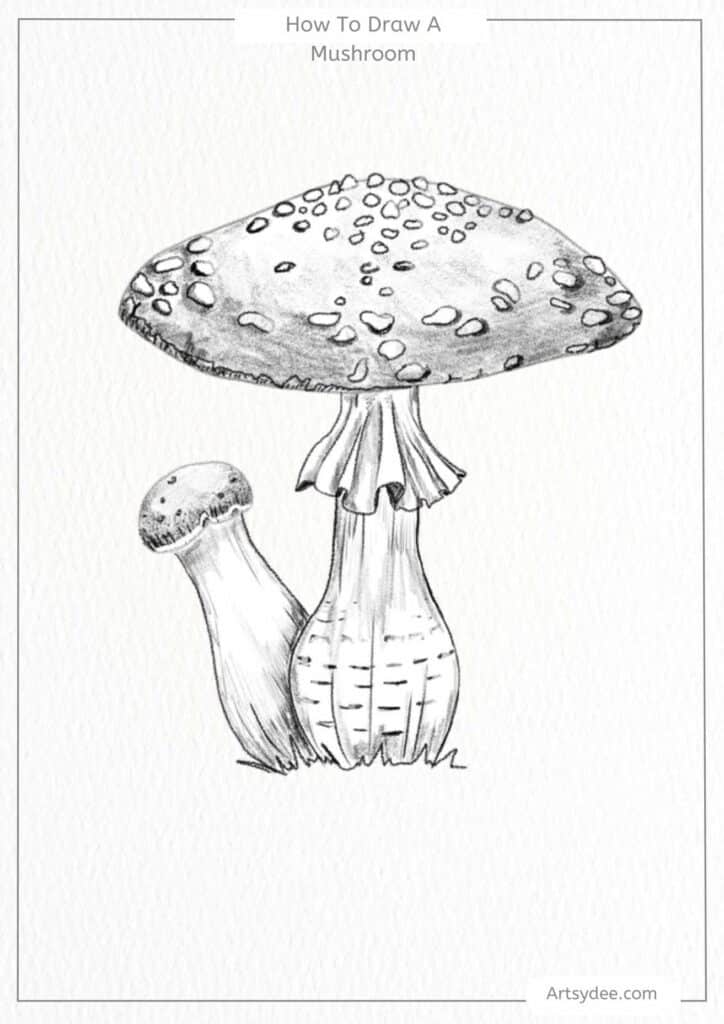

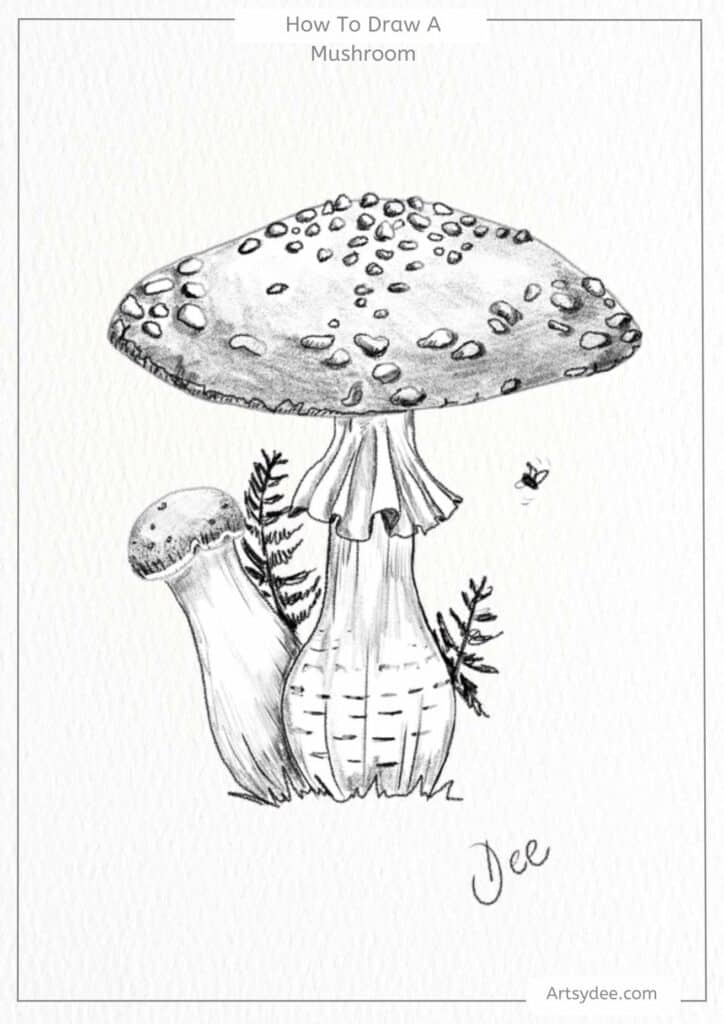
Adding color and shading will bring your mushroom drawing to life. Use colored pencils, markers, or watercolor for this step.
- Color the Cap: Choose a color like red, brown, or orange for the cap. Apply light and dark shades to create depth, focusing darker colors around the edges and lighter colors in the center.
- Color the Stem: Use earthy tones like beige, cream, or light brown for the stem. Add shading along one side to make it look three-dimensional.
- Add Texture and Details: Add small dots, spots, or lines to the cap and stem for added texture. This will make your mushroom look more realistic and interesting.
Get Creative with Our Printable Mushroom Drawing Guides!
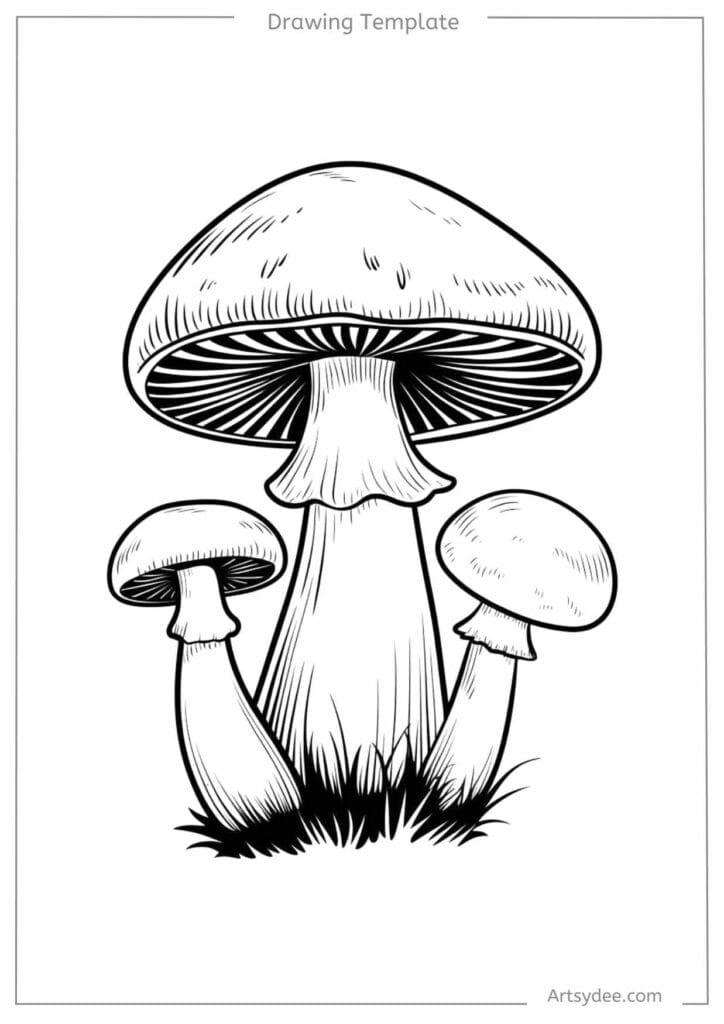
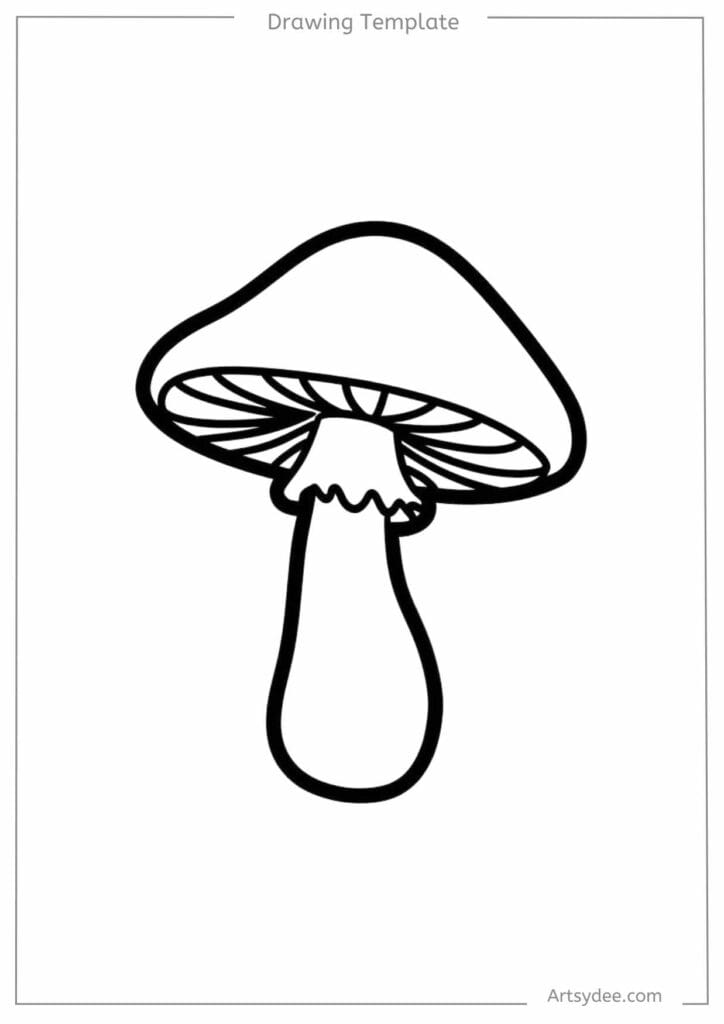
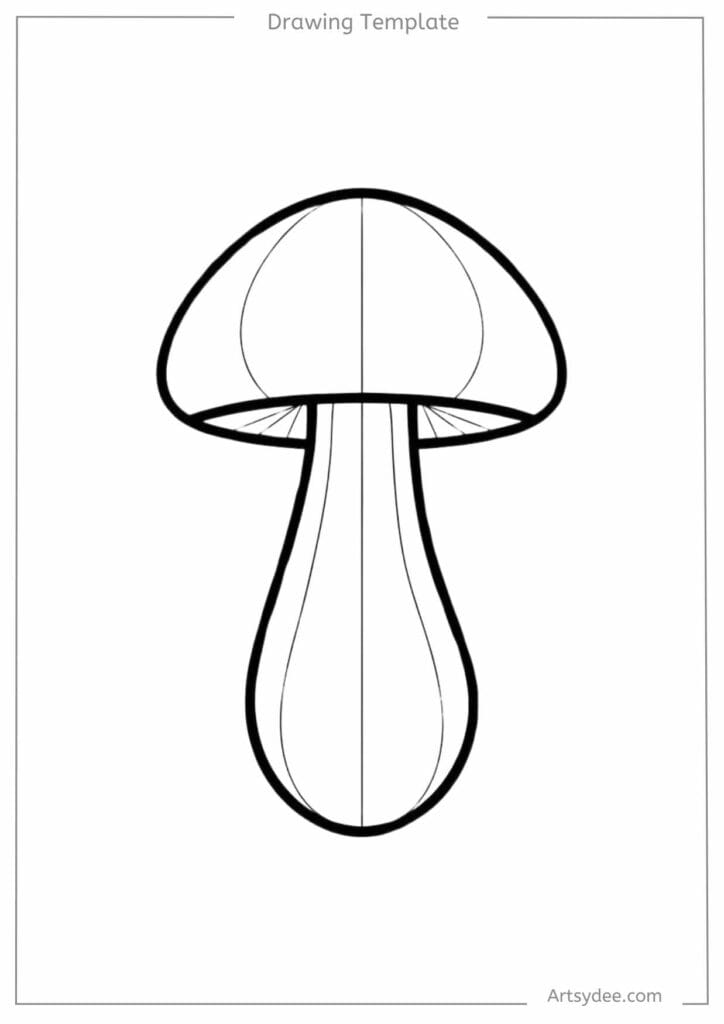
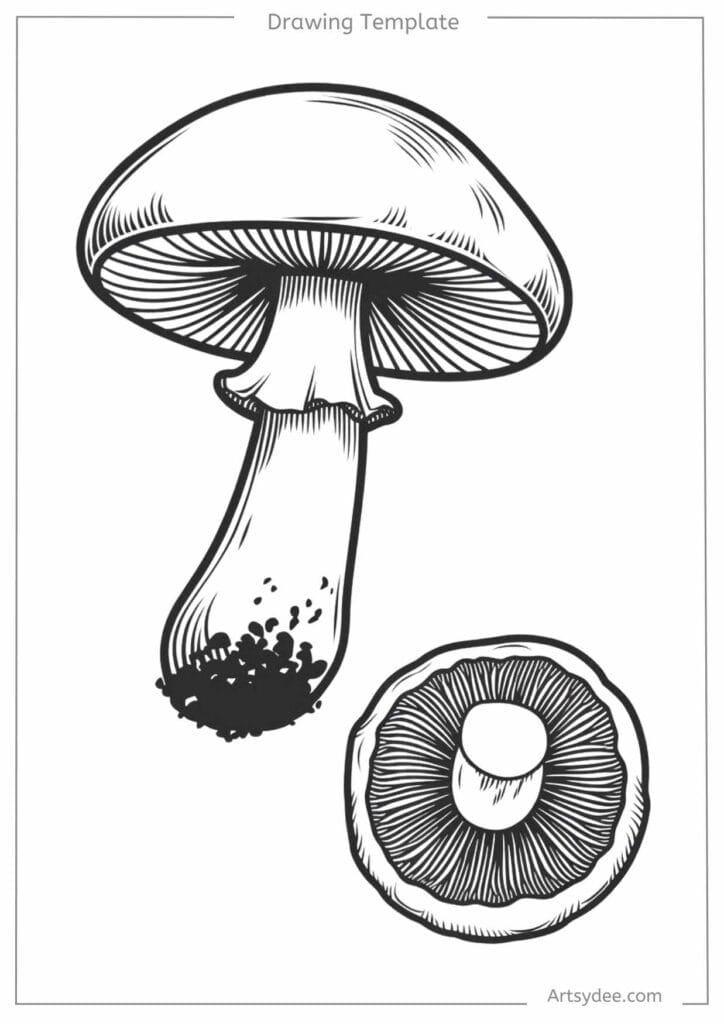
At the end of this tutorial, you’ll find simple, printable PDF drawing guides that make drawing mushrooms even easier! These templates are designed to help you get started right away—just download, print, and trace over the shapes to create a basic mushroom outline, or follow each step in the guide to draw freehand. They’re perfect for building confidence in your drawing skills, whether you’re a beginner or just looking for a quick way to add mushrooms to your art projects. Enjoy experimenting with colors, adding details, and making each mushroom your own!
Grab the Free Mushroom Drawing Guides & Templates HERE (below)!
To access the free in-post printables for this post, you’ll just need to create a free account or log in with the Grow.me tool. Then, confirm by email and refresh the page, and ALL my free printables will automatically unlock in every post!
Love These Drawing Templates? Get Even More Exclusive Creative Goodies on My Patreon! 🎨
If you’re enjoying these free printables, why not join my Artsydee Patreon community? As a member, you’ll gain access to exclusive Procreate tutorials, watercolor lessons, and tons of printables like this one—delivered to you monthly (and sometimes even twice a month!). Plus, you’ll get sneak peeks at upcoming projects and have a say in what content I create next. ✨
Join today and unlock premium resources to take your creativity to the next level!
Other posts you may enjoy…
The Best Beginner Art Supplies You Didn’t Know You Needed!
59 Aesthetic Things to Draw: Art Ideas for Creative Minds
121 Fun and Easy Objects to Draw
Looking for things to draw on your hand? 50 Easy drawing ideas!
101 Cool Designs to Draw | Easy Ideas for Drawing Fun!
How to Draw a Lily | Easy Lily Flower Drawing Tutorial
How to Start a Daily Sketchbook | 17 Top Tips to Get You Inspired
10 Best Artists Light Boxes: Why You Need One, and How to Choose the Right One For Your Needs
18 Texture Drawing Examples to Help You Get Inspired: How to Draw Texture
How to sign your artwork – and make sure people know who you are!
How to draw a nose step by step
🎬 Love video tutorials? Subscribe to my YouTube channel for weekly art tutorials and creative inspiration!
Frequently Asked Questions About Mushroom Drawing
What are mushroom drawing and why are they useful?
Learning how to draw a mushroom can be a simple and rewarding experience, perfect for beginners and seasoned artists alike. In this tutorial, I’ll walk you through drawing a mushroom using easy-to-follow steps that focus on basic shapes and adding realistic details. Let’s dive in and create a charming mushroom illustration together! Grab our FREE Printable Mushroom Drawing Guide & Templates at the end of this post! Art Supplies for Your Mushroom Drawing To begin your mushroom drawings, here are some art supplies that we at Artsydee have personally used and can vouch for their quality: *This pa.
Can you explain step by step instructions for how to draw a mushroom?
Begin by lightly sketching the main shapes of the mushroom. Keep your lines light so that they’re easy to adjust as you refine your drawing.
Do I need to be good at drawing to try mushroom drawing?
Not at all! The mushroom drawing in this post are designed for all skill levels. Start with the simpler designs and work your way up. The free printable templates and guides make it easy even if you are a complete beginner.
How do I download the free mushroom drawing printables?
Just use the Grow.me download box in this post — create a free account (takes 30 seconds), confirm your email, and refresh the page. Once unlocked, you will have access to ALL free mushroom drawing and every other free printable across artsydee.com!