


Last Updated on July 7, 2026 by Dee
I’ve put together everything you need to get started with watercolor backgrounds. Here’s what I’ve put together for you. . Whether you’re a beginner looking for simple techniques or an experienced painter seeking new challenges, these ideas will spark your imagination and help you create stunning watercolor backdrops.. Let’s unleash the potential of watercolor and transform blank pages into breathtaking pieces of art!
Grab your free watercolor background painting templates at the end of this post!
Table of Contents
50+ Watercolor Background Painting Ideas


Watercolor Painting Techniques
Gentle Watercolor Background Gradient
**This page may contain affiliate links to products I have used or recommended. If you purchase something from this page, I may receive a small percentage of the sale at no extra cost to you.**
If you have been wondering how to paint with watercolours, painting a watercolor gradient is a lovely way to create a soft and simple background for lettering, embossing art, or as a background for mixed media art and art journaling.

Steps to Follow
- Create a clean, white border around the edge of your watercolor paper by sticking down artists masking tape.
- Choose a color to use. You can either use a color straight from the tube or pan set or mix colors together to create another color. I have chosen to use Ultramarine straight from the tube.
- For this watercolor background, I used the wet-on-dry watercolor technique. I loaded my brush with ultramarine blue and started painting from the top of the page moving down to the bottom.
- Paint in a vertical motion as you slowly move down the page. Add water to your paint as you continue. This will water down the pigment you are picking up on your brush – this means the color will get lighter and lighter as you continue painting.
- Once I had done the first wash, I loaded my brush with more ultramarine and painted a second layer over the top part of the background so that it was darker and had a more obvious gradient. You can continue to do this as many times as you want in order to get the desired effect. Bear in mind that watercolor paint tends to be brighter when wet, and becomes lighter as it dries. It is a good idea to wait for it to dry between layers.
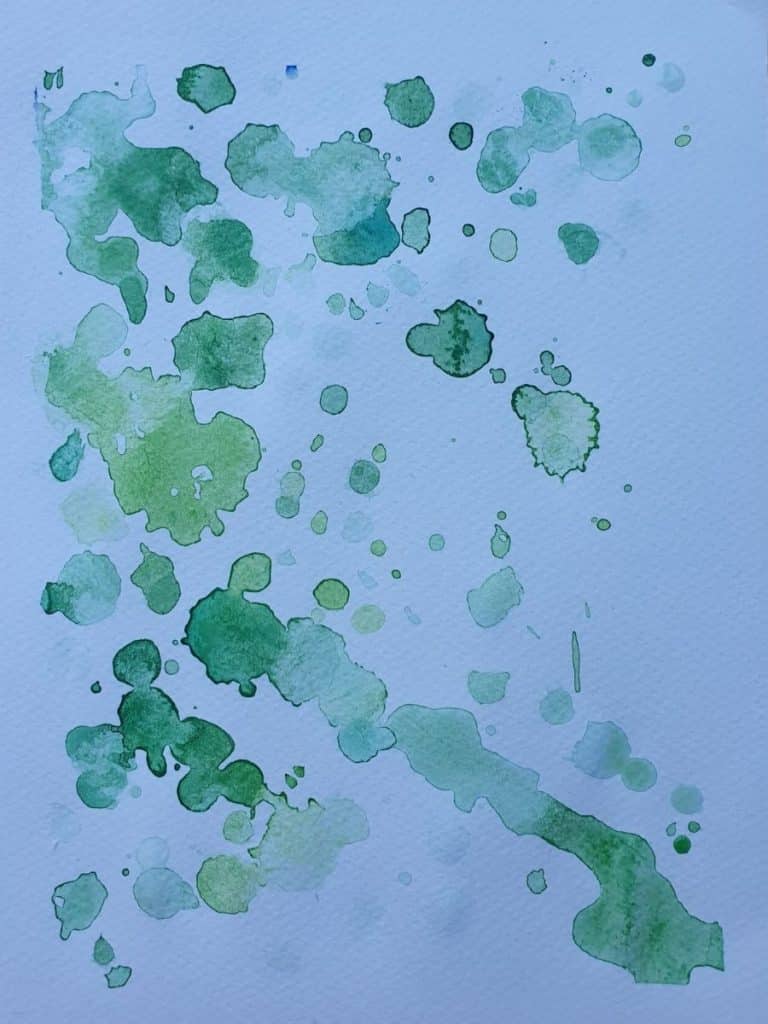
Dripping Watercolor
You can use a paintbrush, syringe, dropper, or any tool that creates a drip-like mark on your page. This is a fun background and you can also use this technique to create a sense of some sort of dense background. The green together with the mottled drip pattern makes me feel as though I could create an artwork featuring a leafy bush, or some sort of foliage emerging in the background.
[Related article: Looking For a Mixed Media Sketchbook? 16 Best Mixed Media Sketchbooks for Wet & Dry Media]
Steps to Follow
- Load your brush, syringe, or dropper with paint and allow it to drip onto the surface of the paper. Experiment with both the wet-on-wet and the wet-on-dry watercolor techniques and explore the different effects.
- If you have dripped too much water and you are worried about the paint running, then you can take the corner of a paper towel, or tissue and gentle touch the watercolor droplet to “suck” up or absorb the excess watercolor paint. Choosing to dab a few of your droplets creates an interesting result because some will be lighter and some will be darker!
Read this super helpful article by Erika Lancaster on how to mix believable and interesting greens with watercolor…
Blending Watercolor

Steps to Follow
- Choose two or more colors to blend. In this example, I chose two colors – Opera Pink and Dioxazine Violet.
- Start by painting one of your colors on the one half of your watercolor paper.
- While the first color is still wet, paint your second color on the other half of your watercolor paper.
- Move the colors into one another to allow them to blend.
- Keep layering washes of each color and allowing them to blend.
Scumbling/ Dry Brushing Watercolor Paint

- Using a dry brush, rub off some slightly wet paint from your palette. You can use a spray bottle to lightly activate your watercolors so that you can pick up some pigment.
- Using a circular and a ‘rubbing’ motion, you can scrub the surface of the paper with your paintbrush.
- This creates an interesting texture and you can use several different colors to build up your background.
Wet-On-Wet Watercolor Background
Wet-on-wet is a watercolor technique where you apply wet paint onto a wet paper surface. You are able to create whimsical effects where the pigment seems to magically move and bloom on the paper surface. I always find it very exciting to watch how the color moves and dries when you paint in this way. It really teaches you to let go!
[Related article: How to Draw a Background | 11 Easy Tips for Beginners]
- Using a clean watercolor brush, paint clean, fresh water over the paper surface.
- Load your brush with activated (wet) watercolor.
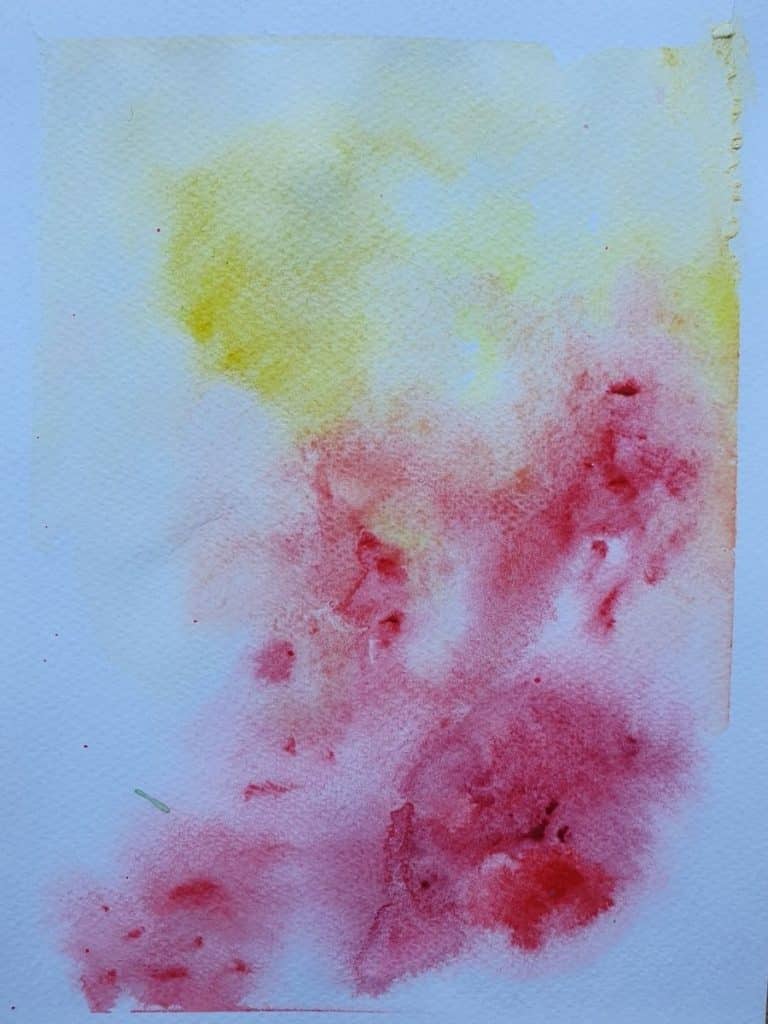
- Touch the wet surface of the paper and watch the colors bloom. In this example, I used two colors (Permanent Rose, and Lemon Yellow) and allowed them to blend.
Coarse Salt on Watercolor
Sprinkling coarse salt onto a wet watercolor surface creates fascinating speckles, and patterns when it dries.

Steps to Follow
- Paint the surface of the paper using your chosen watercolor hue.
- While still wet, sprinkle coarse salt (even table salt will create an interesting effect) onto the watercolor and allow to dry.
- Once dry, rub off the salt.
Watercolor Stencil Background
Stenciling is a fun way to create a watercolor background. You can make your own stencils or even buy stencils online to get the desired effects. There is a huge range of stencils to choose from – flowers, to animals, to lettering!

Steps to Follow
- Create a clean, white border around the edge of your watercolor paper by sticking down artists masking tape.
- Decide on the position of your stencil on your page.
- Use repositionable spray adhesive on the back of the stencil and then stick it onto your sheet of watercolor paper.
- Mix your chosen color and start painting the surface of your paper. I find that you need to manipulate the brush so as to get into the small spaces in the stencil.
- It often happens that the watercolor might bleed beneath the stencil – and to be honest, I quite like that effect!
- Once the watercolor paint has dried you can gently remove the stencil.
- I like to further work in to the stenciled watercolor painting by using permanent pens, pastel, or colored pencils.
Splatter Watercolor Painting
This is a fun way to create an energized watercolor background. I chose to use some Opera Pink mixed with Permanent Rose to get a ‘hot’ splatter background. You can use any tool from a wet paintbrush where you can ‘throw’ paint, or an old toothbrush to flick the pigment onto your surface.

Steps to Follow
- Create a clean, white border around the edge of your watercolor paper by sticking down artists masking tape.
- Using your tool of choice (I flicked my brush onto the paper), spray the paint onto the paper.
- If you have dripped too much water and you are worried about the paint running, then you can take the corner of a paper towel, or tissue and gentle touch the watercolor droplet to “suck” up or absorb the excess watercolor paint. Choosing to dab a few of your watercolor sprays creates an interesting result because some will be lighter and some will be darker!
Watercolor Shadow
Choosing a simple shadow grounds your painted subject and add a sense of realism to your painitng. Here I have added a soft shadow behind each of the watercolor gooseberries I painted. I wanted this painting to have a naturalistic feel to it, and I think the shadows really helped.
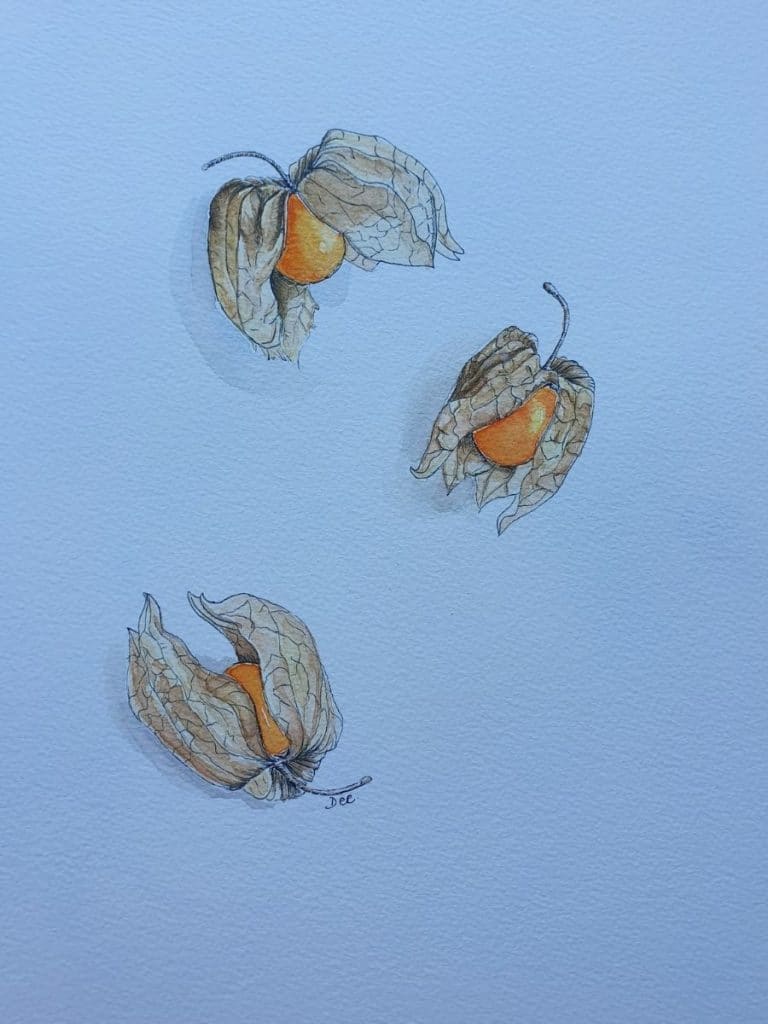
Steps to Follow
- Decide where your light source is coming from. If the light source is coming from the right-hand side, then the shadows will fall on the opposite side behind the subject. Make sure your shadows are all falling in the same general direction to create a more realistic effect!
- Using a touch of the main color in your subject, add a touch of black and white watercolor paint and mix these together to create the color of a shadow. I used a touch of the sienna color in my gooseberries and added it to a black and white mix to create the gray shadow color I used.
- Shadows will often be darker the closer they are to the object.
Watercolor Grass/ Ground
To give your subject a context it is a good idea to add some sort of ground, like grass! Here is an example of how I added a grass and greenery sprouting out from the ground beneath my poppies.

Coffee Splashes & Stains
I painted this fox in coffee – an unusual but exciting medium to work in! I decided to create a coffee stain or coffee splash effect. Using these kinds of design elements can make your painting really interesting. There are so many shapes, patterns and creative ideas you can explore in the background of your watercolor paintings!
[Related Article: Let’s Explore Painting with Coffee!]

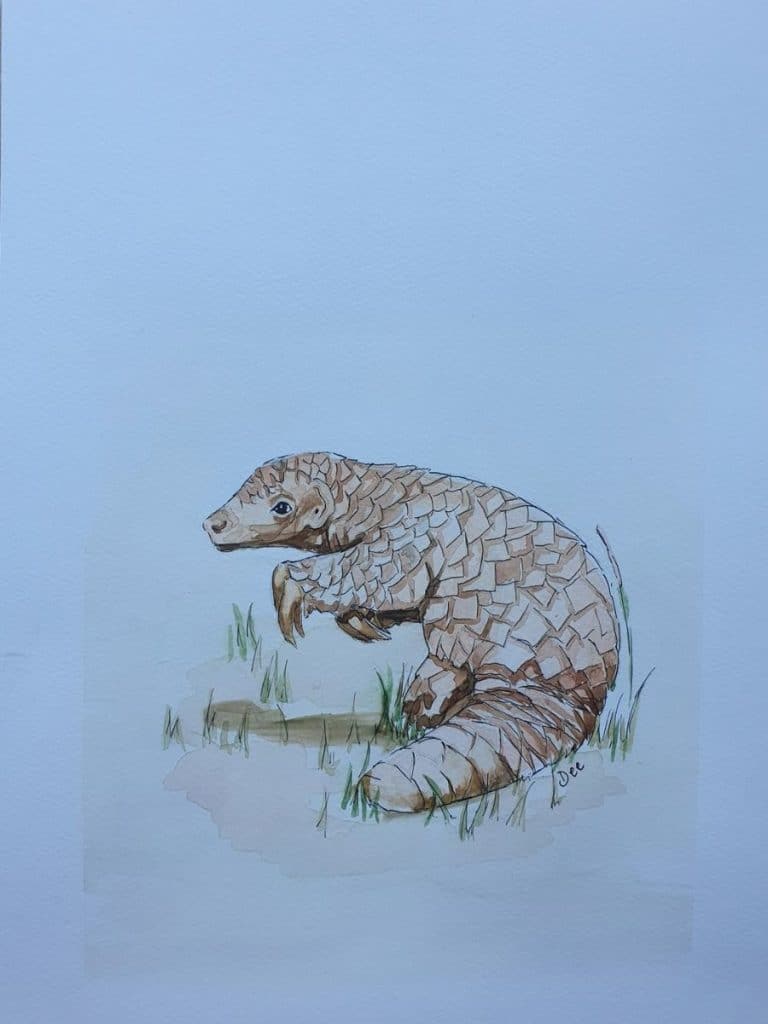
Simple Fade-Out Watercolor Background
This was a sweet little pangolin illustration I completed as a commission. I decided that I wanted the focus to be on her, so I painted a soft, simplistic wash of color that faded into the background. This grounded my subject and placed her in a natural context, without taking too much focus away from her.

Minimalist Blank or White Background
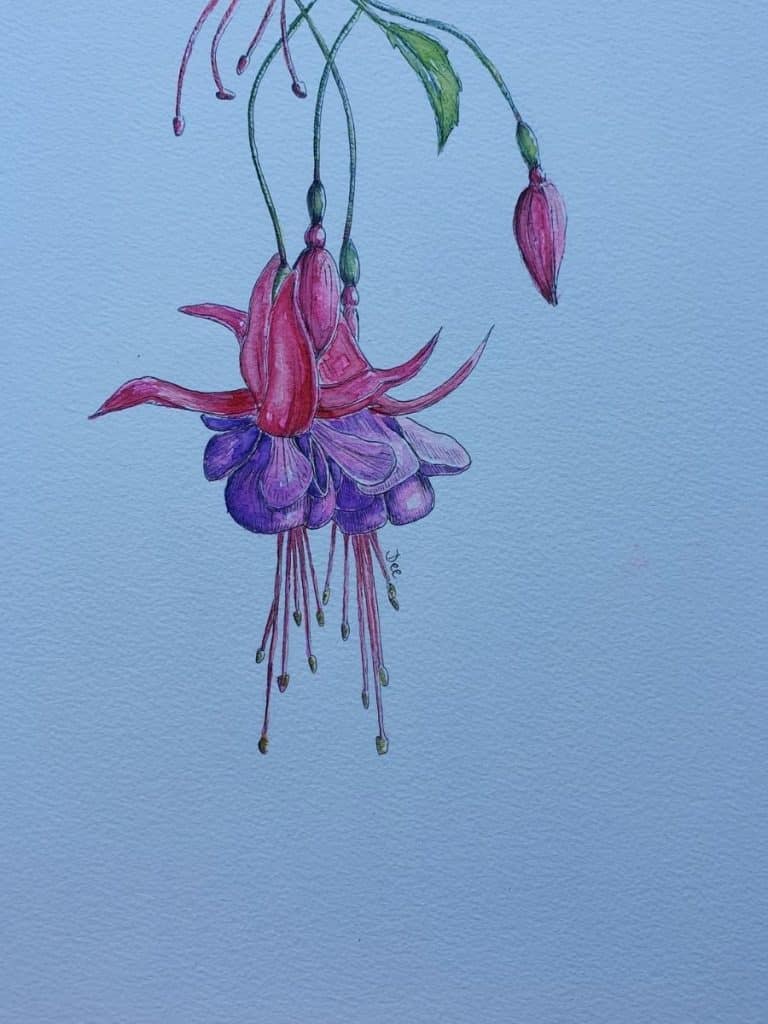
There is no hard and fast rule about what sort of background you should be adding to any painting. In fact, many people prefer to have a clean, minimalist background. This really works well with botanical artwork!
Materials & Tools for Painting Watercolor Backgrounds
300gsm Watercolor paper (a good idea to use a heavier paper so that it doesn’t warp or buckle when you apply watercolor paint)
Watercolor paint (tubes or pan sets)
Soft bristle brushes (round or filbert)
Syringe
Coarse Salt
Hair Dryer or Heat Tool
Top Tips for Painting Watercolor Backgrounds
- Start with High-Quality Supplies:
Invest in good-quality watercolor paints, brushes, and paper. Quality supplies can make a significant difference in the outcome of your painting. - Use the Right Paper:
Choose watercolor paper specifically designed for watercolor painting. It should be thick, absorbent, and have a texture suitable for your desired style. - Practice Color Mixing:
Learn how different colors mix and interact with each other. Experiment with mixing primary colors to create a wide range of hues and shades. - Control Your Water:
Water is a crucial element in watercolor painting. Learn to control the amount of water you use on your brush and paper. More water creates lighter, translucent washes, while less water results in more saturated colors. - Master Wet-on-Wet and Wet-on-Dry Techniques:
Wet-on-wet techniques involve applying paint to wet paper, creating soft and blended effects. Wet-on-dry involves painting on dry paper, resulting in crisp and defined lines. Practice both techniques for versatility. - Plan Your Layers:
Watercolor is a transparent medium, so plan your layers carefully. Start with lighter colors and build up to darker ones. Allow each layer to dry before adding the next to avoid muddying your colors. - Embrace White Space:
Leave areas of your paper blank to create highlights and add depth to your paintings. White space can enhance the luminosity of your watercolors. - Work from Light to Dark:
When adding details and shadows, work from light to dark colors. It’s easier to darken areas as needed than to lighten them once they’re too dark. - Experiment with Masking Fluid:
Masking fluid can be used to preserve areas of white paper that you want to keep untouched by paint. Apply it before painting and remove it once your painting is dry. - Keep a Clean Palette:
Regularly clean your watercolor palette to prevent colors from becoming muddy. Clean water and a separate palette for mixing can help maintain color purity. - Control Drying Times:
You can control drying times by using a wet palette or a palette with a lid to keep your paints moist. This is especially useful for larger, time-consuming projects. - Be Patient and Learn from Mistakes:
Watercolor painting can be challenging, and mistakes are part of the learning process. Don’t get discouraged; instead, learn from your errors and keep practicing. - Study and Observe:
Study the works of accomplished watercolor artists and observe the techniques they use. Learn from their compositions, brushwork, and color choices. - Experiment and Have Fun:
Watercolor is a versatile and expressive medium. Don’t be afraid to experiment with different styles, techniques, and subject matters. Enjoy the process and let your creativity flow. - Keep a Sketchbook:
Maintain a watercolor sketchbook to practice and document your ideas, observations, and daily experiences. It’s a great way to improve your skills and capture moments in a visual diary.
Should you paint the background first with watercolor?
Often people want to know whether they should paint the background or the subject of their watercolor painting first. This really depends on what sort of painting you are doing.
Professional watercolor painters will often start working on the subject first in order to keep their edges clean. Watercolor backgrounds in painting are often very flowing, light-filled, and impressionistic and as a result, many people prefer to paint a focus area with more detail first and then develop ideas for the background.
That being said, this is completely up to personal preference. Painting the background first can help to give you an overall sense of where your painting is going. You can use masking fluid, or tape to block out the elements in your painting that you wish to remain blank so that you can paint those later on.
When you are creating a poster or a design with lettering or embossing it is a good idea to paint the watercolor background first.
[Related article: 101 Cool Designs to Draw | Easy Ideas for Drawing Fun!]
How do you spread watercolor?
When you first start painting with watercolor, you use a method known as wet-on-dry. Essentially, you do this by dipping your paintbrush into activated, wet watercolor paint and applying it to a dry paper surface. This method offers you more control and it is the basic, standard method used in all painting.
The second method is called wet-on-wet. This is where you dip your brush into wet, activated watercolor paint and then apply it to a wet paper surface. You can also drip, splatter, or spray the paint onto the wet surface.
The wet paper surface holds the newly applied pigment and ‘moves’ it along the surface. We call this bleeding or blooming. The watercolor pigments create beautiful shapes or blooms. This process cannot be controlled by the artist and you have to let go and enjoy the results. This can be very exciting!
Can you paint watercolor on top of watercolor?
You can absolutely paint watercolor on top of watercolor! We can this layering washes. Essentially, you paint a wash of watercolor paint and then allow it to dry before painting another wash on top of it. You can keep doing this to build up depth of color and develop your shadow areas.

Grab the Free Printable Stencils for Watercolor Backgrounds HERE (below)!
Conclusion
Practicing painting watercolor backgrounds like the examples in this article will give you a good idea of what you can achieve with watercolor and help you to become better at watercolor painting. It also allows you to become better at problem-solving – being an artist and creating artwork is so much about finding creative solutions!
Before you go, I would LOVE to hear about any creative projects you are working on at the moment! Send me an email or comment below!
Other Articles You May Enjoy…
How to Paint Watercolor Palm Trees
How to Paint a Cherry Blossom Watercolor
Pen and Ink Watercolor Flowers
Best Watercolor Set For Beginners
Looking for things to draw on your hand? 50 Easy drawing ideas
🎬 Love video tutorials? Subscribe to my YouTube channel for weekly art tutorials and creative inspiration!
Frequently Asked Questions
What are watercolor backgrounds used for?
All sorts of lovely things — card-making, journal pages, mixed-media pieces, digital design elements, or simply as relaxing practice in your sketchbook. A soft wash background can also become the first layer of a bigger painting, giving your florals or lettering something beautiful to sit on.
Which watercolor techniques work best for backgrounds?
Flat and graded washes are the classic starting points, and wet-on-wet blending gives you those dreamy, soft colour transitions. From there you can play with the fun stuff covered in this post — salt sprinkled into damp paint for starburst texture, plastic wrap pressed into a wash, splattering, and lifting out clouds with a tissue.
What supplies do I need to paint watercolor backgrounds?
Nothing fancy to start: a student-grade watercolour set, cold press paper around 140lb/300gsm (so it won't buckle under the water), and a couple of round brushes — sizes 6 and 10 cover most jobs. A flat wash brush is a nice addition for smooth, even backgrounds on bigger pages.
How do I keep my background colours from turning muddy?
Work with a limited palette of two or three colours that sit near each other on the colour wheel, and let layers dry before adding more. Mixing too many pigments — or fiddling with a wash while it's half-dry — is what creates mud. If in doubt, stop sooner than feels natural; watercolour does its prettiest work while you leave it alone.
How do I download the free stencils for watercolor backgrounds?
Scroll to the free download section in this post and follow the sign-up prompt there — it unlocks the printable stencils so you can print them and get painting straight away.
thank you. I do hope to learn somehting that will look nice. Newbee
DEE! I love these so much Thank you!
Thank you for sharing. These are great:)