
Hey there, fellow Procreate aficionados! Get comfy and buckle up because we’re about to embark on an enlightening journey to Mastering the Art of Clipping Mask Procreate 101.
It’s as though we’re hopping onto the Hogwarts Express, except this time, the magic unfolds on your iPad. Whether you’re a seasoned artist just starting to explore Procreate or a digital art newbie still testing the waters, this blog post is perfect.
Just imagine this, with a few simple taps, your digital art starts to look like a masterpiece with textures, shades, and effects that seem out of this world. That’s the power of clipping masks in Procreate! But wait, it’s not just about mastering the steps; it’s about understanding the whys and hows behind each stroke.
So let’s ditch the jargon, roll up our sleeves, and dive headfirst into the world of clipping masks. Are you ready? Awesome, let’s go!
Understanding Clipping Masks in Procreate
What Is a Clipping Mask?
A clipping mask in Procreate is a layer that you place above the part of your artwork you want to modify. Anything you draw or insert on the clipping layer will be restricted to the layer directly beneath it.
This means you can add textures, patterns, or details to your artwork without directly affecting the original layer.
Clipping masks are a powerful tool that can help you work non-destructively in Procreate, ensuring that your base layers remain unaltered.

Benefits of Using Clipping Masks
Some of the benefits of using clipping masks in Procreate include:
- Non-destructive editing: Clipping masks enable you to change your artwork without altering the original layer. This is great for experimentation and adjustments without fear of destroying your initial work.
- Flexibility: Easily toggle the visibility or effects of the clipping mask layer, allowing you to quickly compare different versions of your artwork or switch between various effects.
- Layer organization: Keep your layers clean and well-organized by using clipping masks to isolate different effects, textures, or details in separate layers.
Clipping Masks vs. Layer Masks
While both clipping masks and layer masks in Procreate provide non-destructive editing capabilities, they serve different purposes, and understanding their differences will help you choose the best technique for your project:
- Clipping Masks: As mentioned, clipping masks constrain the changes you make on a layer to the shape of the layer directly beneath it. This method is excellent for adding textures, patterns, or details without affecting the base layer.
- Layer Masks: Layer masks allow you to hide or reveal parts of a layer without deleting or erasing any content. They use grayscale values to control the transparency of the layer — where black completely hides a part of the layer, and white fully reveals it. Layer masks are helpful when you want to blend layers or control the visibility of specific areas within your artwork.
Creating and Managing Clipping Masks
How to Create a Clipping Mask
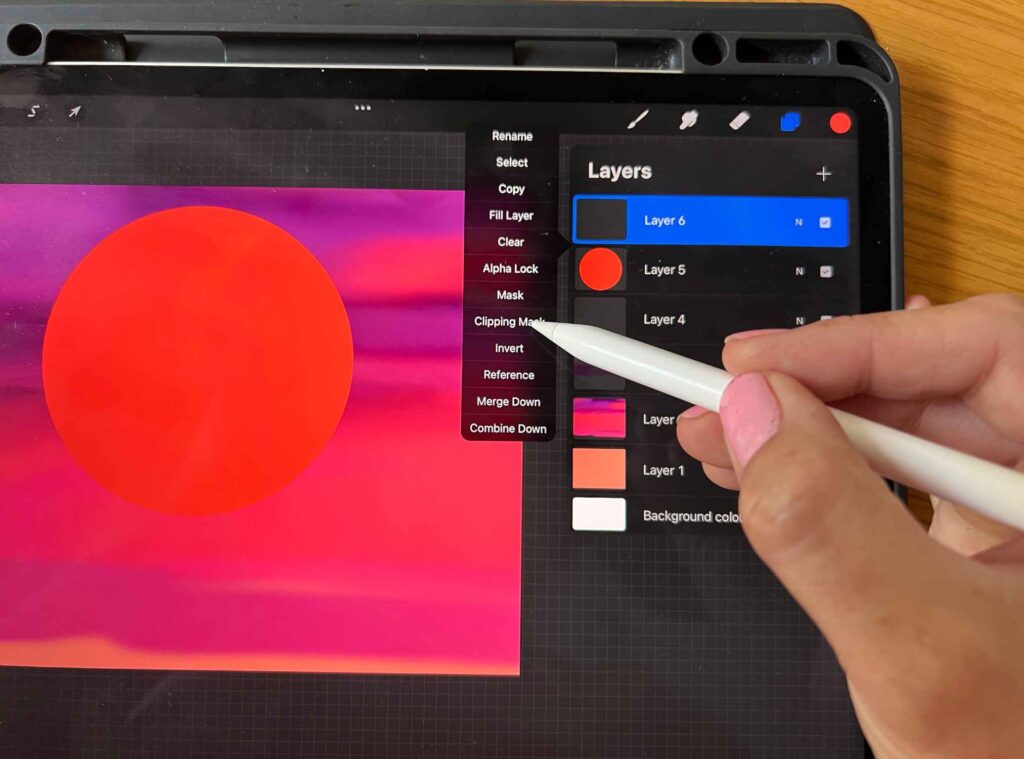
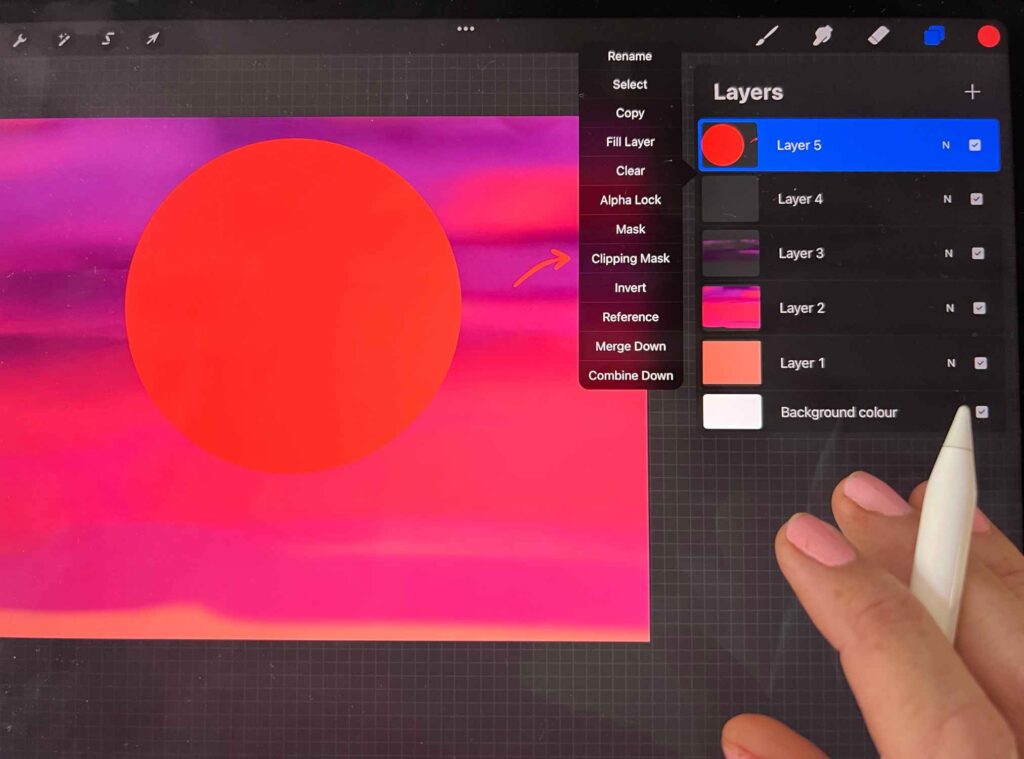
To create clipping mask in Procreate, begin by creating a new layer above the base layer that you want to edit. Tap the newly created layer and select “clipping mask” from the layer options menu. This will transform the layer into a clipping mask.
Now, you can add color, texture, or a design to the clipping mask layer, and it will be constrained to the layer just below it. This is a non-destructive way of editing your artwork, as it doesn’t affect the content of the base layer.
Modifying a Clipping Mask
If you want to modify a clipping mask, use your brush to paint on the mask layer. You can quickly reveal or hide parts of the mask by switching between painting with white (to reveal) and black (to hide).
Additionally, you can adjust the mask layer’s opacity to control the effect’s intensity. Remember that clipping masks allow you to edit your artwork without altering the original layers.
Reordering Layers and Masks
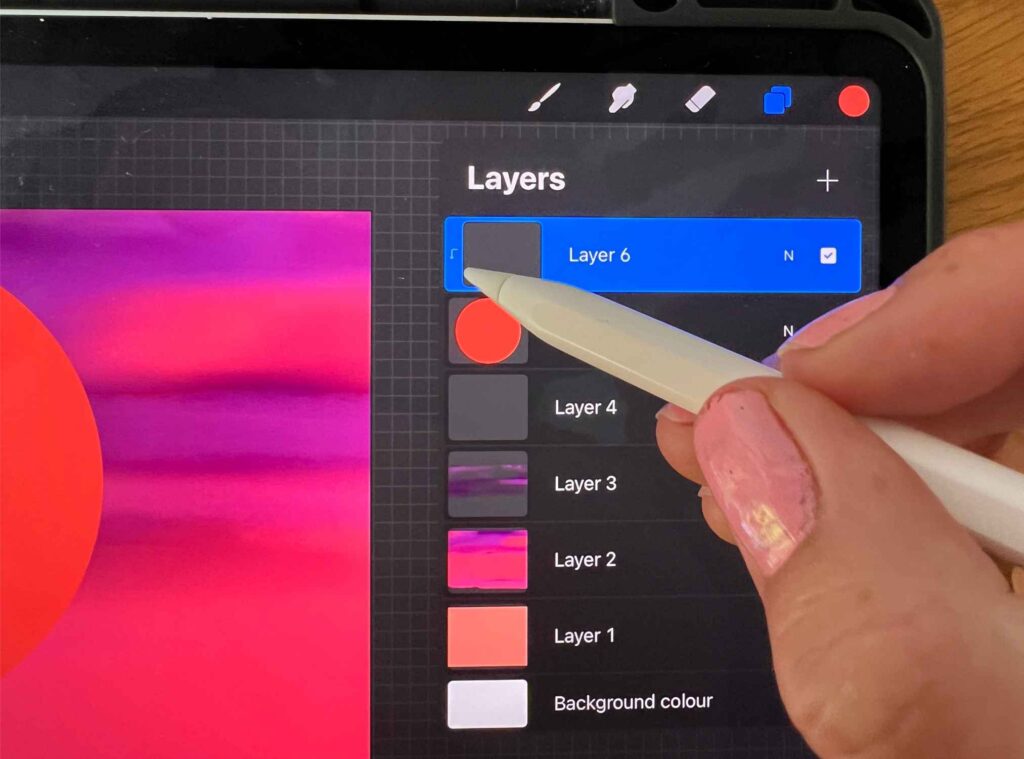
Managing the order of layers and masks is crucial for creating complex artwork in Procreate. To reorder layers and masks, tap and hold the desired layer in the layers panel, then drag it to the desired position.
It’s essential to keep in mind that the clipping mask will always affect the layer directly below it. Moving a clipping mask above or below other layers may not produce the intended effect. Proper management of your layer hierarchy will help you achieve the desired result in your artwork.
By using clipping masks, layer masks, and the appropriate brush settings, you can create intricate and visually appealing art pieces in Procreate.
Remember to experiment with different shapes, colors, and textures to develop your unique style while maintaining a non-destructive workflow. So, go ahead and explore the world of Procreate clipping masks, and bring your creative vision to life!
Advanced Clipping Mask Techniques
This section will explore a few advanced clipping mask techniques in Procreate to help you elevate your digital art.
Implementing Textures
Applying textures using clipping masks can add depth and interest to your artwork. To start, create a new layer above your base layer, and set it as a clipping mask. Import an image with exciting textures, or create your own. Drag and drop the image onto this new layer.
Adjust the layer opacity and blending mode to achieve the desired effect. Experiment by using different textures to see how they interact with your artwork.
Applying Alpha Lock
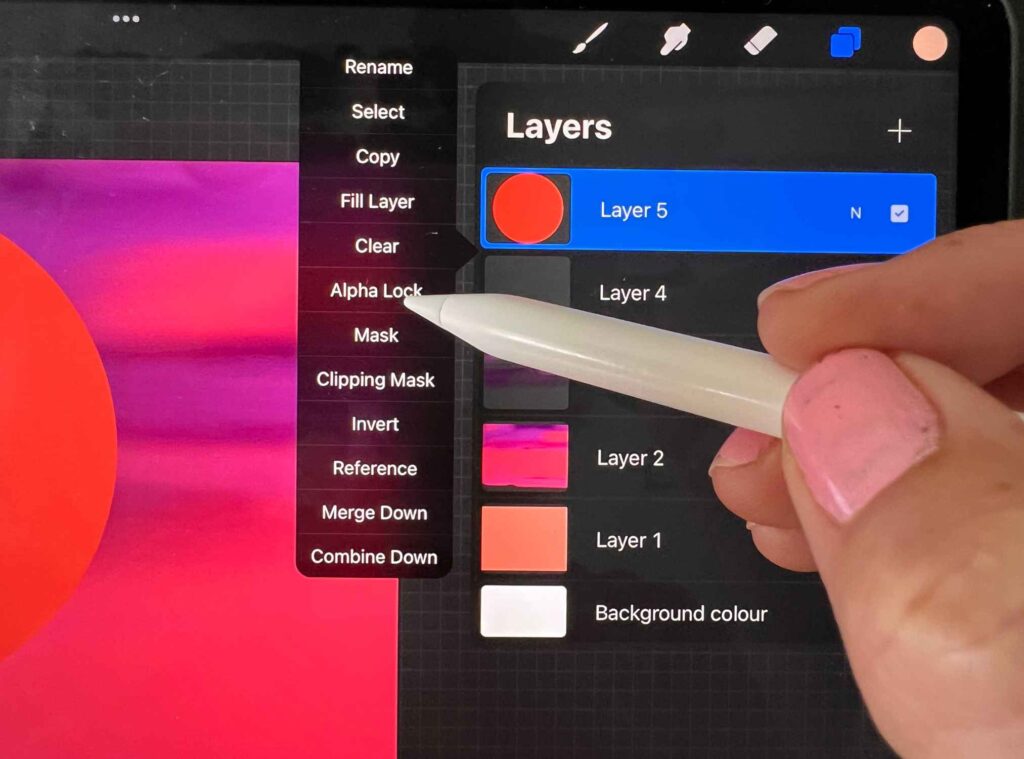
Alpha lock is a useful tool that allows you to edit a specific layer without affecting its transparency. To enable alpha lock, swipe right with two fingers on a layer, or tap the layer and select “Alpha Lock” from the layer options.
With alpha lock enabled, any painting, erasing, or effects you apply will only affect the existing opaque pixels on the layer while preserving their transparency.
This makes alpha lock perfect for adding textures, shading, and highlights to your artwork, without worrying about accidentally editing the wrong areas.
Here are some ways you can use alpha lock:
- Shading: Paint with darker colors over the locked layer to add depth.
- Highlights: Use lighter colors on the locked layer to create shiny or reflective surfaces.
- Color adjustments: Easily adjust the locked layer’s hue, saturation, or brightness by painting over it with the desired colors.
Combining Layer Modes
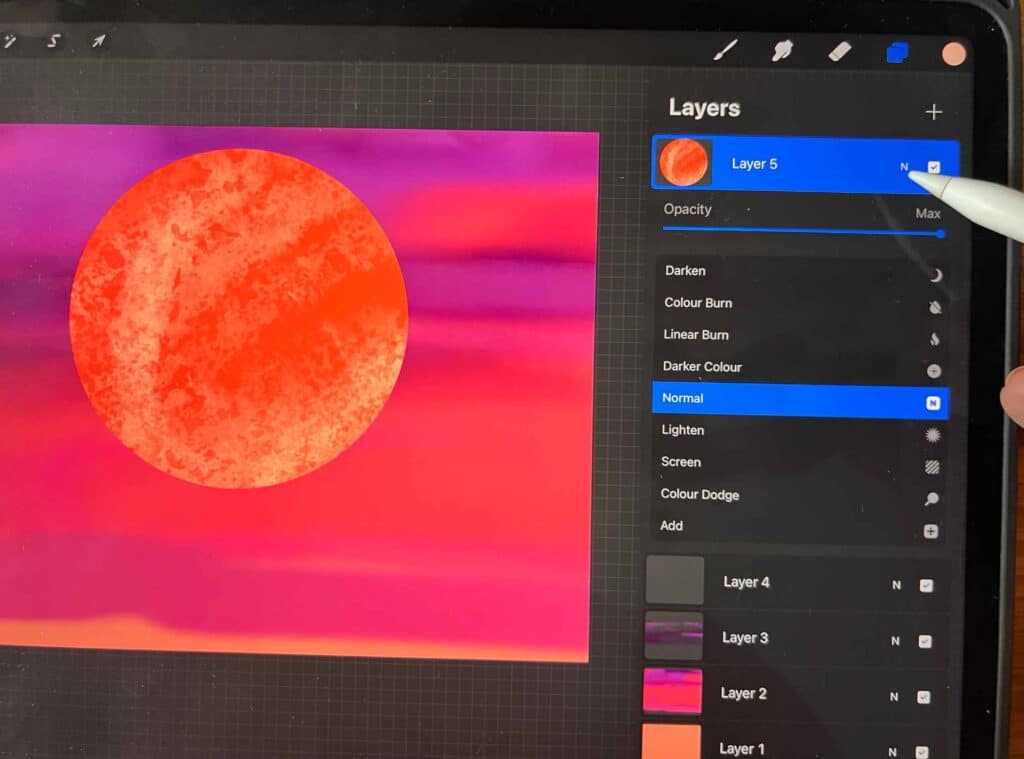
Combining layer modes with clipping masks can give you even more control over the look of your design. Layer modes affect how a layer interacts with the layers beneath it and can be accessed by tapping on the “N” icon in the layer panel. Here are some layer modes to try with clipping masks:
- Multiply: This mode darkens the base layer, making it useful for adding shadows or blending colors.
- Screen: This mode lightens the base layer, which helps add highlights, glows, or other light effects.
- Overlay: This mode combines the best of both Multiply and Screen, making it ideal for balancing shadows and highlights.
Experiment with different layer modes to achieve unique and interesting effects in your artwork. And remember, you can always undo any unwanted changes and try something new.
Incorporating these advanced clipping mask techniques will allow you to create more complex and professional-looking designs in Procreate while maintaining the flexibility to edit and improve your work.
Incorporating Art and Design Elements
In this section, you’ll learn how to effectively use clipping masks in Procreate to incorporate various art and design elements into your digital artwork.
We will explore techniques such as developing shadows and highlights, customizing brush settings, and adjusting blending modes and opacity.
Developing Shadows and Highlights
Clipping masks in Procreate are a game-changer when it comes to adding shadows and highlights to your digital art. To create dynamic shadows and highlights, start by choosing a layer you want to apply shadows or highlights to.
Add a new layer above it and turn it into a clipping mask by tapping it and selecting “clipping mask” from the layer options menu. This will ensure that your painting or coloring on the new layer will only affect the base layer beneath it.
Using the appropriate brushes and colors, paint your desired shadows and highlights onto the clipping mask layer. Remember, a black brush will help create shadows, while a white or lighter-colored brush will create highlights.
Customizing Brush Settings
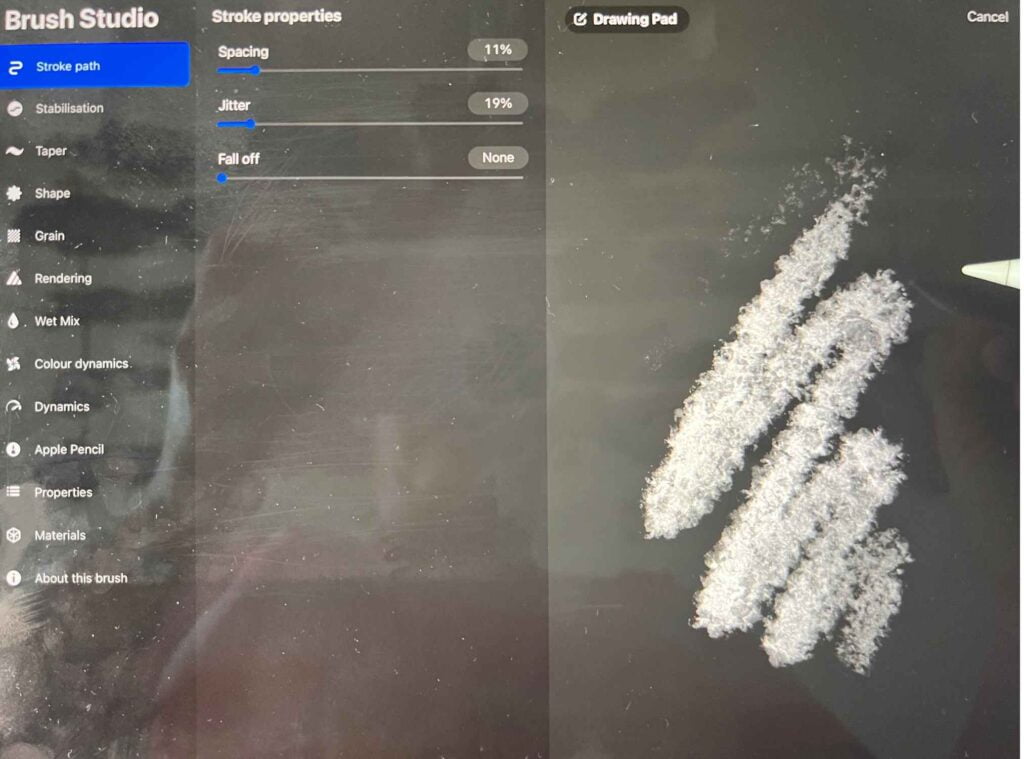
To achieve unique textures and effects in your artwork, customize your brushes in Procreate. Tap on your chosen brush in the brushes panel to access its settings.
Here, you can tweak attributes like opacity, size, and other brush properties to suit your style and the visual effect you’re aiming for. Customizing your brush settings before applying them to a clipping mask can help create visually appealing and organic shapes or textures.
Blending Modes and Opacity
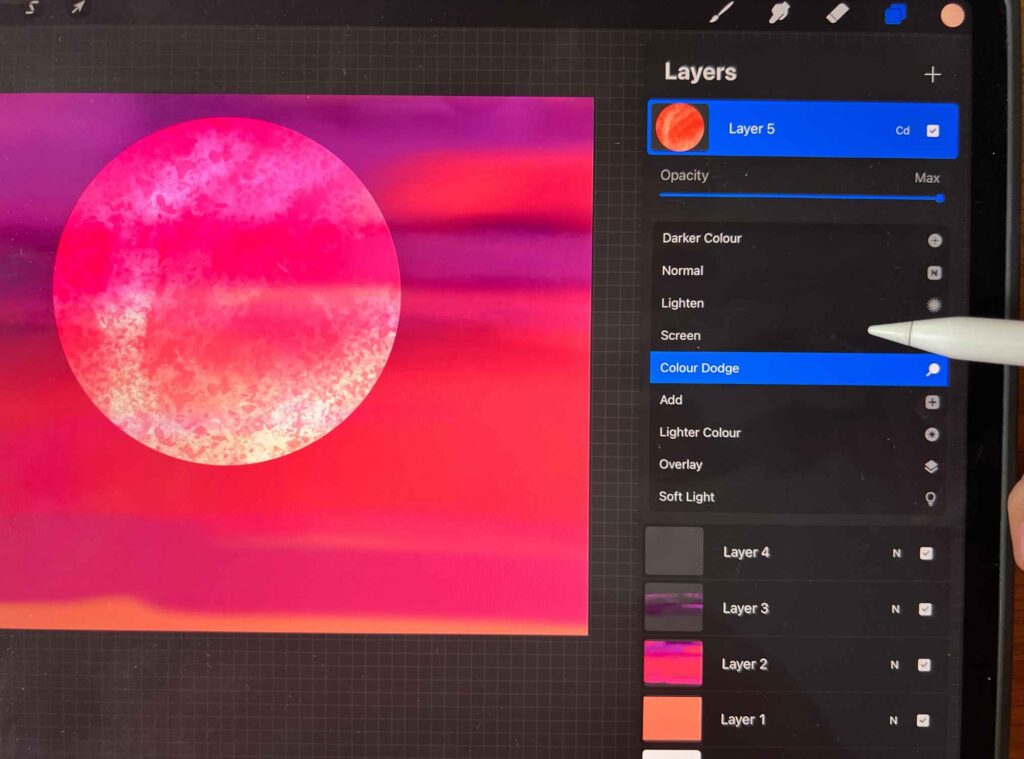
Another important aspect to consider when working with clipping masks is blending modes and opacity. Adjusting these settings allows you to create an array of effects and enhance your digital art’s overall appearance.
To modify the blending mode of a clipping mask layer, tap on the “N” symbol beside the checkered background in the layers panel. This will display a list of blending modes such as Multiply, Overlay, and Screen.
Experiment with different blending modes to see how they affect your artwork’s overall look and feel.
You can also adjust the opacity of the clipping mask layer by sliding the opacity bar in the layers panel. This can help achieve a subtle or more transparent effect when you blend colors and textures with the base layer.
Optimizing Workflow and Flexibility
Organizing Layers and Layer Groups
Organizing your layers is crucial for a smooth workflow in Procreate. With the use of clipping masks, you can maintain the flexibility of your designs while keeping layers organized.
Clipping masks allow you to add edits such as shadows, highlights, or textures to a single layer without affecting your original artwork. This technique keeps your layer count manageable, making it easier to navigate your project.
To create a clipping mask in Procreate, make a new layer directly above the layer you want to edit. Then, tap that layer in the layers panel and click “Clipping Mask”.
Benefits of Non-Destructive Editing
Non-destructive editing is a huge advantage, as it allows you to modify your artwork without compromising your original layer.
This means you can experiment with different effects without changing your base design permanently. Clipping masks provide this flexibility, permitting you to hide or adjust the visibility of the edits made on the mask without affecting the original artwork.
Some benefits of non-destructive editing include:
- Easily undo any changes
- Reveal hidden portions of your artwork
- Experiment without worrying about permanently altering your original layers
Using the Transform Tool
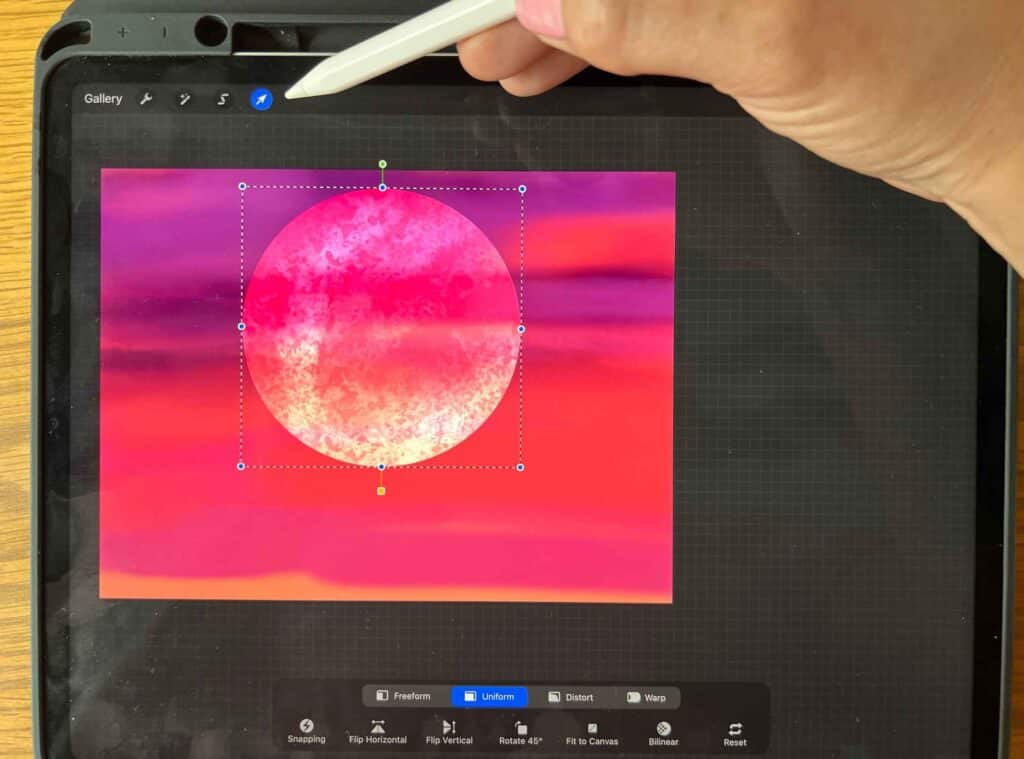
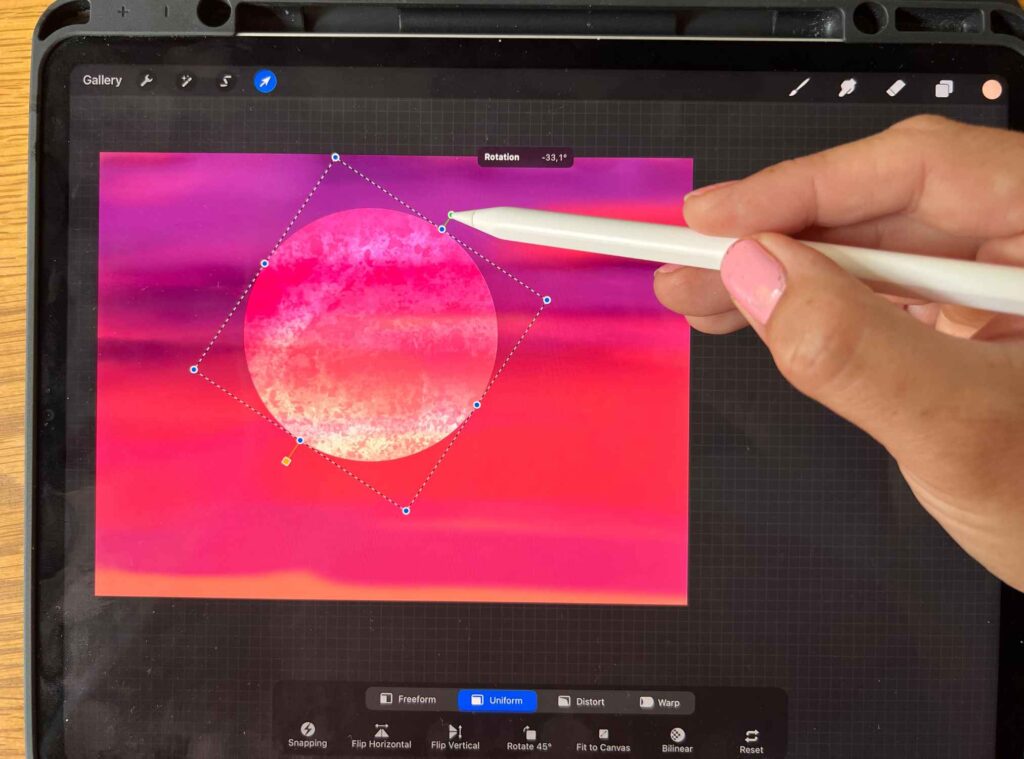
Once you’ve added your edits with the clipping mask, you might want to adjust them further. The Transform tool allows you to scale, rotate, and move your clipped layers to obtain the desired effect. This provides even more control over your composition and helps you to fine-tune your artwork.
Select the layer with the clipping mask to use the Transform tool, then tap the Transform icon in the toolbar. From there, you can modify your clipped edits as needed.
Customization and Expansion
Installing New Brushes and Textures
Procreate offers a wide range of brushes and textures to enhance your art. To install new brushes, follow these steps:
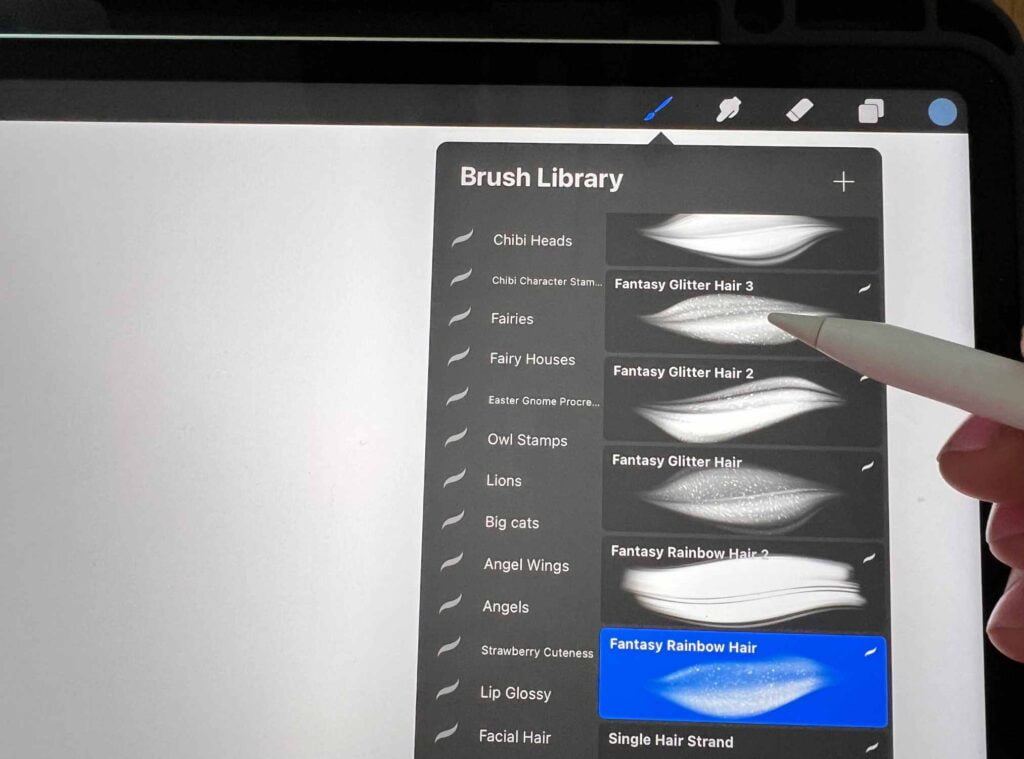
- Open the Procreate app, and go to the Brush Library.
- Tap the “+” button to create a new brush.
- Import the brush file you’ve downloaded by tapping on “Import” in the brush settings panel.
You can also find many other brushes and textures available online. Join various Procreate communities and stay updated with the latest brushes created by fellow artists.
Enhancing Dimensionality of Art
Clipping masks in Procreate can help expand your artistic expression by enabling you to work on multiple layers, maintain transparency, and improve shading. Here are a few tips for enhancing the dimensionality of your art using clipping masks:
- Experiment with different blend modes, such as Multiply and Overlay, to build depth and shadows in your art.
- Using a white brush is helpful when you want to create highlights and bring focus to specific areas in your painting.
- Try using a black and white, or grayscale, color scheme when creating shadows to help establish tonal values and create contrast.
- Use a fill layer to add texture or pattern, and set it to a clipping mask to limit the effect to specific areas.
Exploring Procreate Community Resources
Connecting with other Procreate artists allows you to gather inspiration, learn new techniques, and get feedback. Here are some ways to explore Procreate community resources:
- Participate in Procreate forums to ask questions and share your knowledge.
- Follow Procreate artists on social media platforms like Instagram and Pinterest to stay updated with their work.
- Watch YouTube tutorials by experienced Procreate artists, who often share valuable tips and tricks.
Remember, being part of the Procreate community will not only help you master clipping masks but also inspire you to develop your overall artistic skills.

Frequently Asked Questions
How do I use a clipping mask in Procreate?
To use a clipping mask in Procreate, create a new layer above the one you want to clip. Then, tap on the new layer to open the layer options and select “Clipping Mask.” Now you can draw on the new layer, and your artwork will only show up within the boundaries of the underlying layer.
What is the purpose of a clipping mask?
A clipping mask in Procreate helps you work non-destructively, meaning you can create and edit artwork without affecting the original underlying layers.
It allows you to apply colors, textures, or effects to a specific image area without worrying about erasing or masking anything manually.
What distinguishes clipping masks in Procreate?
Clipping masks in Procreate are unique because they’re easy to use and offer a non-destructive way to work with your art.
Procreate’s interface makes creating and adjusting clipping masks simple, allowing artists to work quickly and efficiently without relying on more complex methods.
What is the difference between alpha lock and clipping mask?
Alpha lock and clipping mask serve similar purposes: they both constrain your art to the boundaries of an existing layer.
The main difference is that alpha lock restricts your painting to the specific pixels of the locked layer, while a clipping mask applies your artwork to a separate layer, offering more freedom and flexibility.
How can I fix a non-working clipping mask?
If your clipping mask isn’t working, there could be a few reasons:
- Check to make sure your layers are in the correct order. Your clipping mask should be above the layer it’s clipping to.
- Verify that the layer options turn the “Clipping Mask” option on.
- Double-check your underlying layer for any invisible or transparent content that may be affecting the mask.
Are there any shortcuts for using clipping masks in Procreate?
Unfortunately, there aren’t any specific shortcuts to create clipping masks in Procreate. However, the process itself is pretty simple and fast.
By tapping on the layer options and selecting “Clipping Mask,” you can quickly apply a clipping mask to your art and get on with your creative process.
Other articles you may enjoy…
What is the Right Digital Art Canvas Size? Important things to Consider to Make the Best Choice.
Gloves for Drawing on Ipad | 9 Best Options
19 Essential Tools for Digital Artists
The best iPad screen protectors for drawing
How to Select Multiple Layers in Procreate
How to Copy and Paste in Procreate (6 Easy Ways to Duplicate in Procreate)