Last Updated on August 21, 2024 by Dee
Ever seen those awesome digital drawings on social media and thought, “How did they do that?” The secret might be Procreate!
This app has become a go-to for both beginners and seasoned artists. If you’ve been wanting to dive into digital art or are specifically wondering how to use Procreate, this blog is tailor-made for you and covers all the basics to get you started!
Download our free Procreate Collage Elements to get started on your next digital artwork at the end of the post! Watch this tutorial to follow along if you want to get started with the basics of Procreate.
Understanding Procreate
Procreate is a powerful and user-friendly painting app specifically designed for the iPad.
It offers a seamless experience for artists who want the flexibility of digital art combined with the feel of traditional drawing methods.
You can find Procreate in the App Store and begin exploring your creativity.
As you start using Procreate, you’ll notice it has an intuitive interface, making it easy for beginners to jump right in.
The app works in harmony with the iPad Pro and Apple Pencil, ensuring a responsive and accurate experience while drawing. Your virtual studio is always within reach, as Procreate is a mobile app that can go wherever you go.
Some key features of Procreate include a wide range of brushes, custom canvases, layer management, and more.
The app even offers a handy handbook that you can access as a mobile guide to help you familiarize yourself with Procreate’s essential tools and functions.
To make the most of your Procreate experience, here are a few tips:
- Experiment with brushes: The Procreate iPad App offers a vast array of brush presets, each with its unique characteristics. Test out different Procreate brushes by tapping the brush icon.
- Use layers efficiently: Procreate allows you to work with multiple layers, ensuring a non-destructive workflow and easier editing of your artwork. Remember to name and group your layers for better organization.
- Customize your workspace: You can personalize your workspace by rearranging the interface to fit your preferences. This way, your favorite tools are always within easy reach.
**This page may contain affiliate links to products I have used or recommend. If you purchase something from this page, I may receive a small percentage of the sale at no extra cost to you.**
Setting Up Procreate
Setting up Procreate is easy and will have you creating digital art in no time!
First, you’ll need an iPad or iPad Pro to run the app since Procreate is currently only available for these devices. Your iPad should be compatible with Procreate’s supported devices list.
Once you have your iPad, head to the App Store to find Procreate. You can purchase and download Procreate for $9.99.
After the app has downloaded and installed on your iPad, we recommend grabbing a stylus, like the Apple Pencil, and a matte screen protector like the Paperlike Screen Protectors to elevate your drawing experience.
When opening Procreate for the first time, you’ll see a gallery view where you can start creating new projects.
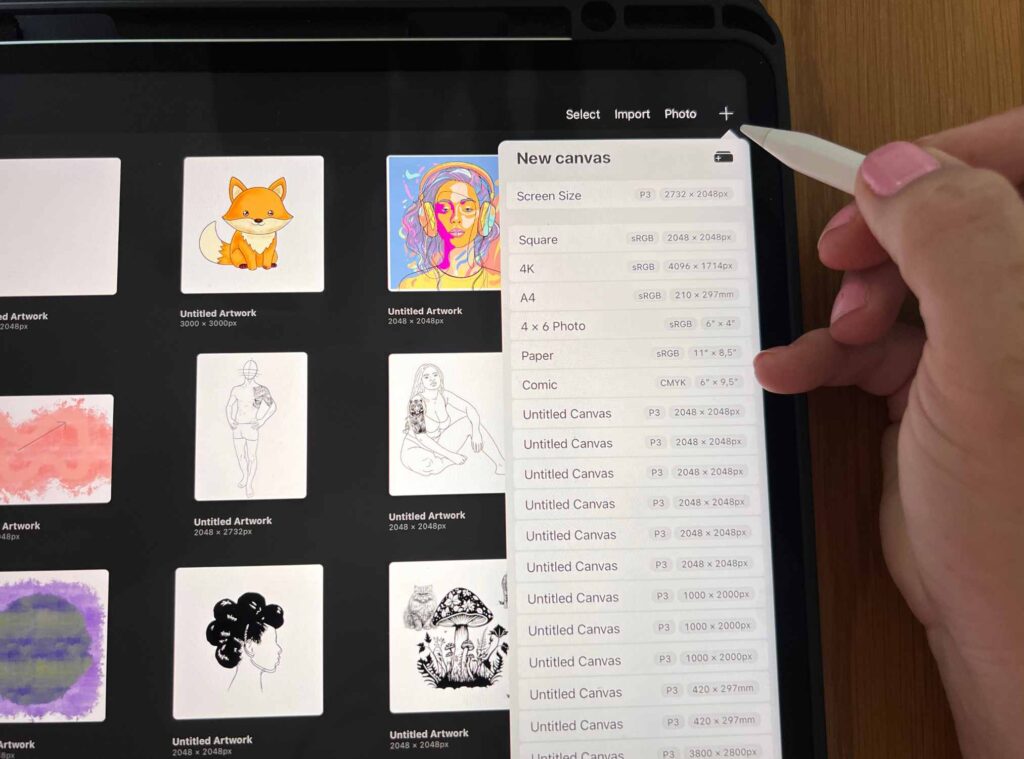
Tap the plus icon in the top-right corner to create a new canvas.
You’ll be presented with default canvas sizes to choose from, but feel free to create a custom size tailored to your project’s needs.
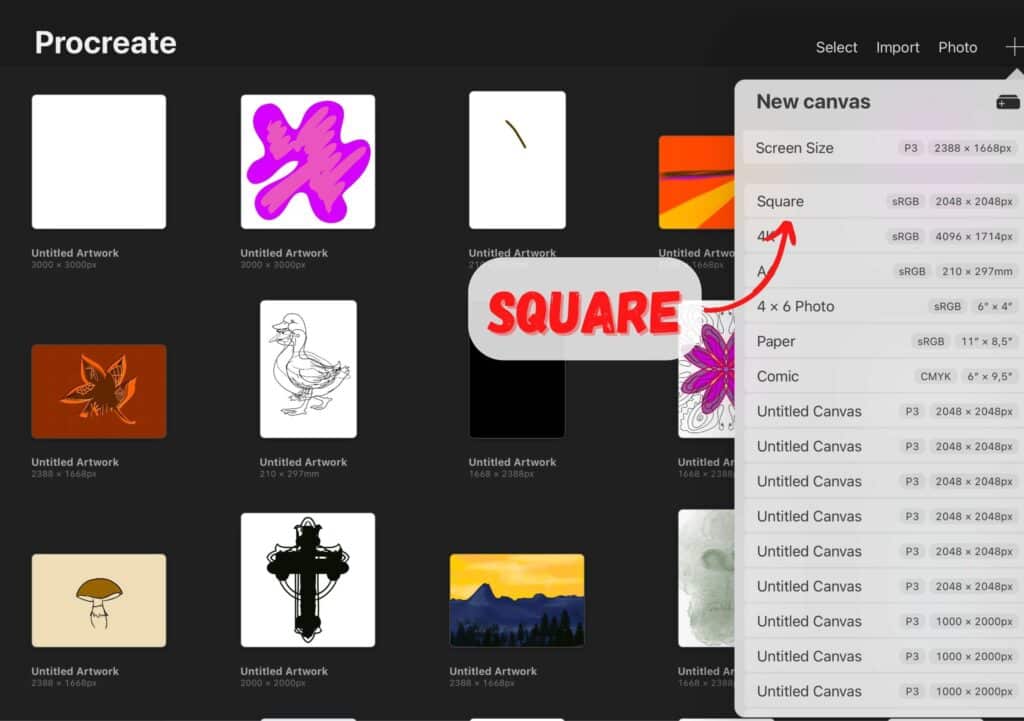
Now that you have your canvas set up, explore the various brushes, colors, and layers available to you. Procreate offers a vast selection of brushes, and they are all customizable.
If you’re not sure where to start, experiment with the included brushes to find your favorites.
Additionally, Procreate allows you to create and organize layers, giving you unparalleled control over your artwork.
To make your Procreate experience even more enjoyable, don’t forget to customize the app’s settings to your liking.
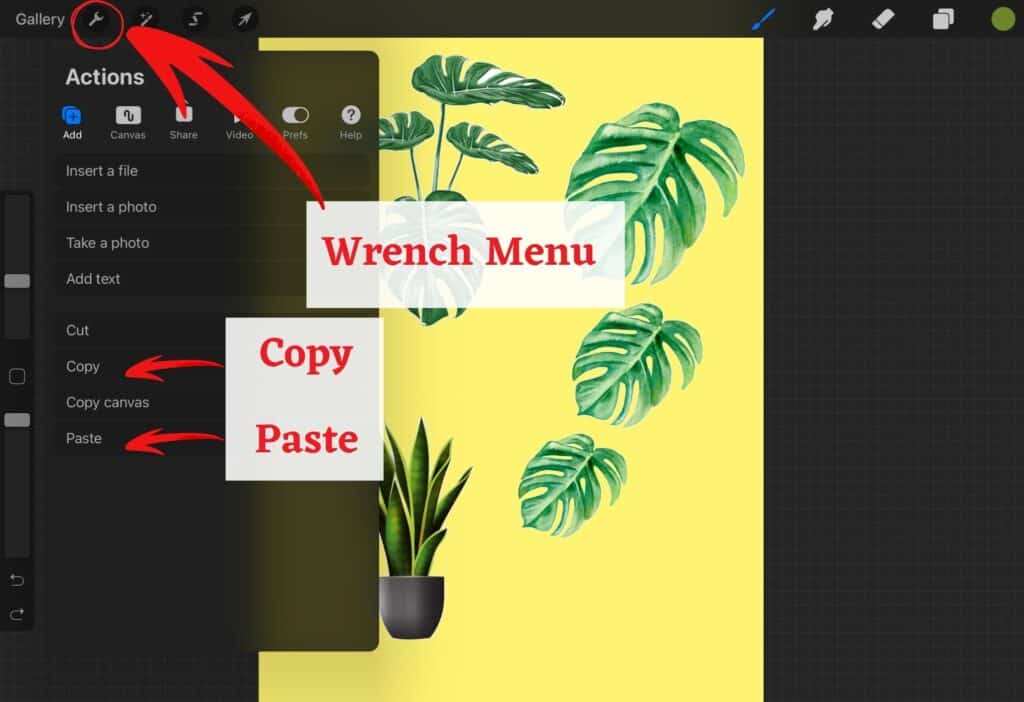
Access the preferences by tapping the wrench icon in the top-left corner.
Getting Started with Procreate
When you first open Procreate, you’ll see the Gallery, which showcases all your previous artwork and projects.
To start a new piece, tap the plus (+) icon in the top-right corner of the screen.
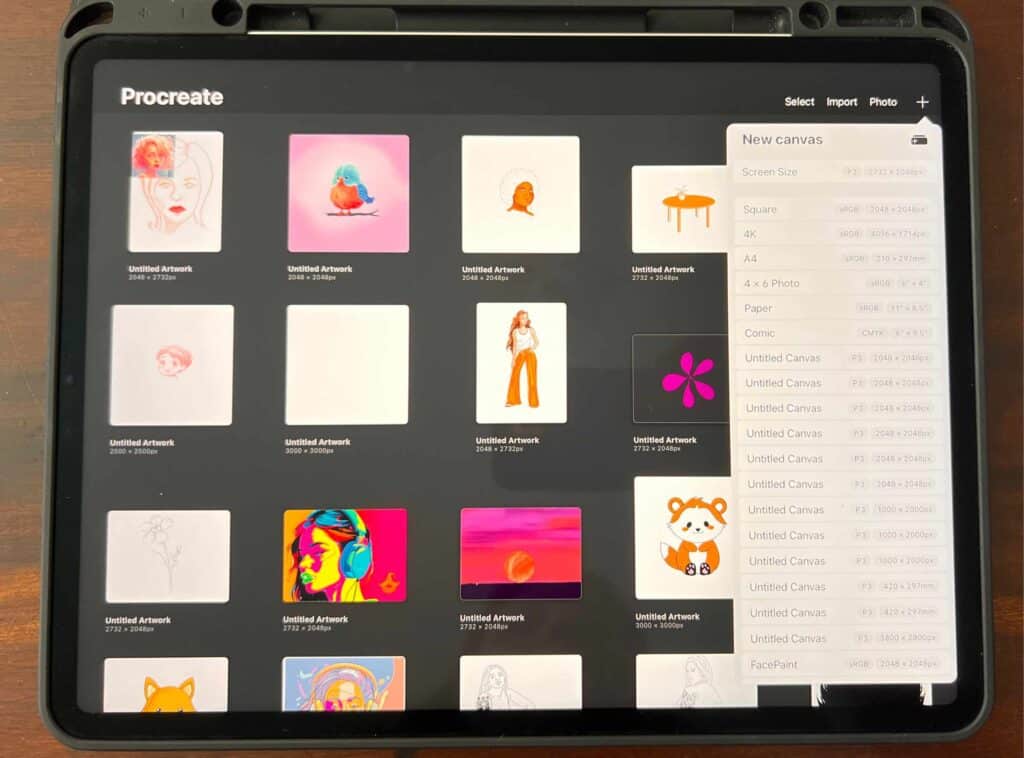
This allows you to create a new canvas on which you’ll create your digital masterpiece.
Selecting the right digital art canvas size is crucial. Procreate allows you to choose from several preset sizes or create a custom option.
Think about the dimensions and resolution you will need for your project. Beginners might find it helpful to start with a smaller canvas to get a feel for the app before diving into more ambitious projects.
There are countless procreate tutorials available online to help you learn and master various painting techniques and tools.
Exploring the Tools
When using Procreate, you’ll encounter a variety of tools that will help you create your digital artwork.
Let’s briefly go through some of the basic tools…
Brush: To start, you’ll want to familiarize yourself with the brush tool. With a multitude of customizable brushes, you can easily change the stroke, size, and opacity to suit your artistic needs.
Don’t be afraid to experiment with different brushes as you develop your style.
Eraser: The eraser tool is pretty straightforward. Just like with traditional art, the eraser in Procreate will help you remove any unwanted strokes or marks.
You can even customize the eraser settings by choosing different brushes and opacities for unique effects.
Eyedropper Tool: With the eyedropper tool, you can effortlessly pick a color from the canvas when creating art. Simply touch and hold on the color you want to sample, then watch as your brush dynamically updates to match the selected color.
Select and Transform: Making selections will become a vital part of your workflow. The select tool allows you to isolate certain areas of your canvas, while the transform tool lets you move, scale or rotate your selection.
These tools are perfect for making precise edits or repositioning elements without disturbing the rest of your artwork.
Layers: One of the most convenient features of digital art is working with layers. Procreate allows you to stack layers of artwork to create depth and dynamic compositions.
Layers can be rearranged, hidden, locked, or even adjusted by applying alpha locks and clipping masks.
Straight Line and QuickShape: To draw a perfectly straight line, simply press and hold at the end of a stroke.
The QuickShape feature will help you create smooth geometric shapes like circles, squares, or triangles with ease.
Just draw a rough shape, then hold your finger or stylus on the screen for a moment, and Procreate will magically refine the shape.
Working With Layers and Selections
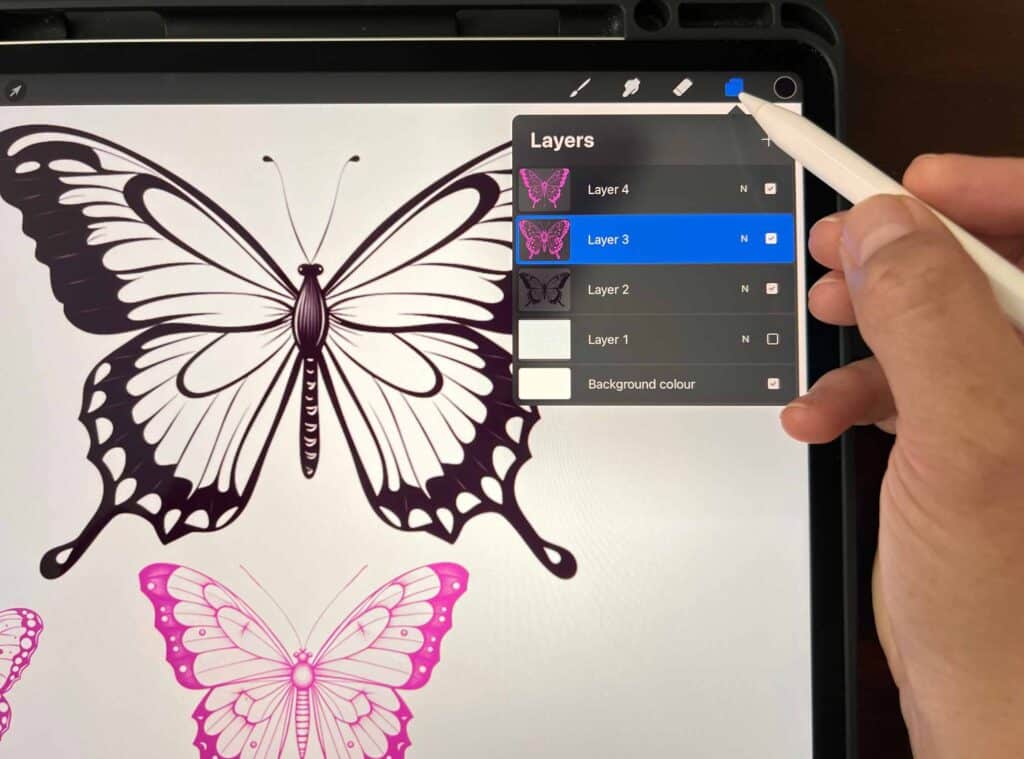
Layers in Procreate allow you to separate different elements of your artwork, making it easier to edit and organize.
To create a new layer, tap the Layers menu, which is represented by two squares on top of each other in the top-right corner of your screen. A ‘+’ sign will appear; tap it to create a new layer.
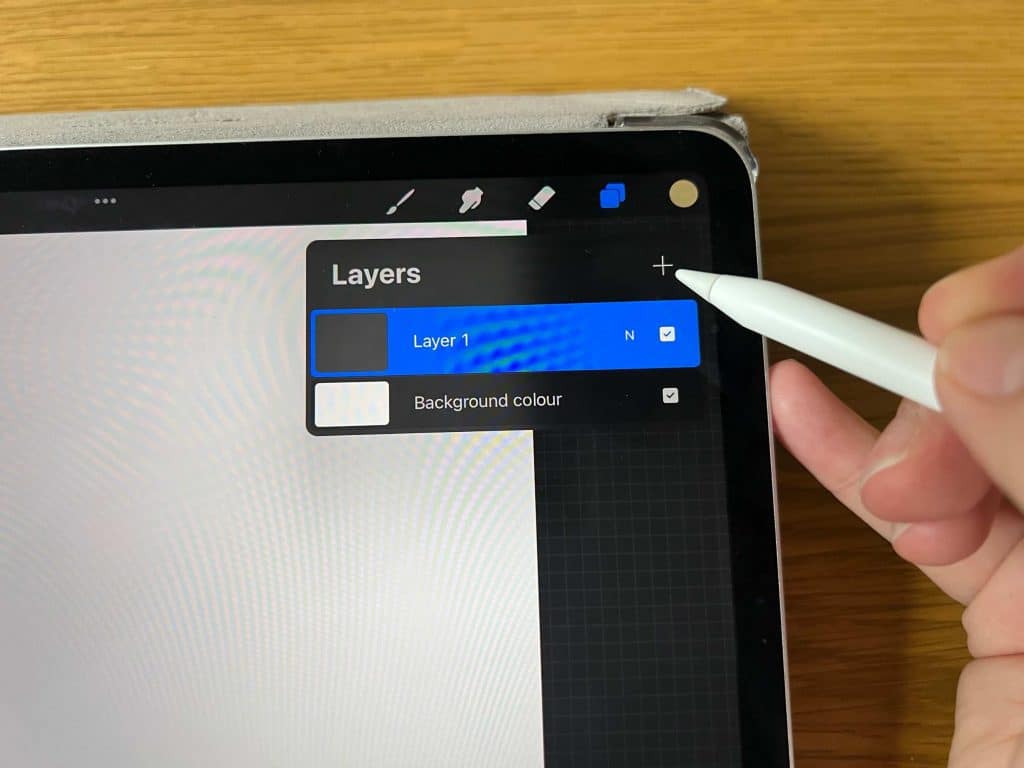
When working with layers, you can select multiple layers to cut, copy, or paste content. This is especially useful when you need to reposition or duplicate elements in your artwork.
Tap and swipe right on your desired layers to select them, then tap the selection tools (arrows icon) and move, resize, or rotate your layers as needed.
Alpha lock is another essential feature that helps you draw within the boundaries of a layer’s existing content, making it easier to add shadows, highlights or patterns.
To enable alpha lock, swipe left on your desired layer and tap the checkerboard icon that appears.
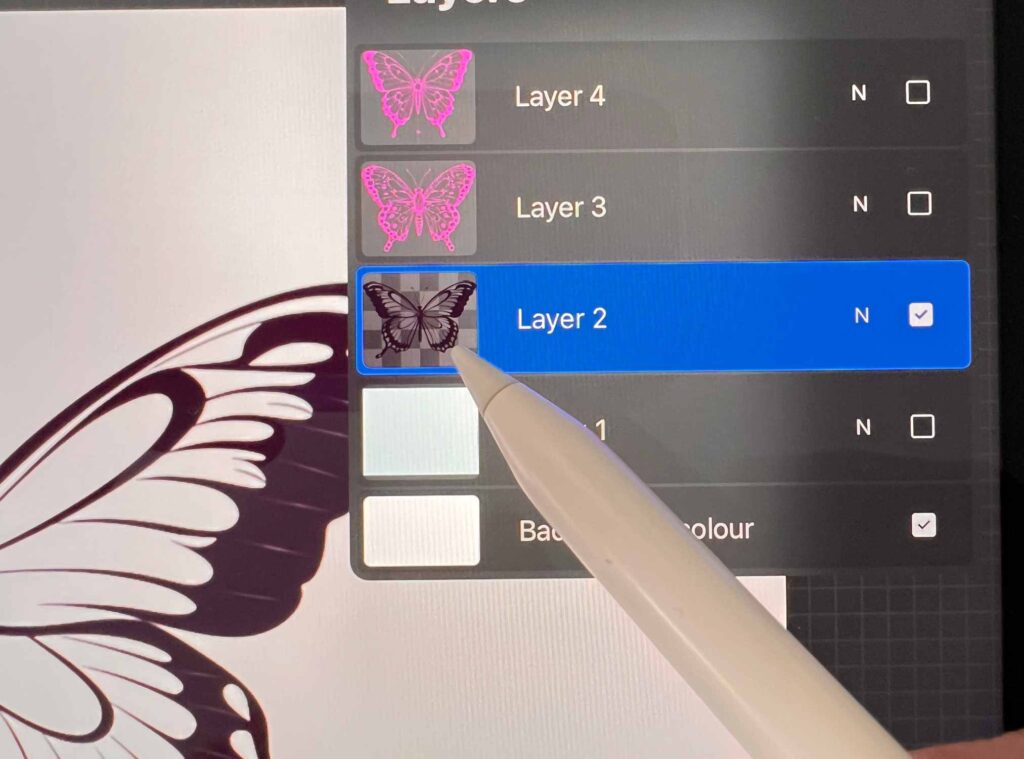
A Clipping mask are another great feature in Procreate that can help you create complex effects by masking a layer to the content of the layer beneath.
To create a clipping mask, drag the layer you want masked onto the layer you want it clipped to, then release.
The top layer will be masked, allowing you to experiment with different blend modes and opacity settings.
Layer Select is a handy tool that enables you to quickly select a layer with a simple gesture.
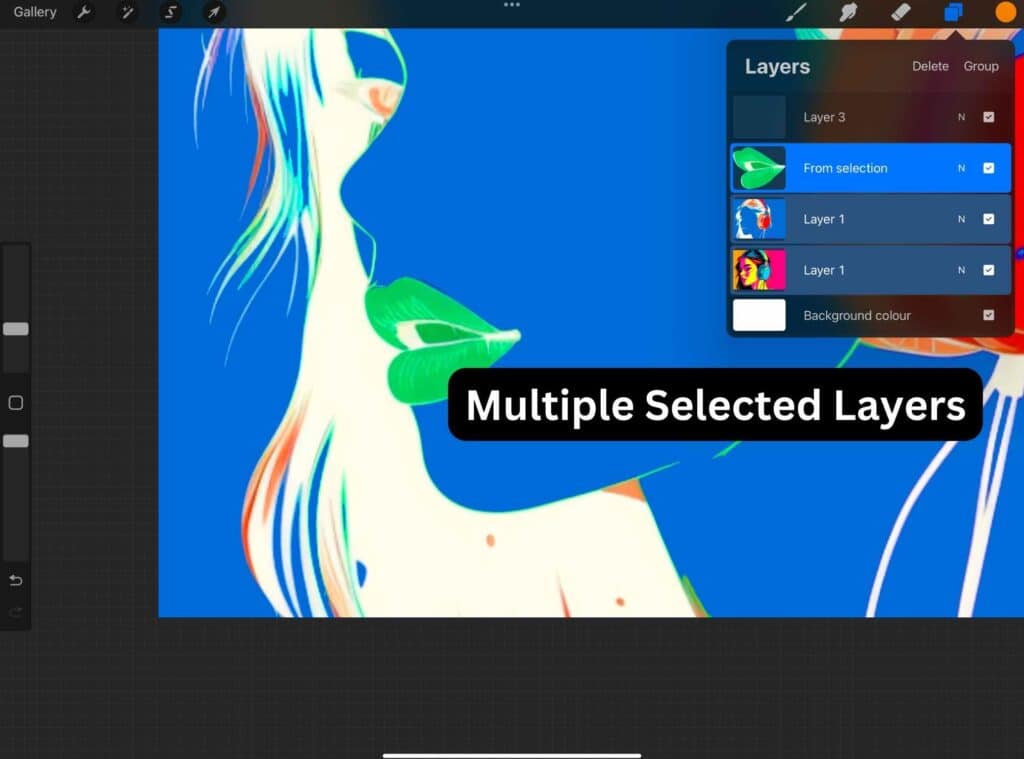
To assign Layer Select to a gesture, head to Actions > Prefs > Gesture Controls > Layer Select.
Once set up, you’ll find that selecting layers becomes much faster and more efficient.
Mastering the Brush Library
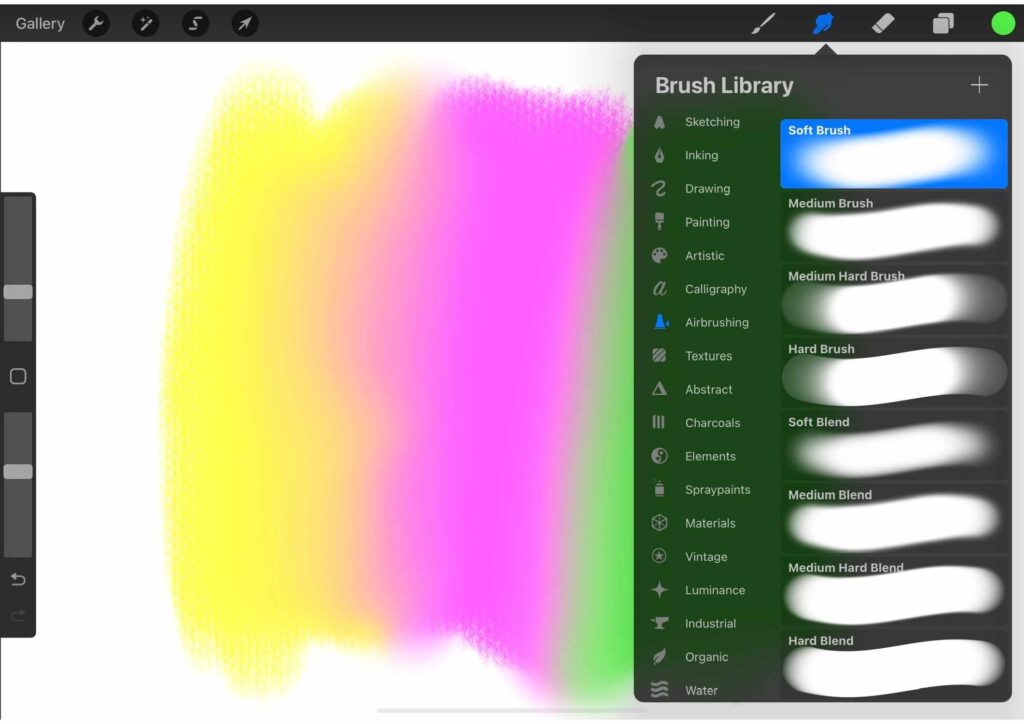
While Procreate comes with a vast array of pre-made brushes, you can further customize and expand your library by importing brushes from other artists or creating your own.
To select a brush, simply tap on it in the library.
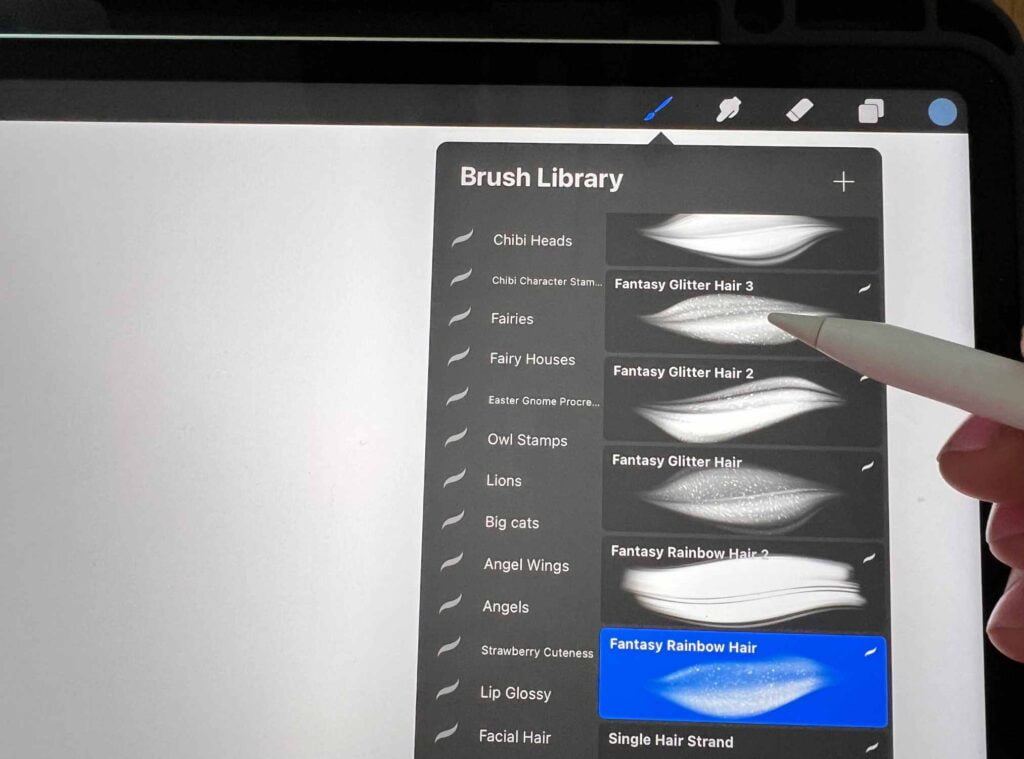
You can adjust its size and opacity using the sliders on the left side of the screen.
Creating and Using Palettes
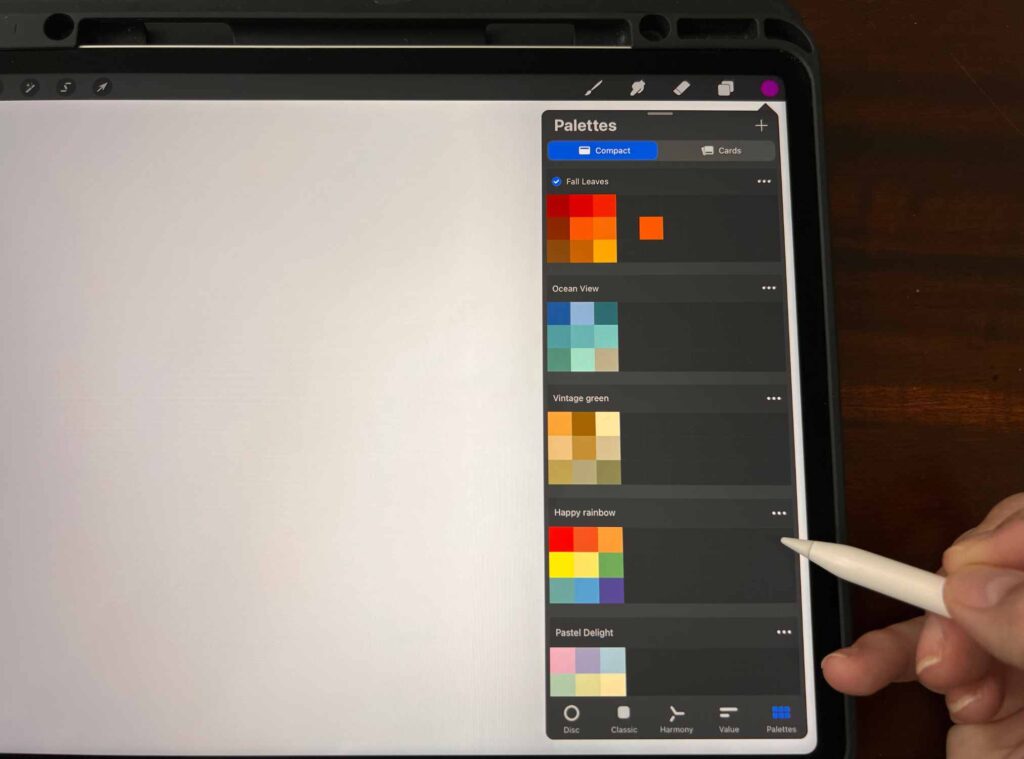
Creating your own palettes is quite simple. You can either import pre-existing color swatches or create custom palettes by manually selecting each color.
To import a swatch, simply download it and open it in Procreate. This will automatically convert the swatch into a color palette for you.
If you prefer to create a palette manually, start by opening an image in Procreate or adding an image to an existing canvas.
Use the eyedropper tool to select each color you want in your palette.
Once you have chosen a color, tap on an empty slot in your palettes library to add it. Repeat this process until your palette is complete.
Palettes can be a great way to explore different color schemes and harmonious combinations.
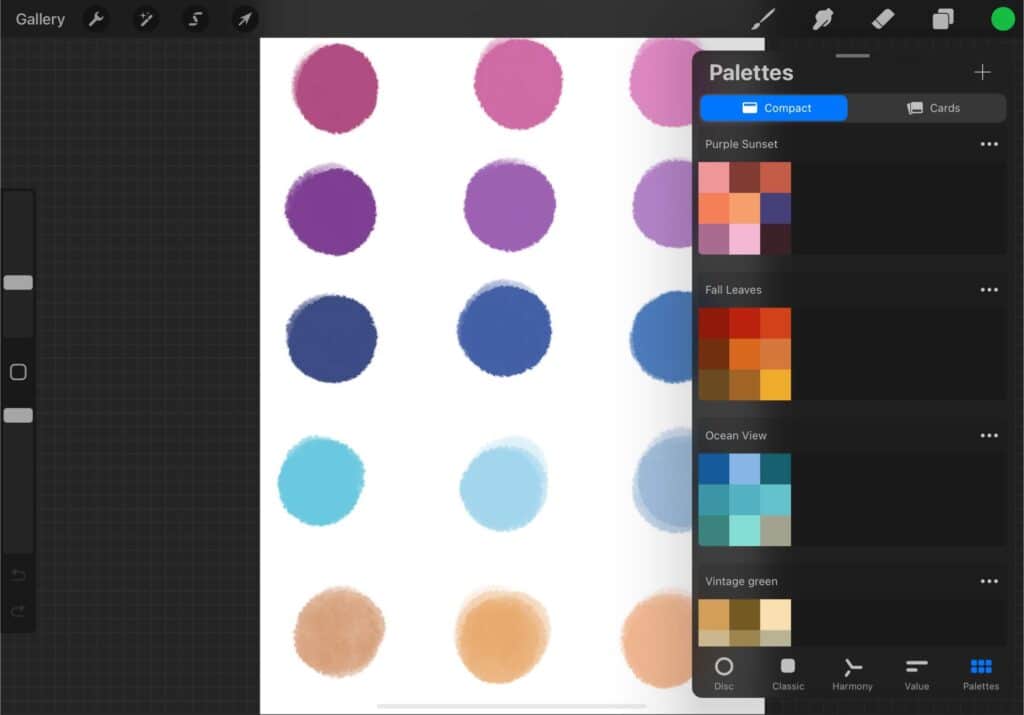
While working on your artwork, you can switch between your custom palettes and Procreate’s default palettes by tapping on the palette tab and expanding the library.
You can also rearrange the colors within a palette by tapping, holding, and dragging them to your desired position.
Sharing your palettes with others is easy as well. All you need to do is export them as a .palette file. To do this, tap on the “share” icon within the palettes tab, and choose your preferred method of sharing the file.
Import and Export Features
You can easily import a photograph into Procreate by tapping on the plus icon in the gallery, then choose “Import Photos.”
This will open your device’s photo library, allowing you to select a photograph to work with. Once imported, you can edit, paint, and sketch on your photograph as you would with any other canvas.
Fonts for Procreate are essential for creating eye-catching designs and illustrations. To import fonts, tap on the “Actions” button and select “Add Text.”
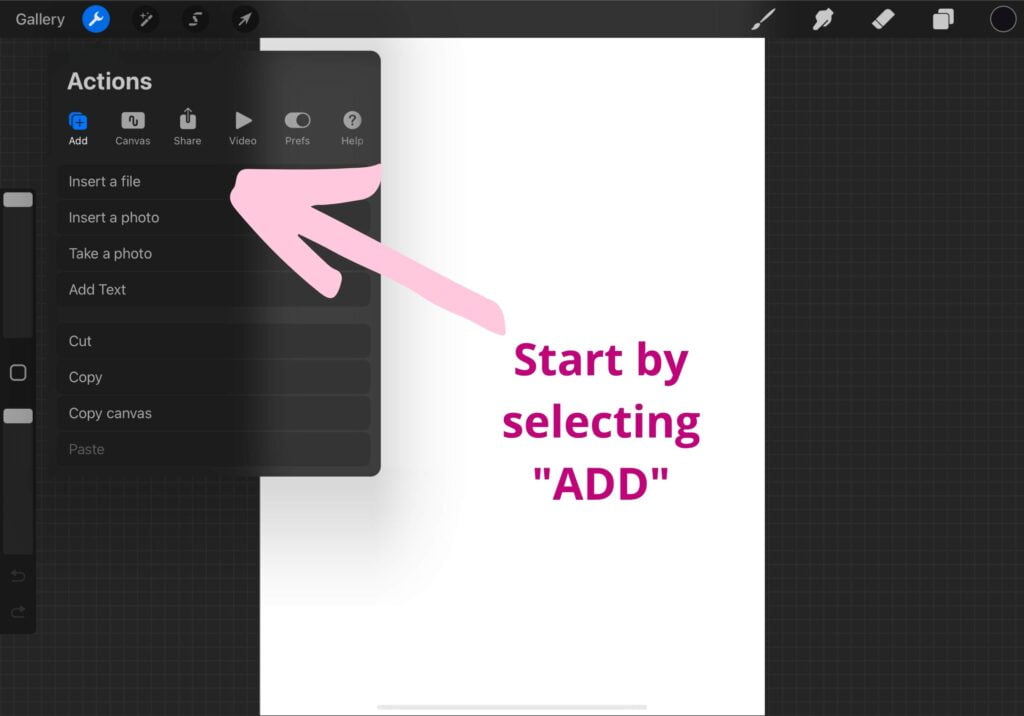
Then, tap on the font name at the top of the screen to access the font picker. Choose the “Import Font” option, and the Files app will open, letting you navigate to your desired font files, such as .otf or .ttf formats.
Simply tap on the font file to import it and make it available for use in your projects.
When you’re satisfied with your work, it’s important to know how to export it for sharing or further editing.
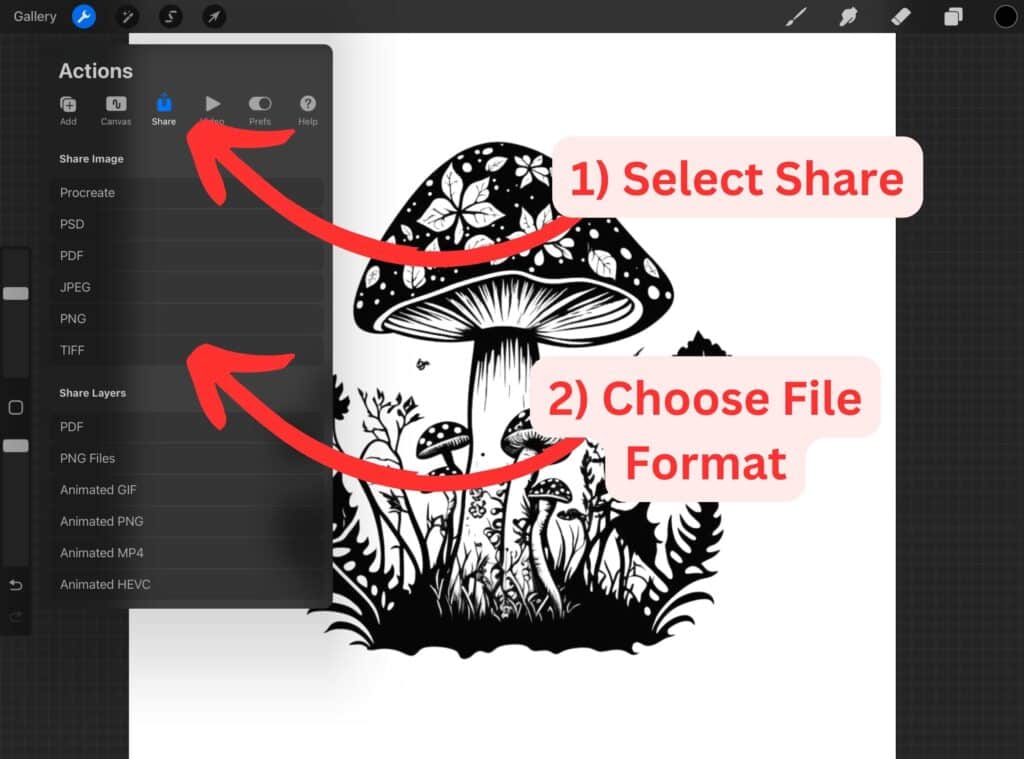
To export a Procreate file, tap on the “Actions” button and choose the relevant option under “Share.”
You can export your artwork in various file formats, including JPEG, PNG, and TIFF for images, or PSD for compatibility with Adobe Photoshop, among others.
Utilizing Drawing Guides
Procreate is an amazing application that offers various features to help you create perfect drawings. One such feature is the Drawing Guides.
To start using the Drawing Guides, you will need to activate them in the Canvas section of the Actions menu (located as a wrench icon at the top left of the screen).
Simply toggle the Drawing Guide option on and tap on the Edit Drawing Guide button to access and customize the guide you want to use.
Procreate offers four types of drawing guides to choose from: 2D Grid, Isometric, Perspective, and Symmetry.
Each guide has its own unique application:
- 2D Grid: Ideal for creating two-dimensional shapes and maintaining proportion in your artwork.
- Isometric: Great for isometric drawings and designs with a 3D effect.
- Perspective: Allows you to set a vanishing point(s) to create realistic scenes and objects with accurate depth.
- Symmetry: Perfect for creating symmetrical designs, such as patterns, logos, or characters.
Hand Lettering in Procreate
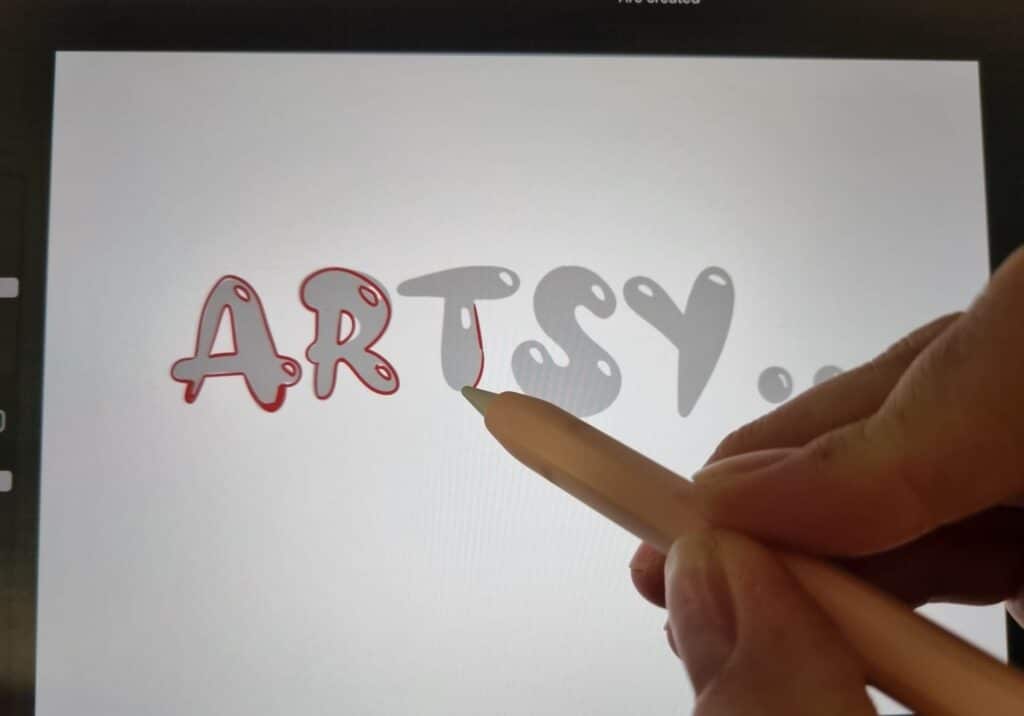
To start hand lettering in Procreate, open the Procreate app on your iPad and create a new canvas. You can choose any size that works best for your project. Now, let’s dive into the world of hand lettering.
Brushes
One of the key aspects of hand lettering is choosing the right brush. Procreate offers a wide range of brush options to suit your style.
Experiment with different brushes to find the ones that work best for your lettering.
Some popular brushes for hand lettering include calligraphy brushes, ink brushes, and brush pens.
Don’t be afraid to explore the library of brushes in Procreate to find your favorites.
Animating with Procreate
Procreate is a fantastic tool for artists, and with its Animation Assist feature, you can create amazing animations too!
To begin, open Procreate and create a new canvas. You can tap the plus (+) icon in the upper-right corner, then select your desired canvas size.
With your canvas created, it’s time to start animating.
First, enable Animation Assist by tapping the wrench icon in the top left corner, then select ‘Canvas’, scroll down, and turn on ‘Animation Assist’. This will bring up a timeline at the bottom of your screen, which is where you’ll manage your frames.
When animating in Procreate, think of each frame as a separate layer. To create a new frame, tap the “+” icon in the bottom left corner of the timeline. Start drawing on your canvas, and don’t worry about being perfect – you can always edit your frames later.
Onion Skinning
Onion skinning is an essential technique when working with animations. It allows you to see multiple frames simultaneously, like how animators used to work with transparent paper.
Turn on this feature by tapping the ‘Settings’ icon in the bottom toolbar.
Here, you can adjust the opacity and number of onion skin layers, making it easier to draw and plan your motion throughout the animation.
Fine-Tuning Your Artwork
When using Procreate, you have a variety of tools at your disposal to fine-tune your artwork.
To experiment with the size, rotation, or position of your artwork, use the Transform tool.
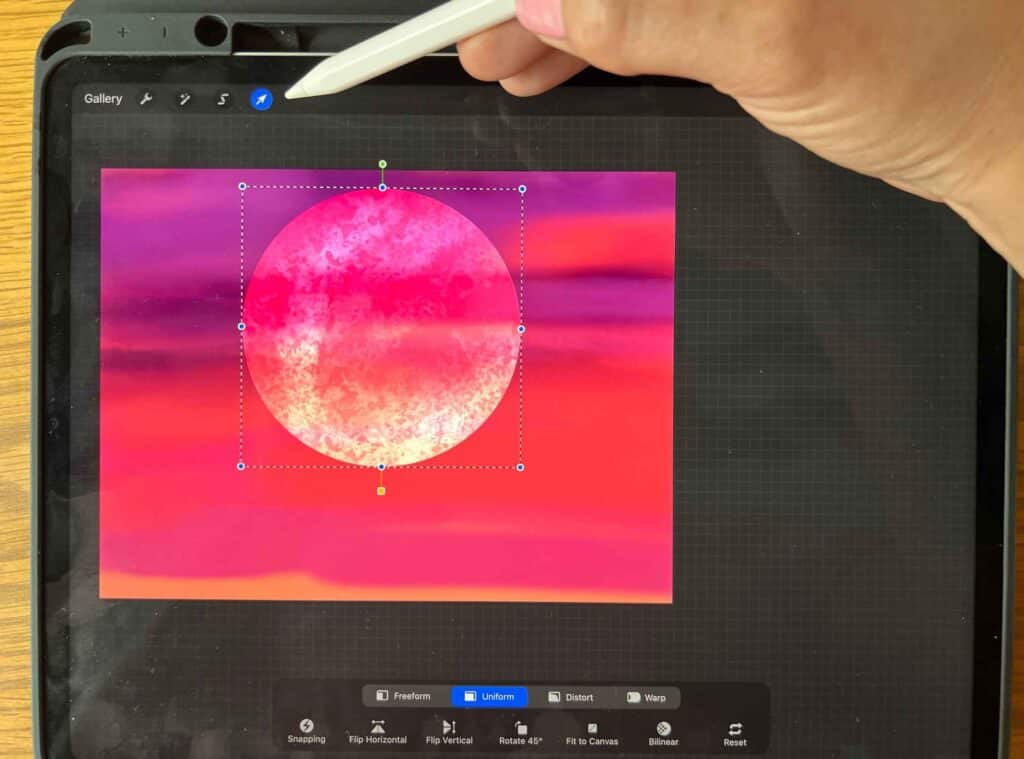
Just tap the arrow icon in the top toolbar and you’ll see handles around your selected layer which you can use to scale, rotate, or move your elements.
It’s a user-friendly feature that helps you quickly adjust your design.
If you need to reshape an object, the Warp tool is your ally.
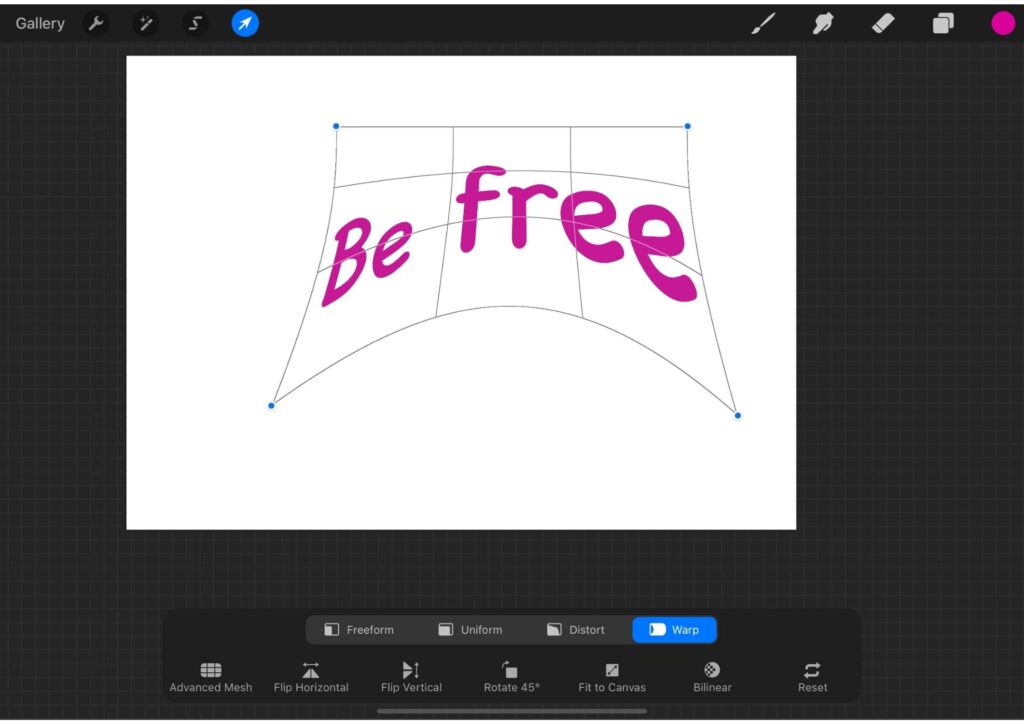
You can find the warp option in the Adjustments panel, and it allows you to change the shape of your artwork by dragging the control points.
Drawing straight lines in Procreate is easy. Simply draw a line and hold your Apple Pencil in place at the end of the stroke.
Procreate will automatically recognize it as a straight line and snap it into place.
You can also use the QuickLine feature by setting the stroke endpoint and holding it for a moment. For accurate straight lines, use the Curves tool from the color adjustment menu.
The Selection tool, represented by the “S” icon, allows you to create precise selections using freehand, automatic, and rectangle or ellipse options.
Once you have made a selection, you can modify it using the transform, color adjustments, or brush tools without changing the surrounding areas.
Controlling the opacity of your artwork is crucial in creating a sense of depth and layering. You can easily change the opacity by selecting a layer and sliding the opacity slider in the Layers panel.
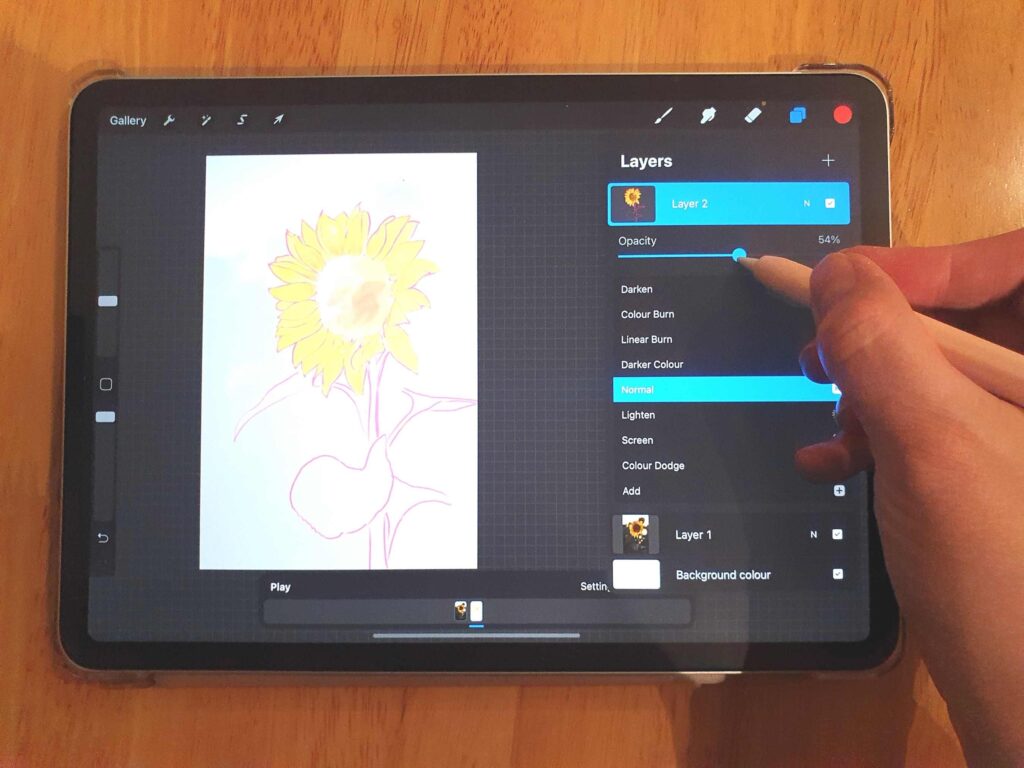
The Smudge Tool allows you to blend colors together and create an even gradient.
Creating Time-Lapse Videos
When you start a new canvas in Procreate, the time-lapse recording is enabled by default. This means that as you work on your artwork, every step is captured and compiled into a high-speed video replay. Don’t worry about turning it on, your progress is automatically recorded.
After completing your artwork, it’s time to view and export the time-lapse video. To access the video settings, tap the wrench icon on the top left corner of your Procreate toolbar. Next, select the Video tab, which will display various video settings for your project.
If you want to take a quick look at your time-lapse video, click on Time-lapse Replay. It provides a real-time view of your progress and allows you to enjoy the journey of your creation.
Frequently Asked Questions
How do I draw on photos in Procreate?
To draw on photos in Procreate, first, open the app and create a new canvas. Then, tap on the “Actions” icon (wrench) and select “Add.” Choose “Insert a photo” and pick the photo from your library. Once the photo is inserted, you can use various brushes, colors, and layers to draw or paint directly onto the photo.
What are the options for photo editing in Procreate?
Procreate offers several photo editing options, such as adjusting color balance, saturation, brightness, and contrast. You can also apply filters, like Gaussian Blur or Sharpen. In addition to these, Procreate provides advanced tools like Liquify and various brushes to create custom editing effects.
What are the main features of Procreate Pocket?
Procreate Pocket is the iPhone version of Procreate that includes most of the same powerful drawing and painting tools as its iPad counterpart.
Can I use Procreate for interior design projects?
Yes, Procreate can be a helpful tool for interior design projects. You can import photos of your space and draw directly onto the images to plan out different layouts, color schemes, or furniture arrangements. Additionally, you can create custom patterns or textures to apply to walls, floors, or other surfaces in your design.
Is it easy to start using Procreate on an iPhone?
Starting to use Procreate on an iPhone can be quite easy, especially with the Procreate Pocket Handbook as a guide. The user interface is designed to be intuitive and responsive. However, if you find navigating on a smaller screen challenging, you might want to consider using Procreate on an iPad for larger workspaces.
How can I use Procreate without an Apple Pencil?
While the Apple Pencil provides a seamless drawing experience, you can still use Procreate without it. Simply use your finger or a third-party stylus to draw or paint on your device. Keep in mind that some features, like pressure sensitivity, might not function the same way without an Apple Pencil.
Grab the Free Procreate Collage Elements HERE (below)!
To access the free in-post printables for this post, you’ll just need to create a free account or log in with the Grow.me tool. Then, confirm by email and refresh the page, and ALL my free printables will automatically unlock in every post!
Other articles you may enjoy…
11 Top Drawing Accessories for iPad: Enhance Your Art Experience


