Last Updated on October 9, 2026 by Dee
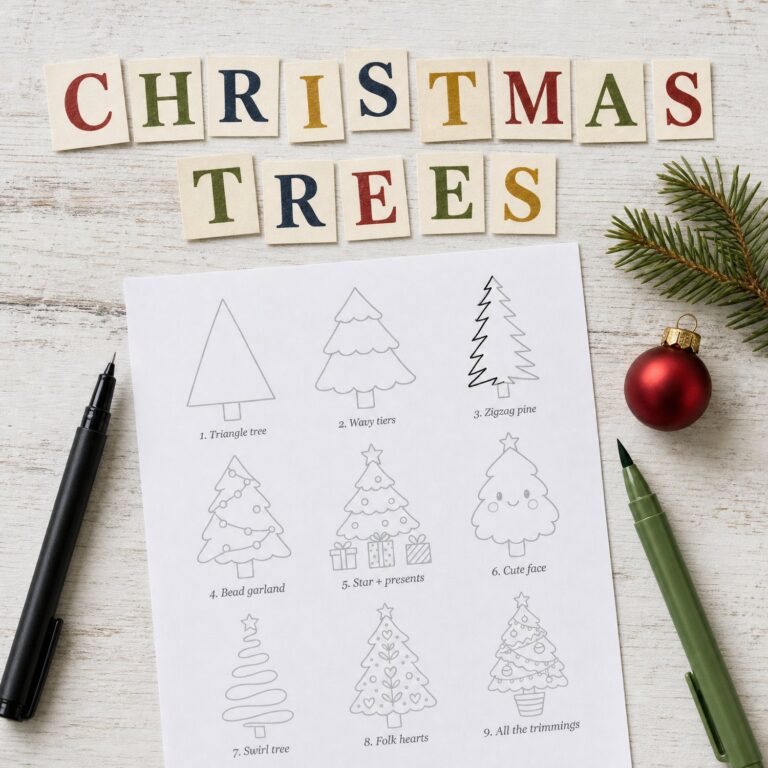
A Christmas tree is the first thing most of us ever drew for the holidays, and it’s still one of the nicest. A triangle and a little trunk, and you’ve got Christmas. Add some wavy layers, a star and a few baubles, and suddenly it looks like something you’d put on a card.
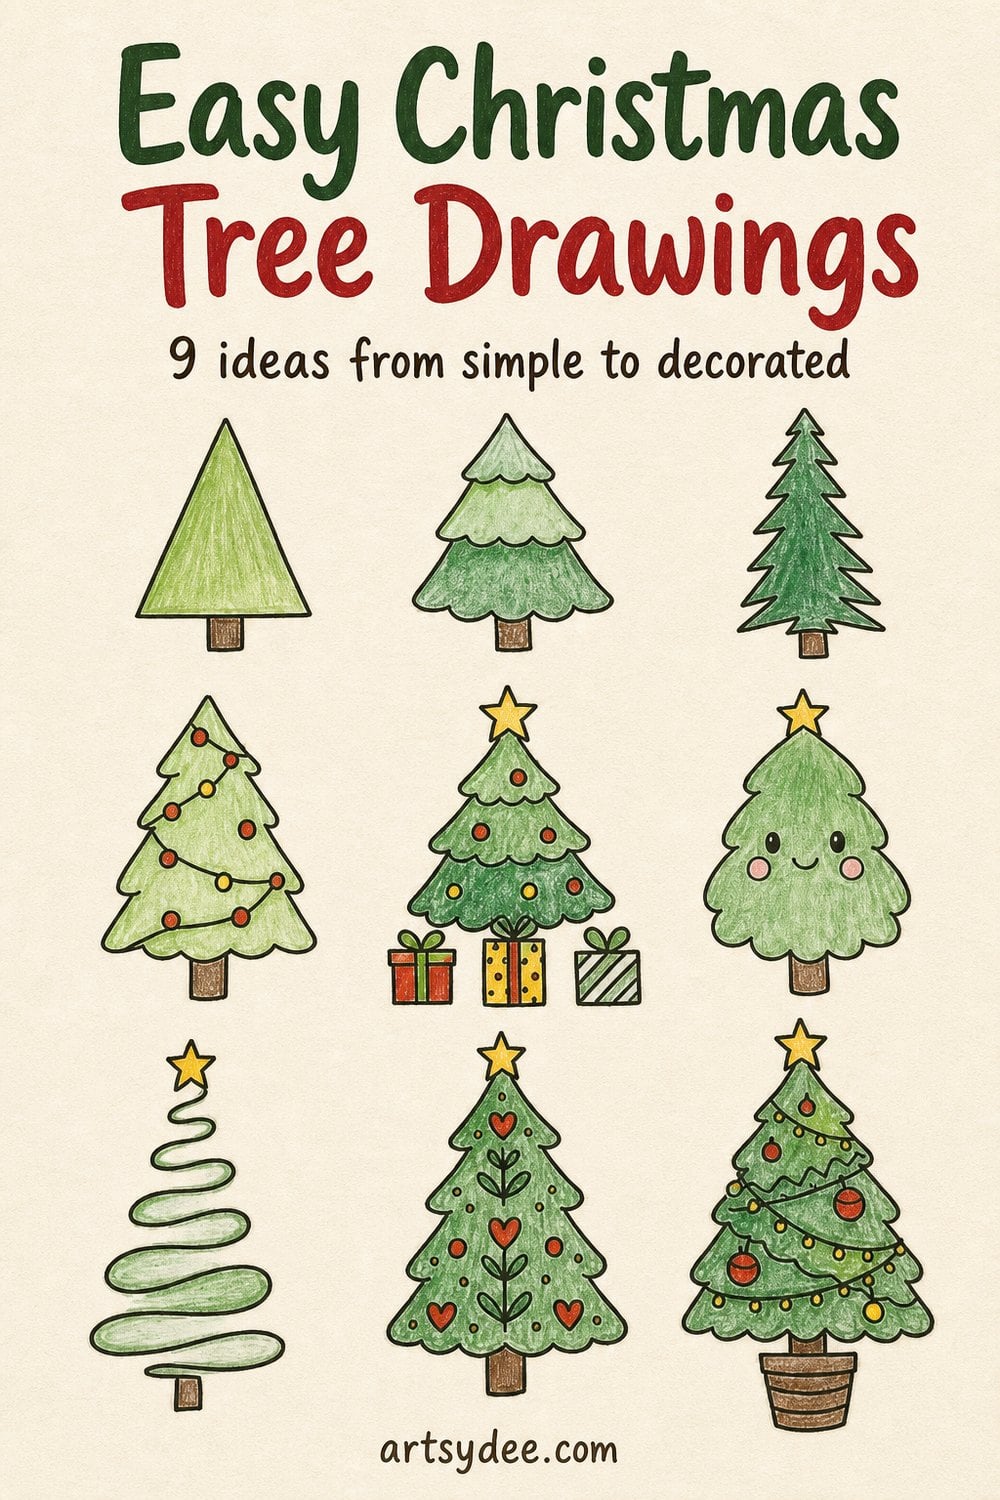
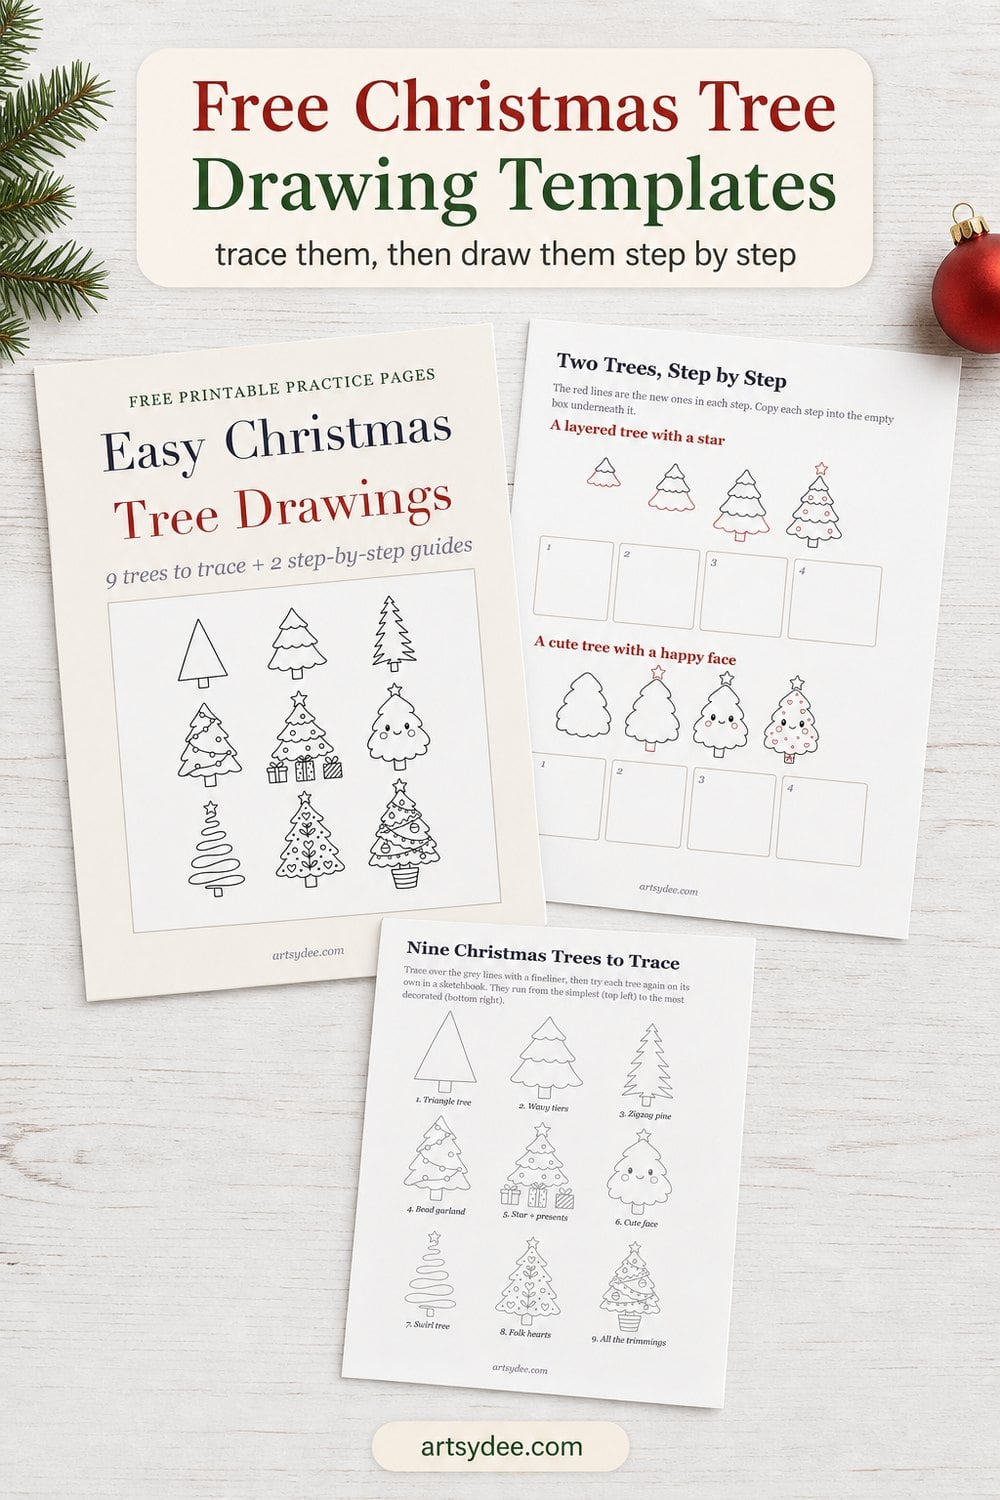
Below are nine easy Christmas tree drawings, running from the plainest triangle to a tree with all the trimmings, plus two proper step-by-step guides: a classic layered tree and a cute tree with a smiling face.
Get the free Christmas tree drawing templates
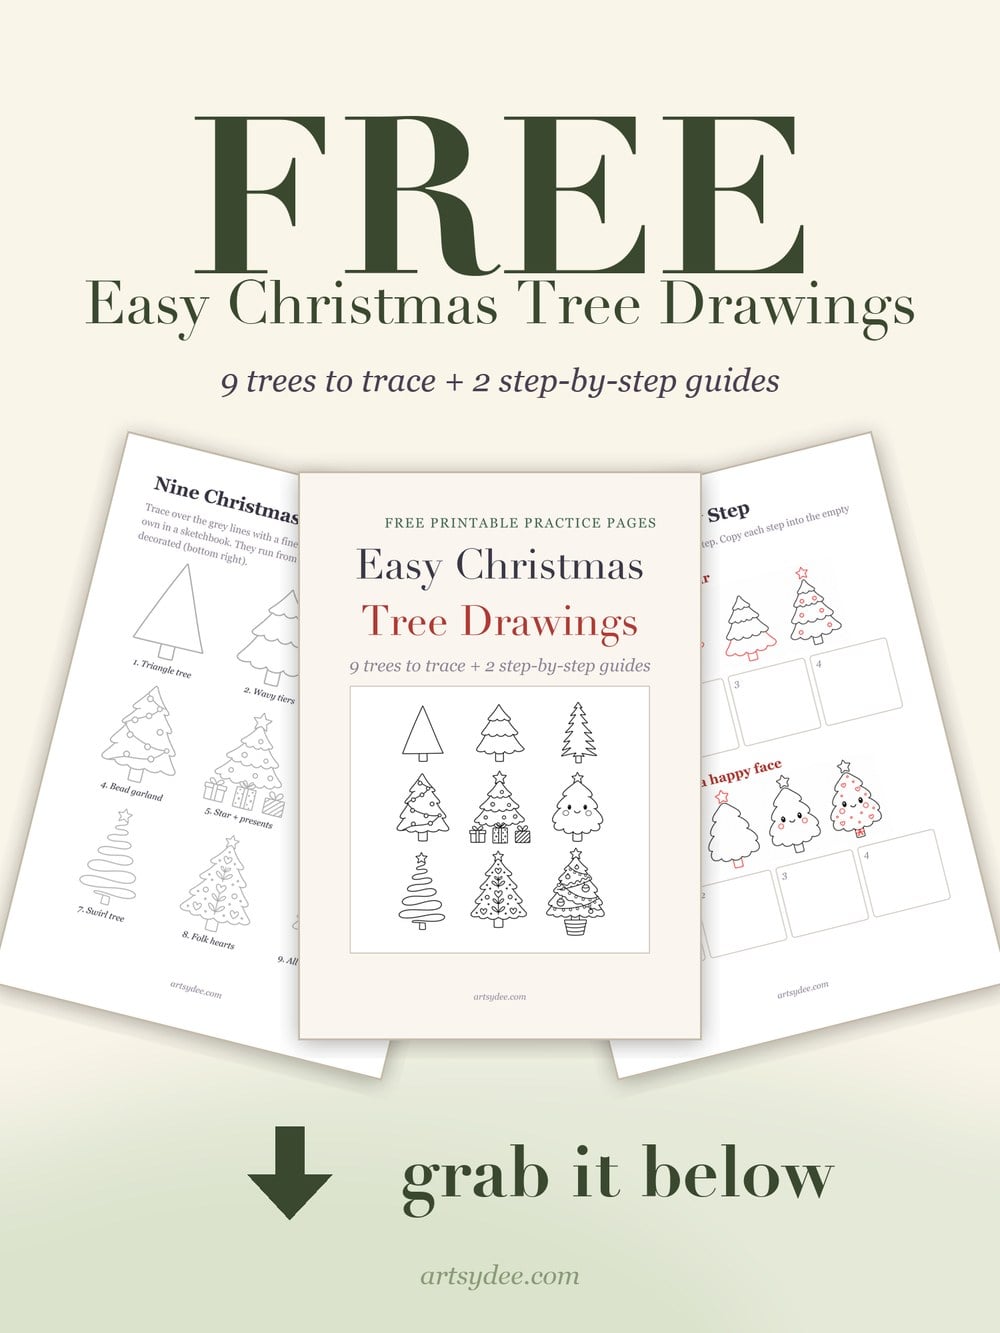
I’ve put all nine trees on a printable page in pale grey so you can trace over them, with both step-by-step guides and empty boxes to practise in. Pop your email in above and the four pages will land in your inbox.
Table of Contents
What Makes a Christmas Tree Easy to Draw?
Quick answer: a Christmas tree is easy to draw because it’s built from one shape you already know, a triangle. Draw the triangle, give it a trunk, then decide how fancy the edges and the decorations get. Every tree on this page starts that way.
The thing that makes a tree look “drawn” rather than “scribbled” is almost never skill. It’s the edges. A straight-sided triangle reads as a road sign. Give the same triangle a wavy, scalloped bottom edge on each layer and it reads as a fir tree straight away, even at the size of a postage stamp.
The other secret is that the decorations do the heavy lifting. A wobbly outline with a star on top and five round baubles looks charming. Nobody is checking whether your tree is symmetrical. Real ones aren’t.
What You Need
Honestly, a pencil and the back of an envelope will do. But if you want your trees to look crisp, a few small things help more than you’d think.
- A fineliner. I use a Sakura Pigma Micron set. The 03 and 05 nibs are right for trees this size, and the ink doesn’t smudge when you colour over it.
- A bolder pen for outlines, if you like a chunkier, more graphic look. The Faber-Castell PITT artist pens are lovely for this.
- A pencil and a good eraser for the first sketch. A Tombow Mono Zero eraser gets into the little gaps between baubles without smudging everything.
- Something green to colour with. Coloured pencils, felt-tips or alcohol markers all work. An Ohuhu marker set gives you several greens, which is the trick to trees that don’t look flat.
- The free templates, printed on ordinary printer paper.
This post contains affiliate links, which means I may earn a small commission if you buy through them, at no extra cost to you. I only link to things I’d happily use myself.
9 Easy Christmas Tree Drawings, Simple to Decorated
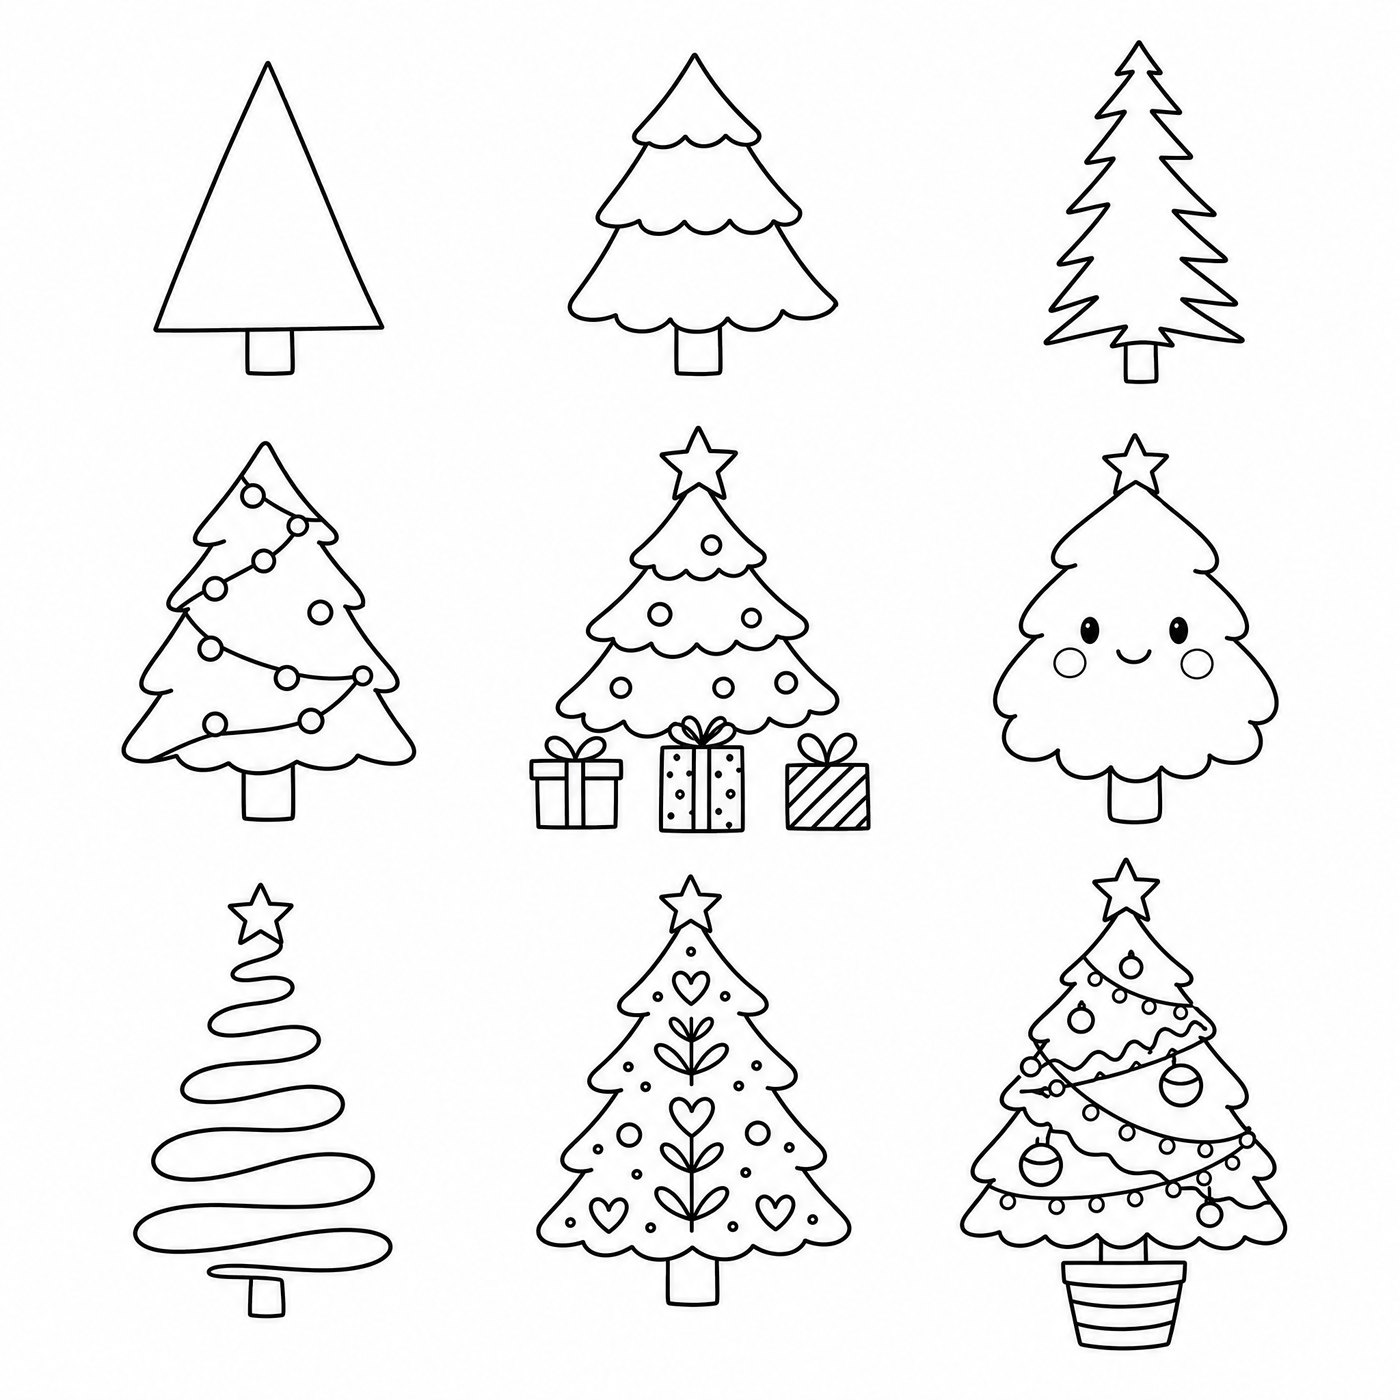
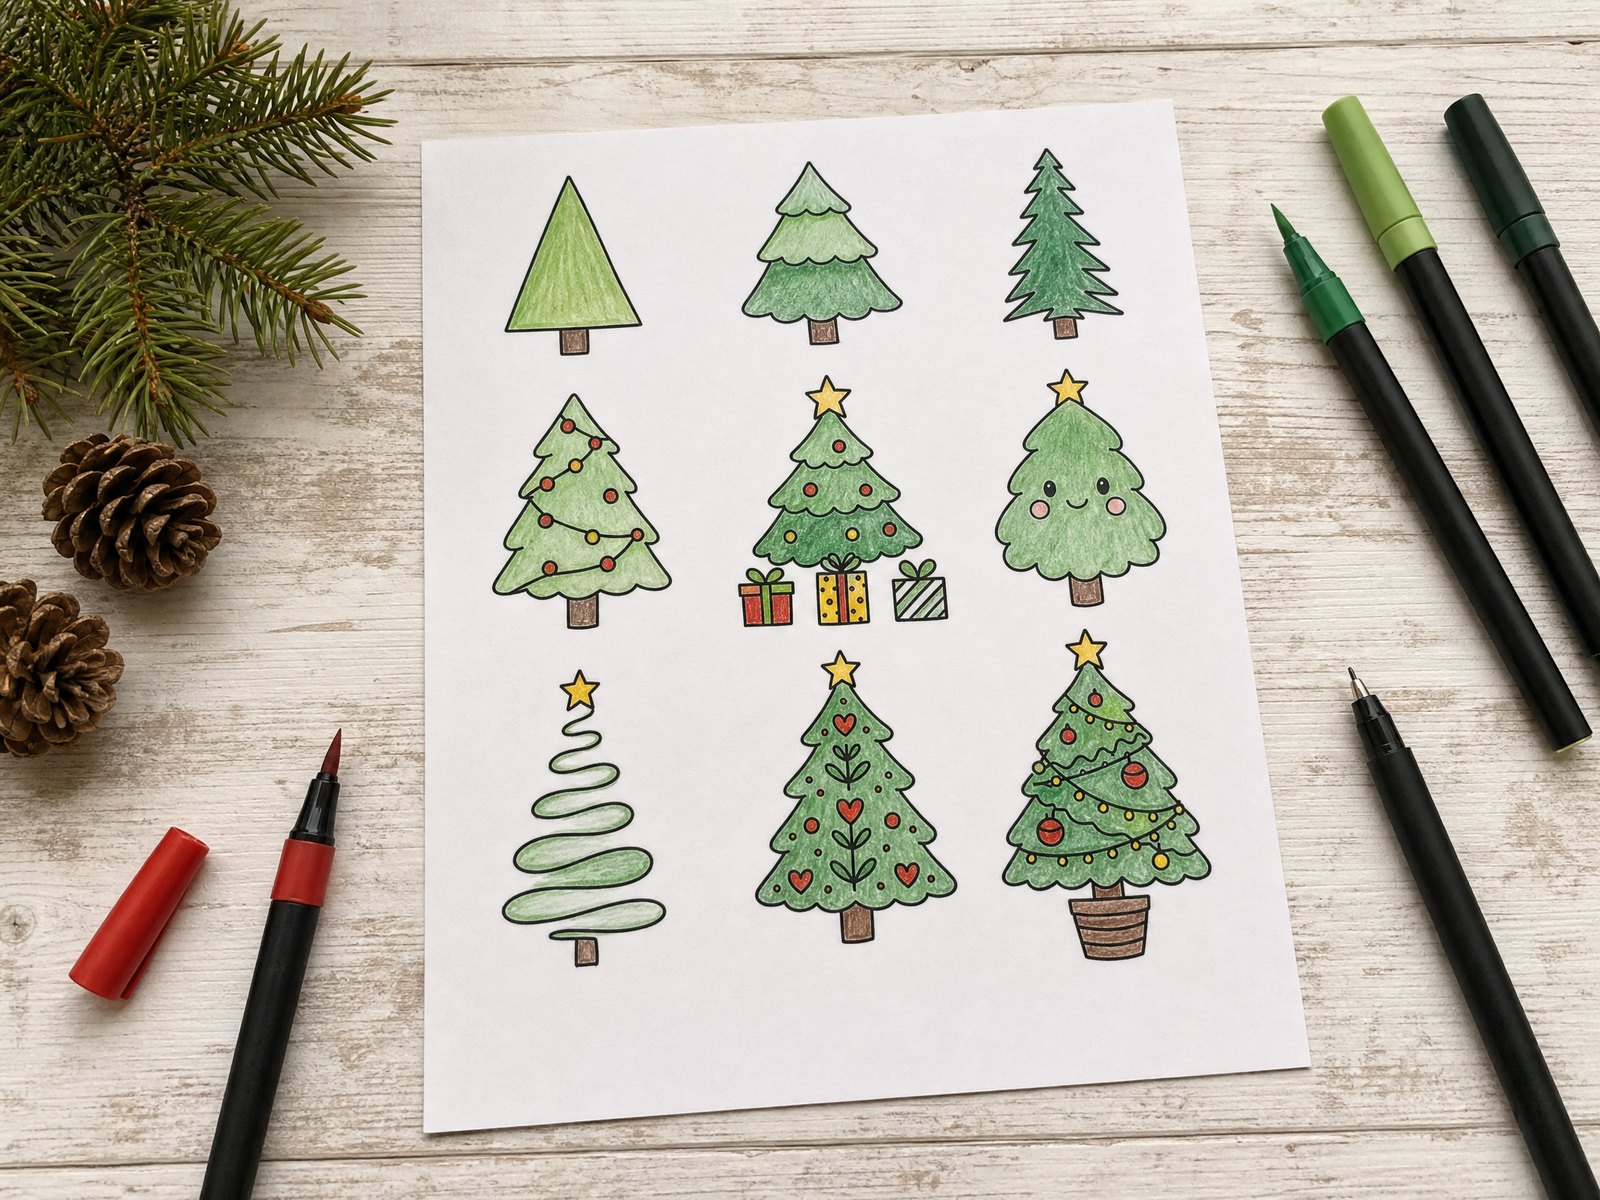
These go roughly from easiest to most detailed, so if you’re a beginner, start at number one and work your way down. Each one is on the free trace-over page in the same order.
1. The triangle tree
A tall triangle and a small rectangle trunk underneath. That’s it. Draw the two sloping sides first, then the flat base, then the trunk. It’s the perfect tree for a tiny doodle in a margin, and the base you’ll build every other tree on.
2. Wavy tiers
Three layers stacked on top of each other, each one wider than the one above, with a wavy, scalloped bottom edge. Start with the top tier, then tuck each new layer slightly under the one above it. This is the shape most people picture when they think “Christmas tree drawing easy”.
3. The zigzag pine
A tall, skinny tree drawn as one long zigzag down each side, with the points getting wider as you go down. Keep the zigzags uneven and it looks like a real spruce. Draw three of these in a row and you’ve got a little forest.
4. The bead garland tree
Take the wavy tiered tree and drape a looping line across it, with small circles strung along it like beads. Let the garland dip down from one side to the other a few times. A couple of extra baubles in the gaps finish it off.
5. Star and presents
A tiered tree with a five-point star on top, a few round baubles, and three little presents lined up underneath: one with a ribbon, one with dots, one with stripes. The presents make it look like a scene rather than a single object.
6. The cute tree with a face
A soft, rounded tree with bumpy sides, a star on top, two big oval eyes, a tiny smile and two rosy cheeks. This is the one people search for when they want a cute Christmas tree drawing, and it has its own step-by-step guide below.
7. The swirl tree
One continuous line that zigzags back and forth in loose swirls, getting wider as it goes down, finished with a star on top and a little trunk. It’s modern and quick, and it looks lovely on a minimalist card.
8. The folk tree
A Scandinavian-style tree with a star on top, decorated inside with little hearts, simple leafy sprigs down the middle and a scatter of dots. Think gingerbread biscuits and embroidered tea towels. It takes a bit longer, but each pattern inside is easy.
9. All the trimmings
The full works: a tiered tree with a star, round baubles, strings of lights draped across it, a wavy garland and a striped pot at the bottom instead of a plain trunk. Build it in layers, outline first and decorations last, and it’s much easier than it looks.
Want even more festive things to draw once you’ve done your trees? My list of easy Christmas drawing ideas has thirty simple subjects, from robins to mittens, with its own practice sheets.
How to Draw a Layered Christmas Tree Step by Step
Quick answer: draw a small rounded tip, then add three scalloped tiers underneath, each one wider than the last. Add a rectangle trunk, then finish with a star on top and a few round baubles.
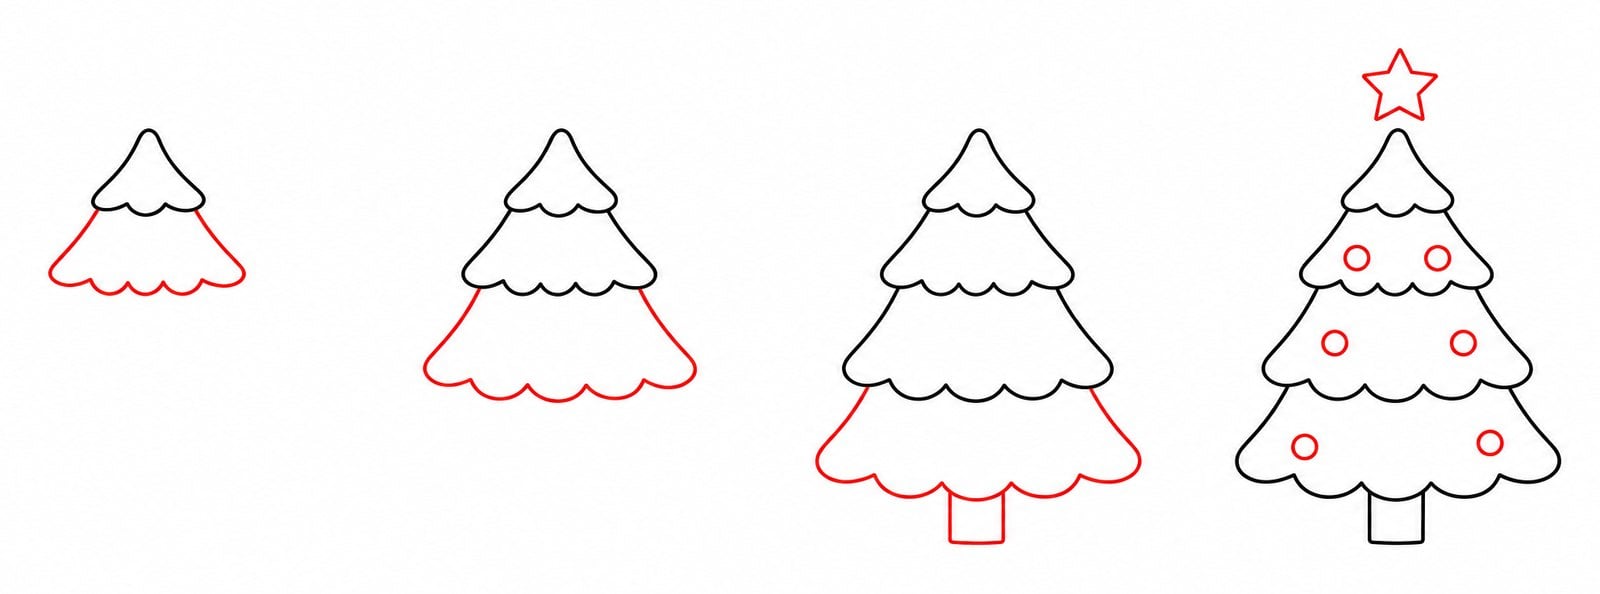
Step 1: the tip and the first tier
Start near the top of your page with a small, rounded point, like the top of a soft-serve ice cream. Draw a small tier underneath it with a scalloped bottom edge: three or four little bumps in a row.
Step 2: the second tier
Add a second, wider tier under the first. Let its sloping sides start just under the bumps above, so the layers look tucked in rather than stacked like boxes.
Step 3: the bottom tier and trunk
Add the third and widest tier, again with a scalloped edge, then draw a small rectangle trunk in the middle of the bottom. Keep the trunk short. A long trunk makes the tree look like a lollipop.
Step 4: the star and baubles
Draw a five-point star sitting right on the tip, then add six small circles for baubles, two on each tier. Spread them out unevenly. That’s your classic tree done.
How to Draw a Cute Christmas Tree Step by Step
Quick answer: draw a chubby, rounded tree shape with bumpy sides, add a trunk and a star, then give it two oval eyes, a small smile and rosy cheeks. Finish with tiny hearts and dots.
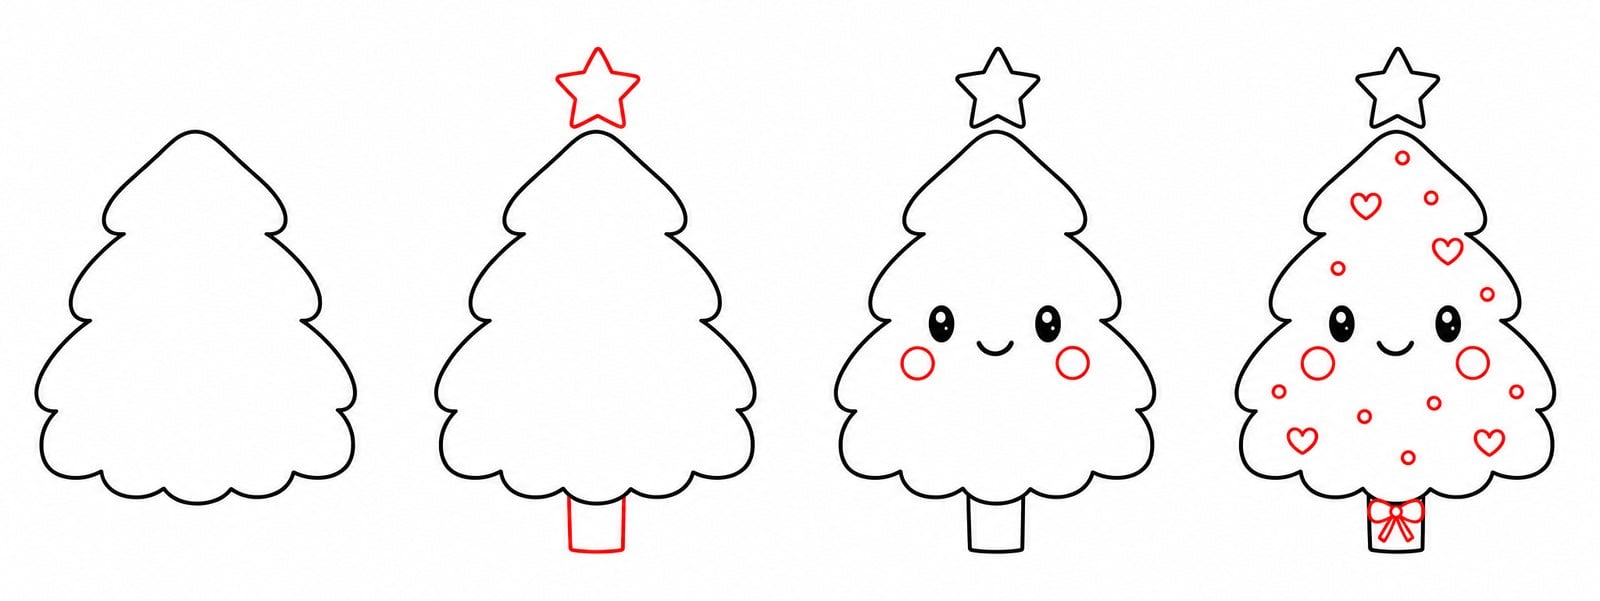
Step 1: a chubby outline
Draw the outline as one soft shape: a rounded top, then three gentle bumps down each side, getting wider as you go, and a wavy bottom edge. Think cloud, not triangle. Rounded shapes are what make a drawing look cute.
Step 2: the trunk and star
Add a short rectangle trunk under the middle and a five-point star balanced on top. Make the star a little bigger than feels right. Oversized details read as cute.
Step 3: the face
Place the face lower than you’d expect, roughly halfway down the tree. Two black oval eyes with a tiny white dot of shine left in each, a small curved smile between them, and two round cheeks just below and outside the eyes.
Step 4: hearts, dots and a bow
Scatter a few small hearts and dots around the face, and add a little bow at the top of the trunk. Leave some empty space. A cute drawing needs room to breathe.
If you enjoy this kawaii style, my Christmas doodles to draw are full of little characters in the same spirit.
How to Decorate and Colour Your Tree Drawings
Once your trees are outlined in pen, colouring them is where they come alive. The biggest difference comes from using two or three greens instead of one. Colour each tree in a lighter green first, then go back over the bottom edge of each tier with a darker green. That little bit of shadow under each layer makes the tree look full.
Keep the decorations bright and simple: red and gold baubles, a yellow star, a brown trunk. Leave a tiny white dot on each bauble for shine. If you’re using markers, colour the light green first and let it dry before adding the dark green, so the colours don’t muddy.
A white gel pen is lovely at the end for snow on the tips of the branches and little highlights on the baubles. And if you’d rather paint than colour, my easy Christmas watercolor paintings use the same simple shapes with a wet brush.
What to Do With Your Christmas Tree Drawings
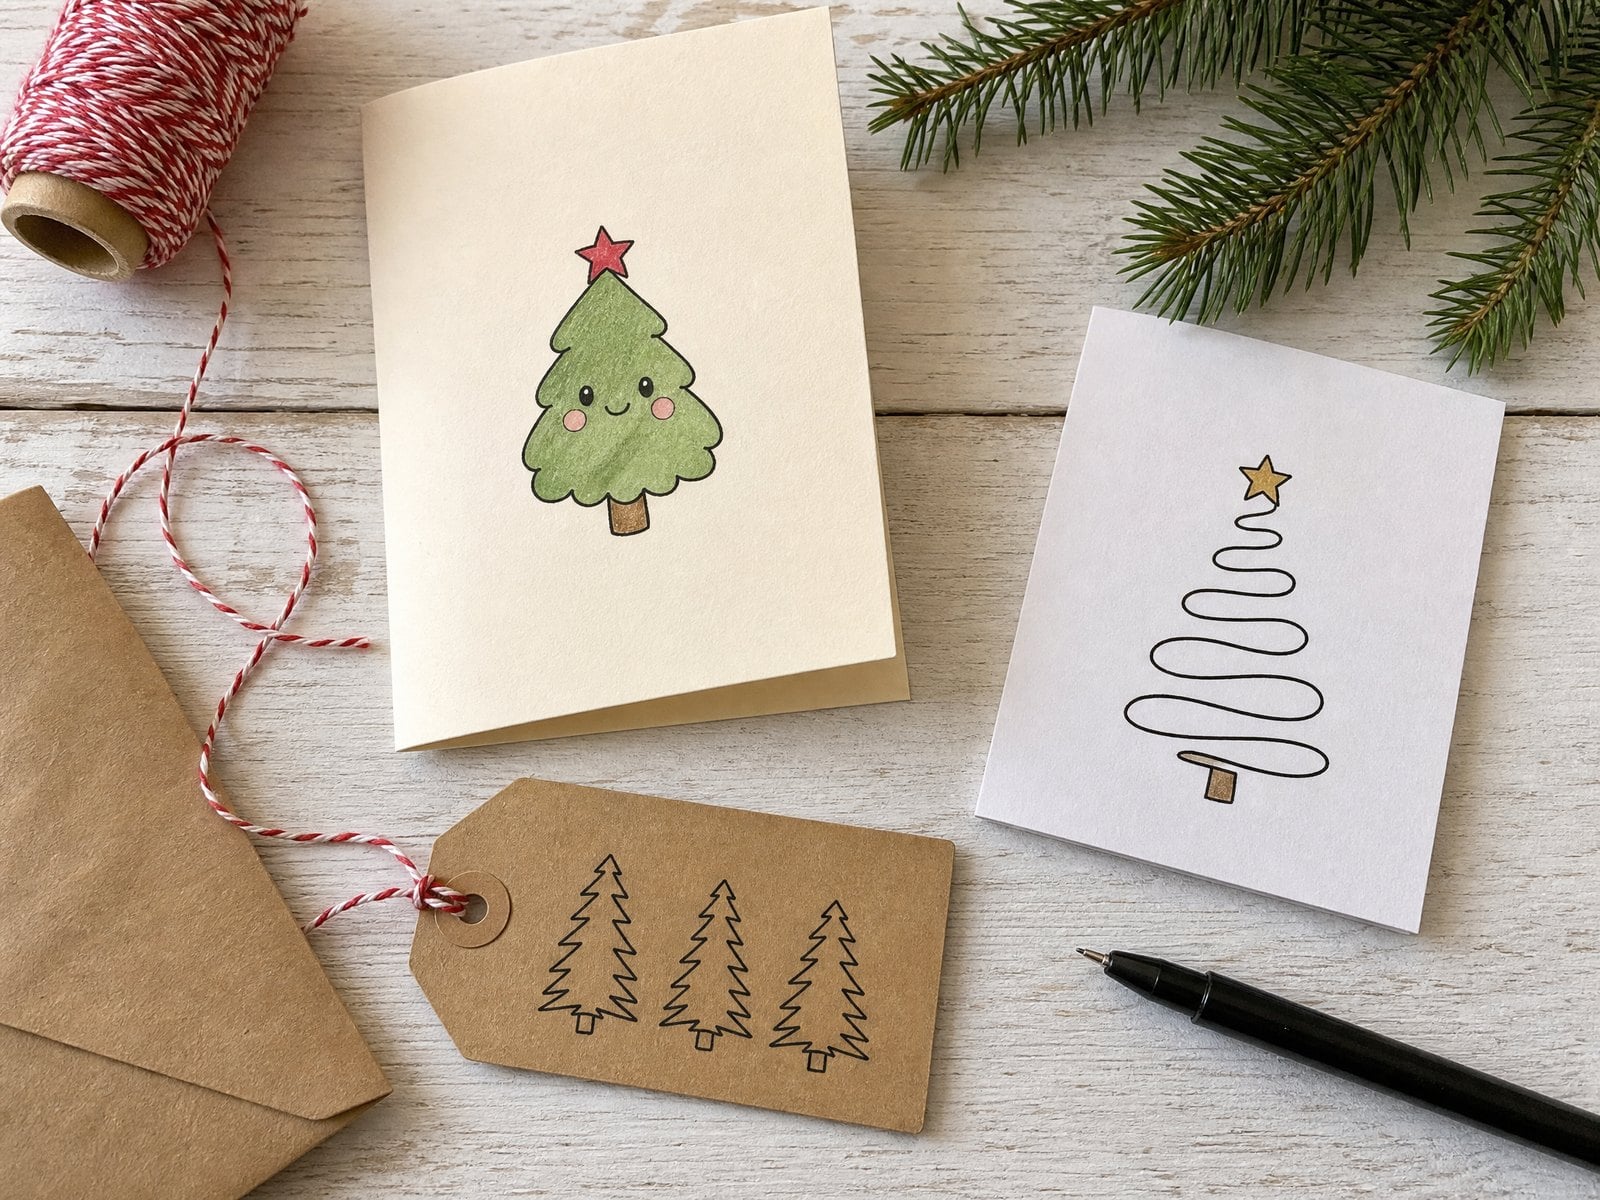
The beauty of a small tree doodle is that it fits on almost anything. Here’s where mine end up every December:
- Christmas cards. One cute tree in the middle of a folded card, coloured with a single green pen and a red star.
- Gift tags. Three little zigzag pines in a row on a brown kraft tag. It takes two minutes per tag.
- Wrapping paper. Plain brown paper covered in tiny triangle trees drawn in white or green pen.
- Journals and planners. A row of trees along the top of a December spread, or one tree per day as an advent countdown.
- Place cards and labels. A swirl tree beside each name looks smart on a Christmas table.
For more ideas in this direction, have a look at my free printable Christmas gift tags.
Five Tips That Make Tree Drawings Look Better
- Draw it small. About the size of a postage stamp. Small drawings hide wobbles.
- Draw each tree three times. Once to work out the shapes, once to get it wrong differently, and once properly. The third is always the keeper.
- Use two line weights. A thicker pen for the outline and a thinner one for the baubles and garland. It’s the cheapest way to make a doodle look designed.
- Overlap the tiers. Tuck each new layer under the bumps of the one above it. Stacked boxes look stiff; overlapping layers look like branches.
- Stop before you think you’re finished. A tree with five baubles looks cheerful. A tree with twenty-five looks busy.
Want the Full Christmas Drawing Set?
Love these? My Christmas Drawing Templates set has 36 more festive drawings to trace or sketch from (five each of gingerbread, Christmas trees, lights and ornaments, plus fourteen stockings and two mixed pages) and four new step-by-step guides: a gingerbread girl, a snowy fir tree, a wreath wrapped in lights and a vintage finial ornament. None of the pages repeat the free sheets above.
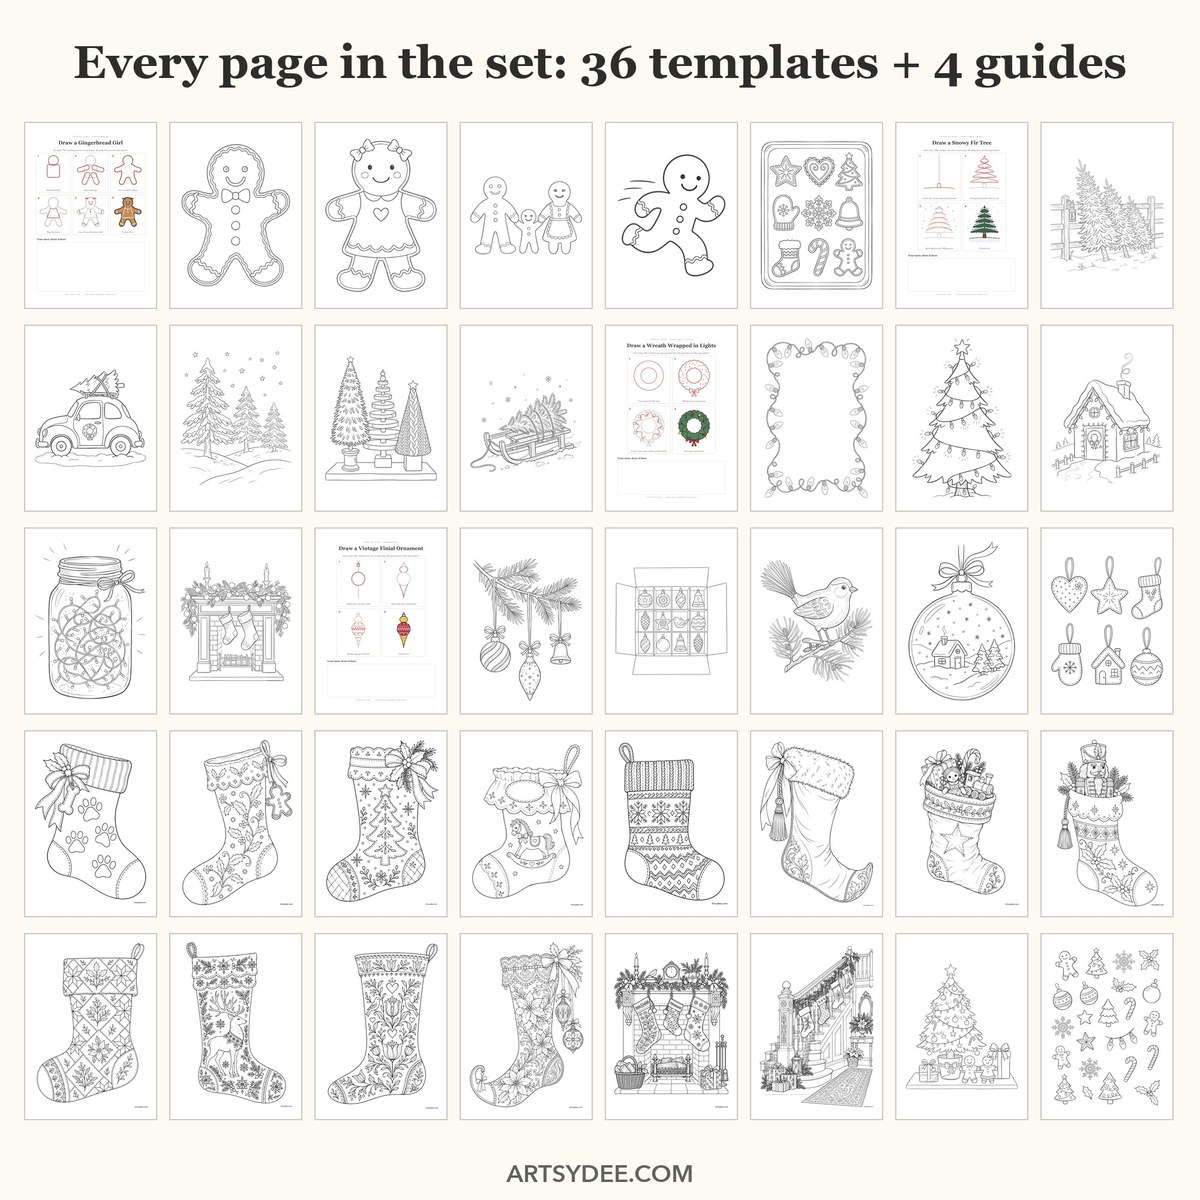
It’s £9, an instant download: a 43-page A4 PDF plus every page as a PNG.
Want More Printables Like These?
If you love having fresh things to draw and paint, come and join me on Patreon. It’s where my weekly watercolor template sets go out to members: printed outlines with painted references, so you can see where the color goes, plus Procreate stamps and palettes.
You can also browse everything in my Payhip shop, from drawing references to watercolour templates.
Frequently Asked Questions
How do you draw a Christmas tree easily?
Start with a triangle and a small rectangle trunk. Then give the triangle a wavy bottom edge, or split it into two or three wavy tiers, and add a star and a few round baubles. Every tree on this page is built that way.
How do you make a Christmas tree drawing look cute?
Round everything off. Use soft bumpy sides instead of sharp points, add a big star, and give it a face: two oval eyes with a white dot of shine, a small smile and rosy cheeks placed about halfway down the tree.
What is the easiest Christmas tree to draw for kids?
The plain triangle tree, then the three-tier wavy tree. Both are just a few lines, and children love adding their own baubles and presents. The trace-over page in the free templates is a good place for younger ones to start.
Can I use the templates in a classroom?
Yes, please do. Print as many copies as your class needs. Just don’t share or sell the file itself, and send other people here to grab their own copy.
Final Thoughts
Pick one tree. Draw it three times. That’s the whole method, and it works whether you’ve got ten minutes with a cup of tea or a whole evening. By the time you’ve done the cute one with the smiling face, you’ll have a little stack of cards and tags ready for December.
I share more drawing and painting over on my YouTube channel, so subscribe on YouTube if you’d like to draw along, and you’ll find all my Christmas ideas saved on Pinterest.
Pin this for later so you can find the free tree templates when you sit down to draw.
Happy drawing!
Dee x
You Might Also Like
- Easy Christmas Drawing Ideas: thirty simple festive things to draw, with practice sheets
- Christmas Things to Draw: more festive subjects broken into simple shapes
- Gingerbread House Drawing: a step-by-step with free templates
- Christmas Doodles to Draw: little festive doodles for journals and cards
- How to Draw a Star: the perfect topper for every tree on this page