Last Updated on April 19, 2024 by Dee
Welcome to this exciting tutorial where you’ll uncover the power of Procreate Watercolor base brushes to create stunning watercolor-style paintings. With a focus on easily accessible resources and techniques, you’ll be able to master the art of digital painting without any expensive purchases. Using Procreate’s stock brushes, you’ll start with the crucial element – the paper texture. Learn how to acquire and utilize various textures like cold press watercolor paper to elevate the appearance of your masterpiece.
Grab my free watercolor paper texture at the end of this post to create your own realistic Procreate watercolor!
Getting Started with Procreate Watercolor Base Brushes
In this section, we will discuss how to create watercolor-style paintings using the base brushes that come with Procreate. You don’t need purchased brush packs initially if it’s not feasible, as you can still create beautiful watercolor effects with standard brushes.
First, let’s establish the paper texture. This is essential when trying to recreate traditional media in a digital format. Grab my free digital watercolor paper below!
Now, let’s dive into the brushes suitable for creating watercolor-style paintings in Procreate:
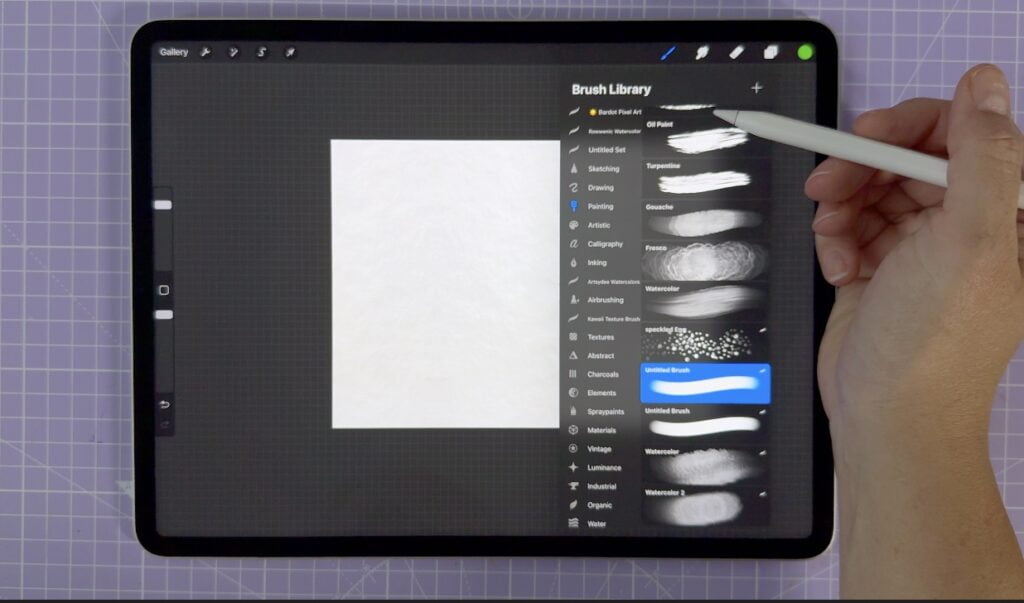
Sketching Brushes:
- Peppermint: Found under Sketching, it mimics a 2B pencil. Great for line work and shading.
- 6B Pencil: This brush creates darker and bolder lines, perfect for emphasizing your sketch.

Inking Brushes:
- Tinderbox: Found under Inking, it has texture and pressure sensitivity. When used to create outlines, it gives a natural media feel.
- Syrup: Also under Inking, it behaves like a gel pen, and it’s excellent for adding highlights.
Painting Brushes:
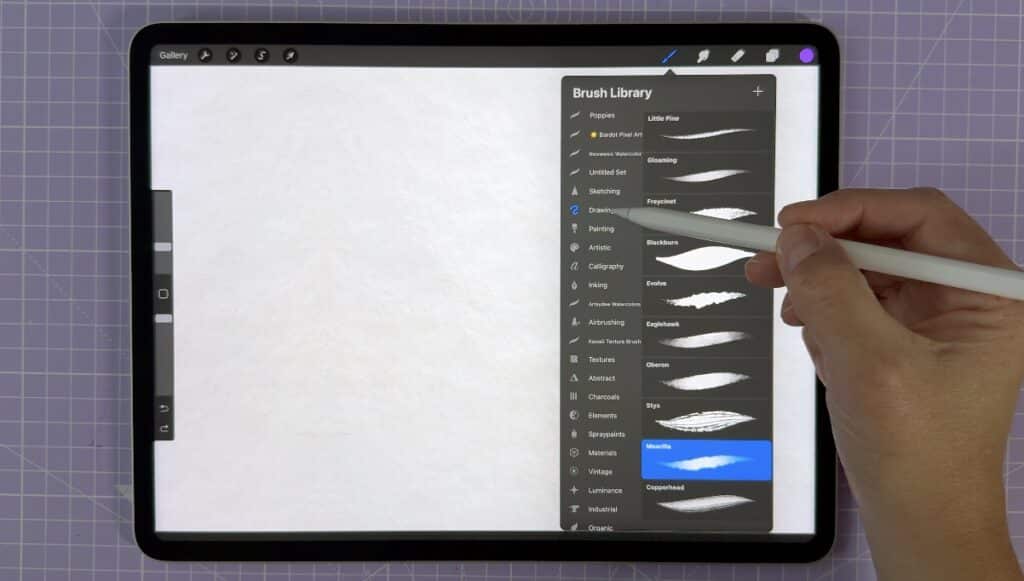
- Morilla: Found under Drawing, it has built-in texture and pressure sensitivity. Great for laying down general color washes.
- Tamar: Under Painting, this brush is fantastic for building up shadows, blending, and creating watercolor effects.
- Gouache: Found under Painting, it’s a smoother brush for blending colors, but also gives an appealing texture to the piece.
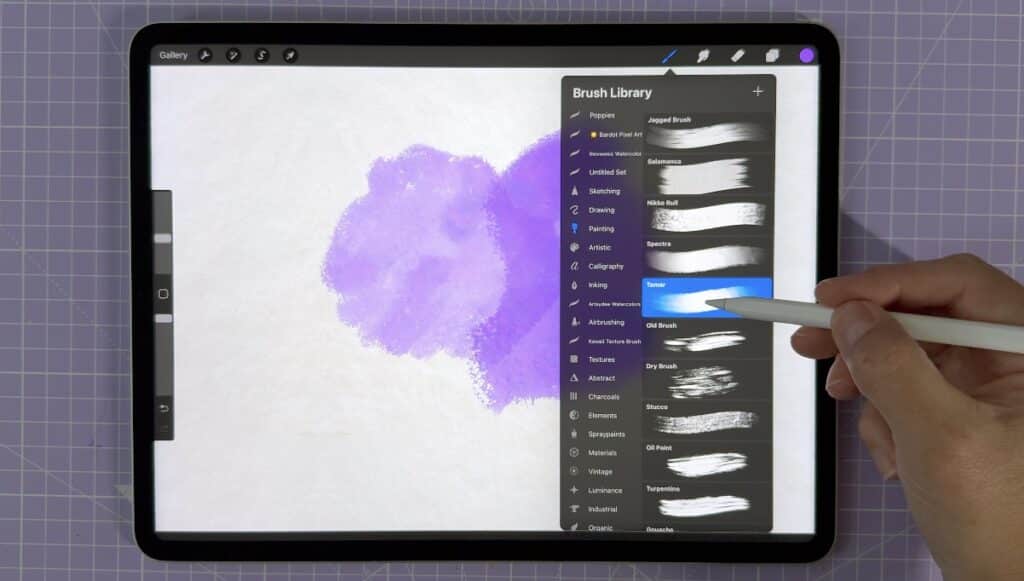
With these standard Procreate brushes, you can start creating watercolor-style paintings without any additional purchase! Remember to experiment, mix, and match these brushes to create your preferred watercolor effects. Happy painting!
Creating Traditional Media Effects Digitally
In this section, we’ll discuss some techniques to recreate watercolor style paintings using the base brushes that come with Procreate. You don’t need to purchase any additional brush packs; you can achieve the desired effects using the brushes that come with the app.
Paper Texture
First and foremost, to emulate traditional media, you must start with the paper texture. You can find many free watercolor paper textures for Procreate on Pinterest, deviantART, or even scan your own watercolor paper. Import your chosen paper texture into Procreate, resize it to your canvas, set its layer blend mode to ‘multiply’, and reduce the opacity to around 90%.
Sketching
For sketching, go to the sketching brushes tab in Procreate and choose the ‘peppermint’ brush. This brush simulates the texture of a 2B pencil and is perfect for creating light sketches that can be built upon by darkening some areas.
For bolder lines, you can opt for the ‘6B pencil’ brush, which produces darker, more prominent lines.
Inking
To add ink to your illustration, locate the inking brushes category in Procreate. The ‘Tinderbox’ brush is excellent for this purpose as it has a slightly textured line and can provide excellent pressure sensitivity for creating thin and thick lines.
For highlights, the ‘Syrup’ brush acts like a gel pen and is perfect for achieving smooth, solid lines.
Painting
For painting, go to the drawing category in Procreate and select the ‘Morilla’ brush. This brush has built-in texture and opacity variations that depend on the pressure applied with the stylus. It’s a fantastic choice for laying down general colors and achieving watercolor-like effects.
After applying the base colors with the Morilla brush, transition to the painting category and select the ‘Tamar’ brush. This brush blends colors smoothly, adds texture, and naturally mimics the way watercolor dries on paper.
Lastly, the ‘Gouache’ brush, found under the painting category, is excellent for smoothing and blending colors. It renders a slightly darker and lighter side, contributing further to replicating traditional media digitally.
Now that you’re equipped with these techniques, you’re ready to create stunning watercolor style paintings using Procreate’s base brushes. Happy painting!
Adding Paper Texture
To achieve a watercolor painting style in your digital artwork, a crucial step is incorporating paper texture.
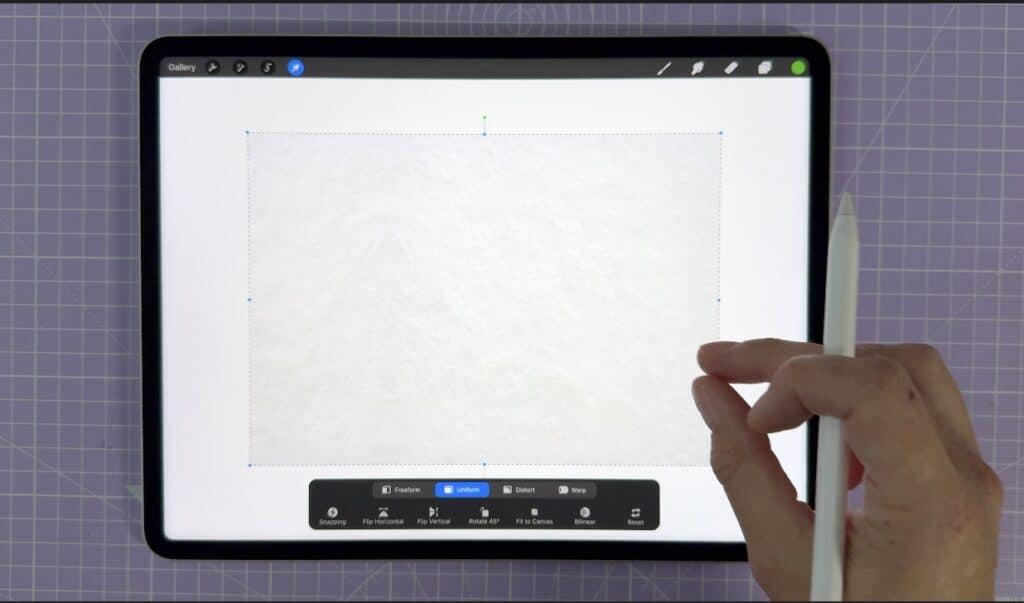
Grab the Free Digital Watercolor Paper HERE (below)!
To access the free in-post digital paper for this post, you’ll just need to create a free account or log in with the Grow.me tool. Then, confirm by email and refresh the page, and ALL my free images, files and printables will automatically unlock in every post!
To start, add your chosen watercolor texture to your canvas. A popular choice is cold press watercolor paper. Once you place the texture on the canvas, change the layer blend mode to “multiply.” Don’t hesitate to adjust the opacity, as doing so can help you achieve the desired effect – around 90% opacity is a good starting point. This layer will become the topmost layer, and all other work should be done underneath it.
Now that your paper texture is in place, it’s time to explore different brushes to make your digital watercolor painting come to life:
- Sketching: The Peppermint brush, found under the Sketching tab, is an excellent choice, as it mimics the texture of a regular 2B pencil.
- Inking: In the Inking category, the Tinderbox and Syrup brushes are ideal for adding depth and highlights to your artwork.
- Painting: The Morilla, Tamar, and Gouache brushes offer built-in textures and blending capabilities that complement the style of watercolor painting.
Experiment with these brushes and your paper texture to create a stunning digital watercolor painting that feels like traditional media.
Changing the Blend Mode
To achieve a more realistic watercolor effect, adjust the blend mode settings for your layers. Here’s how you can do it:
- Start by adding a textured layer, such as watercolor paper, as the topmost layer in your artwork. This will enhance the traditional media look and feel.
- With the textured layer selected, change its blend mode to Multiply. This will allow the colors and details of your painting layers beneath to show through the texture, mimicking real watercolor paintings.
- If the texture appears too strong, reduce its opacity to soften the effect. Try lowering the opacity to around 90 percent and tweak as needed.
Remember to create your painting layers below the textured layer. Experiment with different brushes to achieve the desired watercolor look in your artwork. Keep playing with and adjusting your brush settings, blend modes, and layer opacities to create a beautiful and convincing watercolor effect.
Sketching Techniques
Peppermint for Sketching
Peppermint is a fantastic brush for sketching, available under the sketching tab in Procreate. It mimics the texture of a regular 2B pencil. By tilting your brush, you can achieve shading, and using just the tip allows you to create finer lines. The brush’s pressure sensitivity makes it great for creating delicate lines that can be built upon for shading or emphasizing specific areas.
6B Pencil for Bolder Lines
If you want to achieve bolder lines in your sketch, the 6B pencil is a fantastic choice. It is considerably darker than the peppermint brush, making it closer to the boldness of a ballpoint pen. By using the 6B pencil, you can make lines stand out, which is especially useful if you want to emphasize certain areas in your sketch.
Inking Techniques
Creating Watercolor Effects with Tinderbox
Welcome to the middle of your article! Let’s dive into using Tinderbox for outlining. This fantastic tool is part of Procreate’s inking category and will help you achieve a more organic feel in your artwork. Tinderbox creates lines that aren’t completely solid, allowing for a bit of texture and a natural appearance. Additionally, it offers excellent pressure sensitivity, so you can easily switch between thin and thick lines for more line variance and interest in your art pieces.
Applying Highlights with Syrup
Another fantastic tool for your inking arsenal is Syrup. This brush is perfect for adding highlights to your work as it emulates the effect of a gel pen. With its smooth lines that don’t have as much texture as Tinderbox, Syrup provides solid colors that really stand out. Using white or near-white colors will create beautiful highlights reminiscent of a traditional gel pen.
So, go ahead and experiment with these tips and techniques using Tinderbox and Syrup to elevate your inking skills to new heights!
Painting Techniques
Utilizing Morilla for General Colors
Morilla is an excellent choice when it comes to laying down general colors. This brush has built-in texture and great pressure sensitivity, allowing you to achieve varying shades and depths in color with just a single stroke. Its natural pigmentation variations closely mimic the real watercolor effect, adding authenticity to your digital artwork.
Employing Tamar for Shadows and Blending
Consider using the Tamar brush when you wish to build up shadows and blend colors seamlessly. This brush has a unique texture that enhances the watercolor look, with the edges almost replicating the effect of dried watercolors. Since it operates with a multiply blending mode (unless the brush settings are altered), you can achieve an impressive color layering and blending capabilities with Tamar brush.
Gouache for Smoothing and Blending
The gouache brush works wonders for smoothing and blending in your digital watercolor painting. While it is smoother compared to the Morilla and Tamar brushes, gouache still retains a slight color difference between its sides. This brush is perfect for creating subtle transitions and soft gradients to complete your masterpiece.
Utilizing the Eraser for Lightening Filled Areas
Don’t forget to make use of Procreate’s eraser when you need to lighten filled areas in your painting. With the eraser tool, you can easily correct any imperfections or achieve desired effects that enhance the overall appearance of your watercolor-style artwork. Just like a traditional artist, remember that the eraser is your friend when it comes to making adjustments and refining your painting.
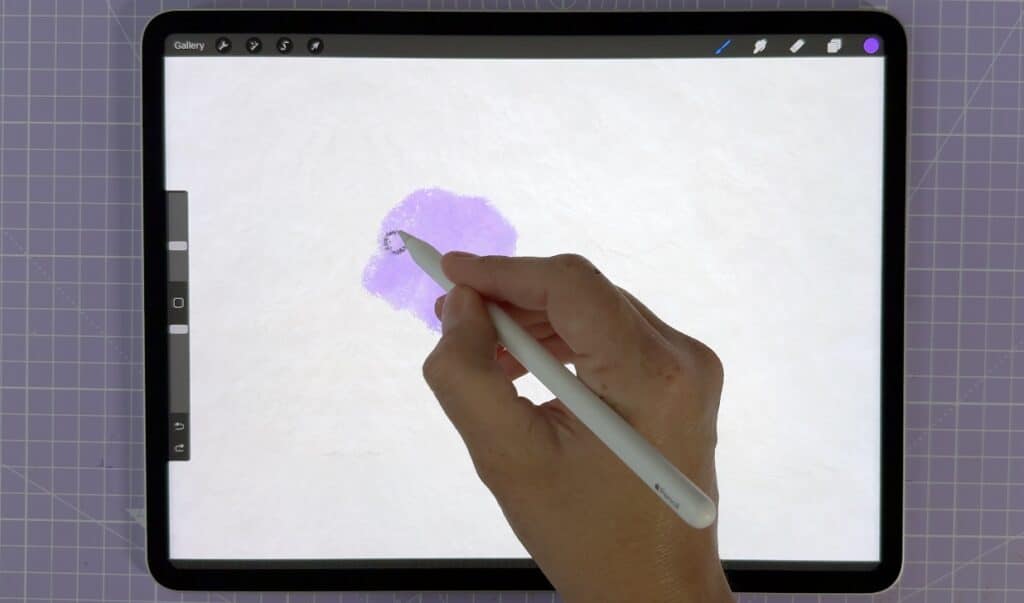
Utilizing the Selection Tool to Craft Shadows and Highlights
To achieve a natural watercolor effect in your digital artwork, you can use the Selection Tool to create shadows and highlights. This versatile tool simplifies the process and makes your artwork come alive. Here’s a quick guide to using it effectively:
- Select the appropriate brushes: When working with watercolor-style paintings, it’s crucial to select the right brushes. For laying down general colors, consider using the Morilla brush. You can then build up shadows and blend with the Tamar brush. To smooth and blend colors more effectively, opt for the Gouache brush.
- Work with layers: To create a more natural, traditional watercolor appearance, take advantage of layers. Start with a base layer and then add highlights and shadows on separate layers. These can later be blended and adjusted to suit your desired outcome.
- Utilize blending modes: Blending modes are vital when working with shadows and highlights. Multiply and Linear Burn are popular choices for creating a natural media feel, while Overlay and Soft Light work well for incorporating highlights.
- Apply pressure sensitivity: To create a variety of stroke thicknesses and opacities, use brushes with pressure sensitivity. This allows you to achieve a more dynamic range of color, mimicking the effects of a traditional watercolor painting.
- Employ the Selection Tool: The Selection Tool allows you to create selections based on specific shapes and areas in your artwork. Use this feature to target areas where you want to add shadows and highlights, without affecting other parts of your painting. Simply select the desired area and paint on a new layer to get the desired effect.
- Enhance edges with Tinderbox and Syrup brushes: Using the Tinderbox brush, you can add texture and a natural edge to the shadows and highlights, giving your artwork a more traditional watercolor finish. The Syrup brush can be utilized to add smooth, gel pen-like highlights for added depth and dimension.
By following these steps and utilizing the Selection Tool to create shadows and highlights, you can elevate your digital watercolor paintings to new heights, achieving a more authentic and naturalistic look.
Watch my other tutorials HERE.
Other articles you may enjoy…
Get Groovy with a Procreate 70s Color Palette
5 Free Skin Tone Collections | Skin Color Palette Procreate
18 Free Color Palettes for Procreate
FREE Procreate Coloring Pages to Help You De-stress and Relax


