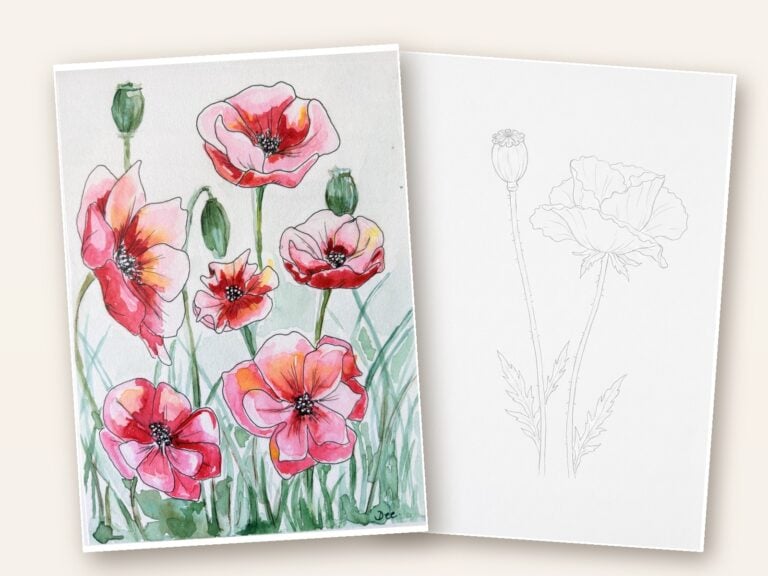
You found a template you loved, you had good paper in the drawer, and what came out of the printer was a shrunken, blurry version with a white border nobody asked for. Or worse, the printer made a noise like a cross goose and ate the sheet entirely.
Printing on watercolour paper is one of those things that feels like it should just work, and then doesn’t. The good news is that it is almost never your printer being broken. It is nearly always one of about seven settings, and once you have changed them you never have to think about them again.
I have put together a free two-page printing cheat sheet with all of those settings on one page and a paper weight chart on the other. Pop your email into the box below and it will land in your inbox, then let’s go through why this goes wrong and how to fix it for good.
Can You Print on Watercolour Paper at Home?
Yes, and far more easily than most people expect. A standard home inkjet will happily print on watercolour paper up to somewhere around 300gsm, as long as you feed it correctly and tell it what it is printing on.
The confusion comes from the fact that printers are built and sold around one assumption: that you are printing on 80gsm copy paper. Every default setting is tuned for that. Watercolour paper is two to four times thicker, considerably more textured, and often coated with sizing to stop water soaking straight through. None of that is a problem. It just means the defaults are wrong for you, and nothing on the screen tells you so.
Laser printers are a different story. The fuser heats the paper to bond the toner, and heavy cotton paper can scorch, curl or jam. If you have a laser printer, print your templates on ordinary paper and trace them onto watercolour paper instead. There is a whole section on tracing further down, and honestly it is what I do most of the time anyway.
Which Printer Settings Do You Actually Need to Change?
Seven of them, and only two really matter. If you change nothing else, change the paper type and turn off Fit to Page.
Set the paper type to Matte Photo Paper
This is the single most important setting and the one almost nobody changes. When your printer thinks it is printing on plain paper, it lays down a thin, fast-drying amount of ink and pulls the sheet through quickly. On textured watercolour paper that gives you pale, patchy lines that look slightly out of focus.
Tell it Matte Photo Paper instead and it slows down, lays more ink, and gives the sheet longer to absorb it. Your lines come out crisp and properly black. If your printer does not offer Matte Photo Paper, look for Heavyweight, Cardstock, Thick Paper or Fine Art. Any of those will do the same job.
Turn off Fit to Page and set scaling to 100%
This is the “why did it print tiny” culprit. Fit to Page is usually on by default, and it shrinks your template by three or four percent to guarantee a printable margin. That does not sound like much until you are printing a card front that has to fold to a specific size, or a set of tags that need to match the envelopes you already bought.
Find the scaling option, set it to 100% or Actual Size, and turn off anything called Fit to Page, Shrink to Fit or Scale to Fit. My templates are all built at A4 with a proper margin already designed in, so they do not need shrinking. If you are in the US, print A4 at 100% onto Letter and you will lose nothing but a strip of empty margin.
The other five
- Print quality: High or Best. Draft mode saves ink by printing fewer dots, which on textured paper reads as a grey, broken line.
- Borderless: off. Borderless printing needs the printer to grip the sheet differently and heavy paper often slips. You do not need it, because the margin is part of the design.
- Paper source: rear tray or manual feed. More on this below, because it is the thing that stops jams.
- Colour handling: let the printer manage colour. Unless you have calibrated a profile yourself, the printer’s own guess is better than a half-configured one.
- Two-sided printing: off. Duplex units bend the sheet through a tight turn. Heavy paper will not make it.
Why Does Watercolour Paper Keep Jamming the Printer?
Almost always because of how the paper went in, not what the paper is.
Most printers have two ways to load paper. There is a cassette that slides in underneath, which curves the sheet around a tight bend on its way through, and there is usually a rear tray or a manual feed slot that takes an almost straight path. Thick paper needs the straight path. Feeding 250gsm through the bottom cassette is asking it to bend around a corner it physically cannot manage, and that is your jam.
Four more things that cause jams, in the order I see them:
- Two sheets at once. Watercolour paper sticks to itself. Load one sheet at a time, every time. It is slower and it always works.
- Curled paper. Paper that has been sitting in a pad or a humid room curls, and a curled edge catches. Press the sheets flat under a heavy book for an hour first.
- Loose paper guides. If the guides are not snug against the edges the sheet goes in at an angle and skews or catches halfway through.
- Genuinely too heavy. Over about 300gsm, most home printers simply stop. That is not a fault, it is the mechanism.
What Weight of Watercolour Paper Should You Use?
It depends entirely on what you are going to do to the page afterwards, and matching the two is most of the battle.
- 120 to 160gsm is for practice sheets, line work and anything you are going to trace. It feeds through any printer without a thought. It will cockle if you flood it with water, but for pencil, pen and light colour it is perfect and cheap enough to use freely.
- 190 to 200gsm handles light washes and is my usual choice for colouring pages that might get a bit of paint.
- 230 to 250gsm is the sweet spot for cards and most printable templates. It feels substantial, it takes a proper wash, and it still feeds reliably through a rear tray.
- 300gsm is real painting paper, and it is where most home printers reach their limit. Some manage it beautifully. Some refuse. Test one sheet before you commit a stack.
- Above 300gsm is for painting, not printing. Trace onto it instead.
One more thing worth knowing: cold-pressed paper has a visible texture and hot-pressed is smooth. Hot-pressed gives you sharper printed lines, so if you want a crisp template to paint over, reach for that. Cold-pressed is lovelier to paint on. I use cold-pressed for anything I will actually paint, and put up with slightly softer printed lines.
How Do You Test a Template Before Printing the Whole Pack?
Print page one on ordinary copy paper first. Every time. It costs you one sheet of the cheapest paper in the house and it catches everything.
Then hold that test print against a window with a sheet of your watercolour paper behind it, and check three things. Is anything important sitting within about 10mm of an edge, where your printer’s unprintable margin will clip it? Are the lines crisp rather than fuzzy or doubled? And did the page come out the size it should be, rather than slightly shrunk?
If all three are fine, load your good paper and print for real. If the size is wrong, Fit to Page is still on somewhere. If the lines are fuzzy, the paper type is still set to plain.
Why Does the Ink Sit on Top and Bead Up?
That is sizing doing its job, and it is not a fault in the paper or the printer.
Watercolour paper is treated with sizing so that paint sits on the surface and moves around instead of soaking straight in like blotting paper. That is exactly what you want when you are painting. It is slightly inconvenient when you are printing, because inkjet ink is water-based and the paper resists it in the same way.
Switch to the Matte Photo Paper setting, which slows the print and gives the ink time to key into the surface. Then leave the sheet completely alone for a full minute before you touch it. Most smudged prints are not printer problems, they are impatience. If it still beads after both of those, the paper is very heavily sized, and a cold-pressed sheet will usually take the ink better than a hot-pressed one.
When Should You Trace Instead of Printing?
Whenever the paper is too heavy, your printer is a laser, or you simply want the finished piece to have no printed lines on it at all.
Tracing is not cheating and it never has been. Print the template on ordinary paper, tape it to a window in daylight or pop it on a lightpad, lay your good watercolour paper over the top and trace lightly in pencil. You end up with a soft graphite guide you can lift with a kneadable eraser afterwards, and the painting is entirely yours.
It is also the only way to use 300gsm and above, which is the paper most people actually want to paint on. If you have been avoiding your nicest paper because it will not go through the printer, this is the answer.
Where Can You Find Templates Worth Printing?
Now that your printer is behaving, here are a few of mine to try it on. The free pumpkin watercolour card template is a good first test because it has to fold accurately, so it tells you immediately whether your scaling is right. If you would rather start somewhere gentler, these easy watercolour ideas for beginners come with printable templates and no expectations.
For something to paint properly, the dahlias walkthrough has line-art sheets that look lovely on 230gsm. The free printable gift tags are the best small-scale test I know, because tags show a scaling error instantly. And if the whole idea of printing something and then not painting it perfectly makes you anxious, read this one about wonky watercolour first. Wonky is the point.
Frequently Asked Questions
Can I print on watercolour paper with a laser printer?
Better not to. The fuser heats the sheet to bond the toner, and heavy cotton paper can scorch, curl or jam. Print onto ordinary paper and trace instead.
Will printer ink run when I paint over it?
Inkjet ink is water-based, so it can bleed a little under a wet wash. Let the print dry for at least an hour, keep your first wash light, and do not scrub over the lines. If you want guaranteed no-bleed, trace in pencil instead.
Why does my template print with a white border?
Every printer has an unprintable margin of a few millimetres. My templates are designed with that margin built in, so the border is normal and nothing is missing. If the border looks bigger than it should, Fit to Page has shrunk the page.
My printer says the paper is too thick. What now?
Check you are using the rear tray rather than the bottom cassette, and that the paper type is set to something heavy. If it still refuses, you are over its weight limit. Drop to a lighter paper or trace.
Do I need A4 or US Letter paper?
Everything I make is A4, because that is what the whole catalogue is built on. If you are in the US, print at 100% onto Letter. Letter is slightly wider and slightly shorter, so you lose a little empty margin at top and bottom and nothing else.
The Short Version
Set the paper type to Matte Photo Paper. Turn off Fit to Page. Feed one flat sheet through the rear tray. Test on copy paper first. That is genuinely most of it, and the cheat sheet above has the rest in a form you can stick to the wall next to the printer.
And if you would like more to print once it is all working, every watercolour template, practice sheet and printable pack I make lives in my Patreon library, with new ones landing every month.
Written by Dee Maene — artist and founder of Artsydee. I make printable templates, watercolour kits and drawing resources to help beginners find their creative confidence. When I’m not painting, I’m probably drinking tea and plotting my next sketchbook page.