
Last Updated on July 26, 2026 by Dee
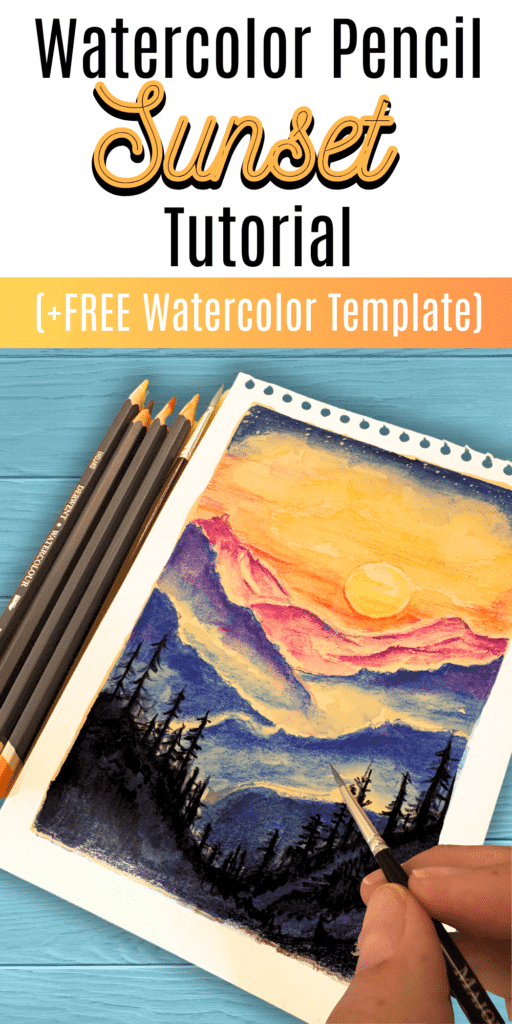
Creating a breathtaking sunset scene with watercolor pencils is fun, relaxing, and perfect for beginners! In this tutorial, I’ll show you how to blend and layer watercolor pencils to achieve a smooth, vibrant sunset effect. Plus, I’ve included a free printable template to help you get started!
Watch the full video tutorial below and follow along step by step. 👇 Grab the free printable watercolor sunset template at the end of this post!
Table of Contents
Watercolor Pencil Art For Beginners: Easy Watercolor Pencil Sunset! Watch the Tutorial ⬆
Before diving into the details, check out my watercolor pencil sunset video tutorial where I demonstrate these techniques step-by-step by creating a bright and colorful toucan using watercolor pencils. The video also includes tips on how to finish your piece with fine liner pens for added structure and detail.
🎨 Materials Needed
Watercolor Pencil Supply List
1. Watercolor Pencils
- Derwent Watercolour Pencils (Set of 24)
- Derwent Inktense Pencils
These high-quality pencils offer rich pigments and smooth application, perfect for achieving vibrant colors in your artwork.
2. Watercolor Paper
- Daler Rowney Aquafine Smooth Watercolour Paper, 300gsm
This heavyweight, smooth paper is ideal for watercolor pencils, providing a sturdy surface that handles water well without warping.
3. Micron Brush Pens & White Gel Pens
- Sakura Pigma Micron Pens
- White Gel Pens
These pens are excellent for adding detailed outlines and finishing touches to your watercolor pencil artwork.
4. Brushes
- Princeton Watercolour Brush (Round, Size 6)
A quality brush for activating watercolor pencils with water, allowing for smooth blending and washes.
To create this watercolor pencil sunset, you’ll need the following supplies:
Sunset Watercolor Pencil Colors
Watercolor Pencils (Derwent Watercolour Pencils)
✔️ Oriental Blue 37
✔️ Ultramarine 29
✔️ Red Violet Lake 24
✔️ Dark Violet 25
✔️ Lemon Cadmium 2
✔️ Middle Chrome 8
✔️ Spectrum Orange 11
✔️ Indigo 36
✔️ Magenta 22
✔️ Black
Other Art Supplies
✔️ 300gsm watercolor paper (thicker paper prevents warping)
✔️ Round watercolor brush (for activating the colors)
✔️ Jar of clean water
✔️ Tissue or paper towel (for lifting highlights)
✔️ Free printable sunset template (Download at the end of this post!)
🖌 Step-by-Step Watercolor Pencil Sunset Tutorial
Step 1: Prepare Your Outline
- Print the free template and lightly trace it onto watercolor paper.
- If drawing freehand, sketch a simple horizon line and cloud shapes to guide your painting.
Step 2: Choosing & Layering Colors
- Start with the lightest colors first, such as Lemon Cadmium and Middle Chrome, at the bottom of the sky.
- Gradually blend into Spectrum Orange and Red Violet Lake in the middle.
- Use Ultramarine, Oriental Blue, and Indigo for the top part of the sky to create depth.
- Layer colors dry first, applying them lightly before adding water.
Step 3: Activating the Colors with Water
- Use a round brush with a small amount of water to blend the pigments smoothly.
- Work in small sections, blending each area before moving on.
- Tip: For a smoother transition, use gentle circular motions when applying water.
Step 4: Adding Depth & Details
- Let the first layer dry completely before adding a second layer for richer colors.
- Use a damp brush to lift some areas of color, creating soft cloud effects.
- Add Indigo or Dark Violet along the horizon to enhance contrast.
💡 Pro Tips for a Stunning Sunset Effect
✅ Less water = more texture. Use a dry brush for a grainy, artistic effect.
✅ More water = smoother blends. Add extra water to soften transitions between colors.
✅ Layering is key! Once dry, add another layer of watercolor pencil to deepen the vibrancy.
✅ Try lifting highlights. Use a tissue to blot areas where you want lighter clouds or reflections.
Different Ways to Use Watercolor Pencils
Watercolor pencils are fun and easy to use and can be used on many surfaces. They are made with softcore in a wide range of beautiful hues.
The only drawback is that they are not always lightfast and don’t last as long as traditional watercolor paints. For that reason, if you are looking to buy watercolor pencils, you need to choose a good quality pencil.
You can use a set of watercolor pencils to create a painting with lots of details and expressive lines. Unlike watercolor paints, watercolor pencils are easy to control and you can keep your lines sharp by keeping your pencils sharp!
Watercolor pencils have a wide range of uses. The colors of these pencils can be subtle or dramatic. They are great for swatching and can be used to draw fine details and create beautiful, vibrant pictures. You can also use them to create bold colors and highlight specific areas of your painting. You can even try blending different colors to create different tones and contrasts.
- Just Coloring Like Regular Colored Pencils
Use them dry for precise lines, textures, and details, just like you would with standard colored pencils. - Dry Coloring Followed by a Water Wash
Lay down your colors dry and then use a damp brush to activate and blend the pigment into a watercolor effect. - Dipping the Pencil in Water
For a bolder and more saturated look, dip the pencil tip into water before coloring. - Removing Pigment from the Pencil Tip
Use a wet brush to lift pigment directly from the pencil tip, then paint as you would with traditional watercolor. - Dipping Pencil in Water for Delicate Effects
Create soft washes by lightly dipping the pencil in water and using it to color on damp paper. For inspiration, check out these fun drawing ideas.
Save this pin for future inspiration! 👇🏻
🎨 Want more free printables? Browse my Free Printables Library — over 400 free templates, coloring pages, drawing guides, and creative resources all in one place!
Try Out These Watercolor Pencil Techniques…
Watercolor pencils are versatile tools that combine the control of colored pencils with the blending capabilities of watercolors. Here are seven techniques you can use to enhance your watercolor pencil artwork:
- Dry on Dry: Start by using the watercolor pencils dry on dry paper, just like regular colored pencils. This technique allows for precise detailing and control over your drawing. After laying down the colors, you can then use a wet brush to activate the pigments and blend the colors.
- Wet on Dry: Apply a wet brush directly to the pencil tip to pick up the pigment, then paint onto dry paper. This method gives a watercolor effect with the convenience of a pencil, providing more control over the amount of pigment and water used.
- Dry on Wet: Draw on wet paper with a dry watercolor pencil to achieve soft, diffused lines that bleed into the paper, creating a unique texture and a more painterly effect.
- Wet on Wet: Wet the paper first and then apply the watercolor pencil. This will create intense, fluid strokes with colors that blend into one another seamlessly, ideal for backgrounds and washes.
- Layering: Layering is a technique where you apply one color over another. You can do this either with the pencil dry or by layering wet over dry for varied effects. This technique allows for depth and complexity in your color mixing.
- Scumbling: Use a light, circular motion to apply the pencil to the paper, creating a textured, uneven application of color. When water is added, this can create a granulated effect that adds interest to your piece.
- Grating Pigments: You can grate the tips of your watercolor pencils to create a powder, which you can then sprinkle onto your paper and blend with water. This technique is great for creating an uneven, speckled effect or for adding a burst of color.
Each of these techniques can be used alone or in combination to create a wide range of effects in your watercolor pencil artwork. The best way to get comfortable with these methods is to practice and experiment with each one.
Grab the Watercolor Pencil Sunset Template
👉 Pop your email into the box near the top of this post and I’ll send these straight to your inbox — free!
Love This Watercolor Pencil Worksheet? Get Even More Exclusive Creative Goodies on My Patreon! 🎨
If you’re enjoying these free printables, why not join my Artsydee Patreon community? As a member, you’ll gain access to exclusive Procreate tutorials, watercolor lessons, and tons of printables like this one—delivered to you monthly (and sometimes even twice a month!). Plus, you’ll get sneak peeks at upcoming projects and have a say in what content I create next. ✨
Join today and unlock premium resources to take your creativity to the next level!
Other articles you might enjoy…
Grab our FREE watercolor stencils here!
Looking for the best colored pencils?
How to use watercolor on canvas
Looking for the best watercolor sketchbook?
The best tape for watercolor paper
21 Gorgeous Gifts for Watercolor Artists
7 Mesmerizing Watercolor Galaxy Ideas
13 Awesome Watercolor Backgrounds
🎬 Love video tutorials? Subscribe to my YouTube channel for weekly art tutorials and creative inspiration!

Frequently Asked Questions
Loved painting this sunset? My Patreon reference sets add colour-recipe cards so you can nail those blended skies every time.
See the premium sets →What supplies do I need for this watercolour pencil sunset?
A good set of watercolour pencils is the main thing — I used Derwent Watercolour pencils (and Inktense are lovely for extra punch). Pair them with a smooth, heavyweight paper like Daler Rowney Aquafine 300gsm so it doesn't warp when you add water, a round brush (a Princeton size 6 is perfect) to activate the colour, a jar of clean water, and a tissue for lifting highlights. A
What order do I layer the colours for a sunset sky?
Work light to dark, bottom to top. Start with your lightest warm colours — lemon and a middle chrome yellow — low in the sky, blend up through spectrum orange and a red violet in the middle, then bring in ultramarine, oriental blue and indigo across the top for depth. Lay all the pencil down dry first, applying it lightly, before you touch any water to it.
How do I activate watercolour pencils with water without it going muddy?
Use a round brush with just a small amount of water and work in small sections, blending each area before moving to the next. Gentle circular motions give the smoothest transitions. Let the first layer dry completely before adding another — layering dry pencil over a dry wash is how you build up rich, vibrant colour without stirring it into mud.
What's the trick to getting different effects from watercolour pencils?
It mostly comes down to water. Less water gives you a grainy, textured look — almost like dry colouring — while more water softens everything into smooth blends. You can also dip the pencil tip straight into water for bold, saturated marks, lift pigment off the tip with a wet brush like traditional paint, or blot with a tissue to pull back highlights for soft clouds.
How do I download the free sunset template?
Scroll to the free download section at the end of this post and follow the sign-up prompt there — it unlocks the full printable template. Once you're in, all my other free printables across artsydee.com unlock automatically too, so it's a one-time step.
If this free sunset template got you blending, my premium reference sets on Patreon go further — finished paintings with colour-recipe cards for skies, water and more, so your mixes are always spot on. From £14 (~$18).
See the premium sets →
Excelente! Muchas gracias!