Last Updated on October 16, 2024 by Dee
Are you looking to fill your sketchbook with vibrant watercolor creations? Watercolor sketching is a wonderful way to capture the world around you and express your creativity. With a portable set of paints and a sketchbook, you can bring your artistic vision to life anywhere inspiration strikes. Grab the FREE Painting Templates at the end of this post!
Table of Contents
50+ Sketch Book Watercolor Ideas:
Exploring different watercolor ideas in your sketchbook can help you improve your skills and discover new techniques. From quick color studies to detailed landscapes, the possibilities are endless. You’ll find that regular practice not only enhances your artistic abilities but also provides a relaxing and enjoyable creative outlet. Let’s dive into some exciting watercolor ideas to get your creative juices flowing and fill those blank pages with beautiful artwork.
1) Sunlit Forest Path


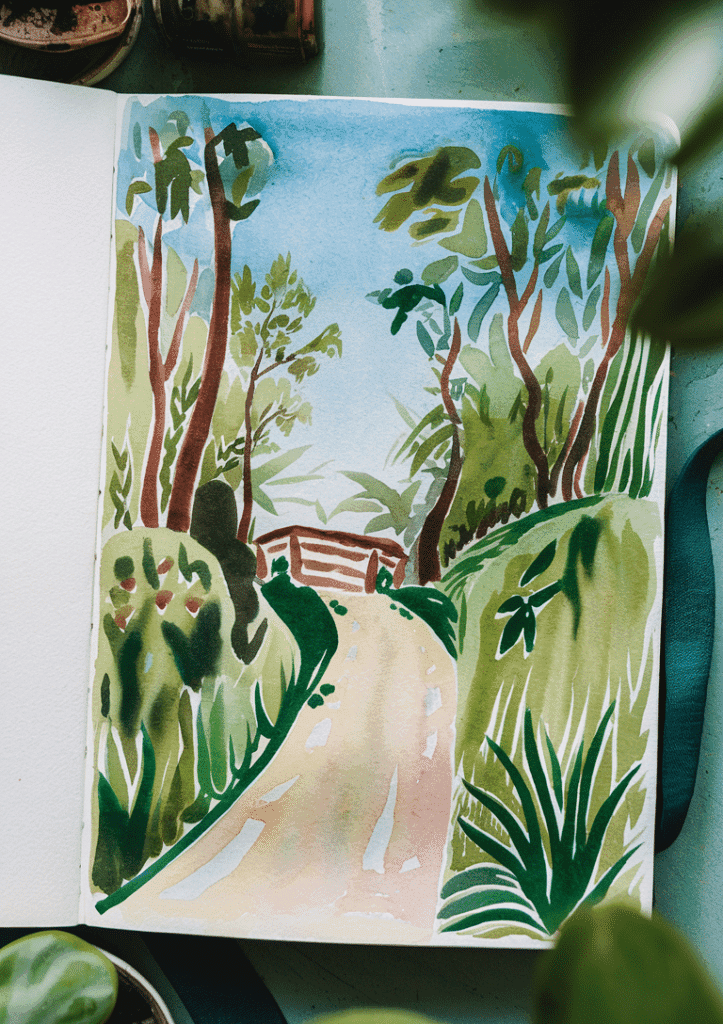
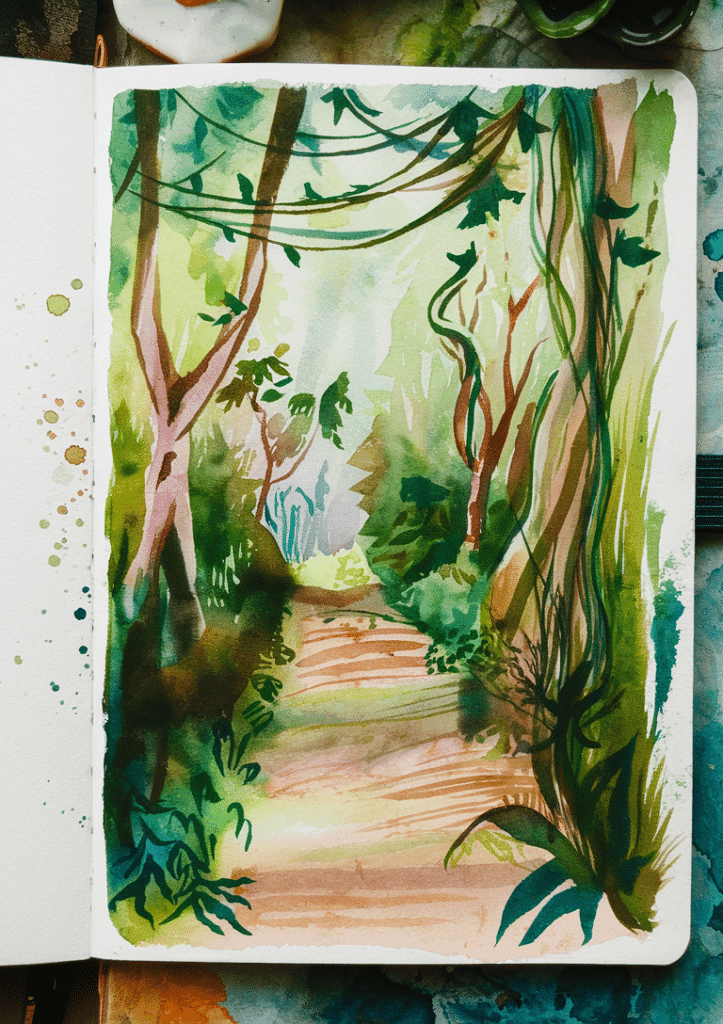
Imagine capturing the enchanting beauty of a sunlit forest path in your sketchbook. This watercolor idea brings nature’s warmth and serenity to life on paper.
Start by lightly sketching the basic elements of your forest scene. Include a winding path, tall trees, and dappled sunlight filtering through the canopy.
Watercolor techniques can help you create the illusion of sunlight. Use warm yellows and soft oranges to paint the areas where sunlight touches the path and tree trunks.
For the trees and foliage, blend various shades of green. Add darker tones for shadows and lighter hues for sun-kissed leaves. This contrast will give depth to your forest scene.
Don’t forget to leave some white spaces on your paper. These areas will represent the brightest spots where sunlight hits, adding a magical glow to your painting.
To enhance the forest atmosphere, you can add small details like fallen leaves on the path or wildflowers peeking through the undergrowth. These touches will bring your sunlit forest path to life in your sketchbook.
2) Splashing Rain Puddles


Capturing the essence of rain puddles in your sketchbook can be a delightful watercolor exercise. Start by sketching the basic shapes of puddles on your paper, varying their sizes for visual interest.
Use masking fluid to preserve highlights where raindrops hit the puddles. This technique will create a captivating splash effect once you remove the fluid later.
Mix different shades of blue and gray to represent the sky’s reflection in the puddles. Apply these colors with a wet-on-wet technique for a soft, blended appearance.
Add depth to your puddles by painting darker tones around the edges. This will give them a more realistic, three-dimensional look.
Don’t forget to include reflections of nearby objects like trees, buildings, or street lamps. These details will bring your rain puddle sketch to life.
Finally, remove the masking fluid and add white paint or gouache for those eye-catching splashes and ripples. Your watercolor rain puddles will now have a dynamic, energetic feel that captures the magic of a rainy day.
3) Starry Night Sky
Capturing the magic of a starry night sky in your sketchbook can be a delightful watercolor project. You can create a dreamy galaxy using simple techniques inspired by Van Gogh’s famous painting.
Start by wetting your paper and applying deep blue and purple hues for the background. While it’s still damp, sprinkle salt to create a twinkling effect.
Next, add layers of lighter blues and purples to create depth. Once dry, use a small brush or toothbrush to splatter white paint for stars.
For a focal point, consider adding a glowing moon to your composition. Paint a circle with yellow or white, then blend outwards for a soft glow.
You can also experiment with different night sky scenes. Try painting the Northern Lights or a galaxy swirl for variety in your sketchbook.
Remember, the key to a stunning starry night is layering and patience. Let each layer dry before adding more details for the best results.
4) Moonlit Mountains


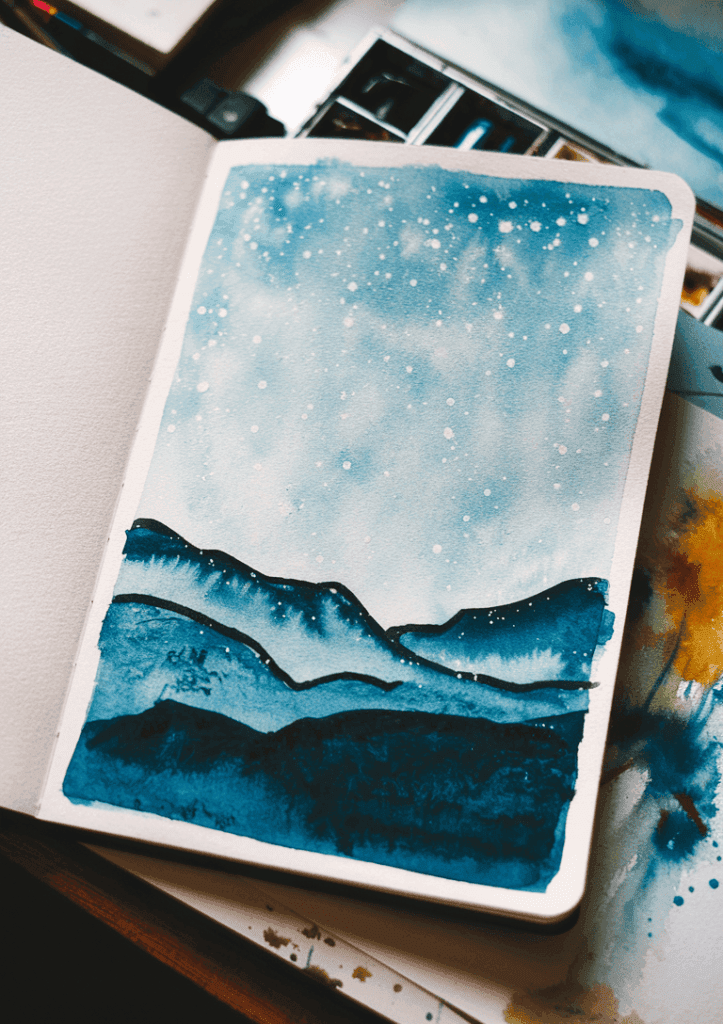

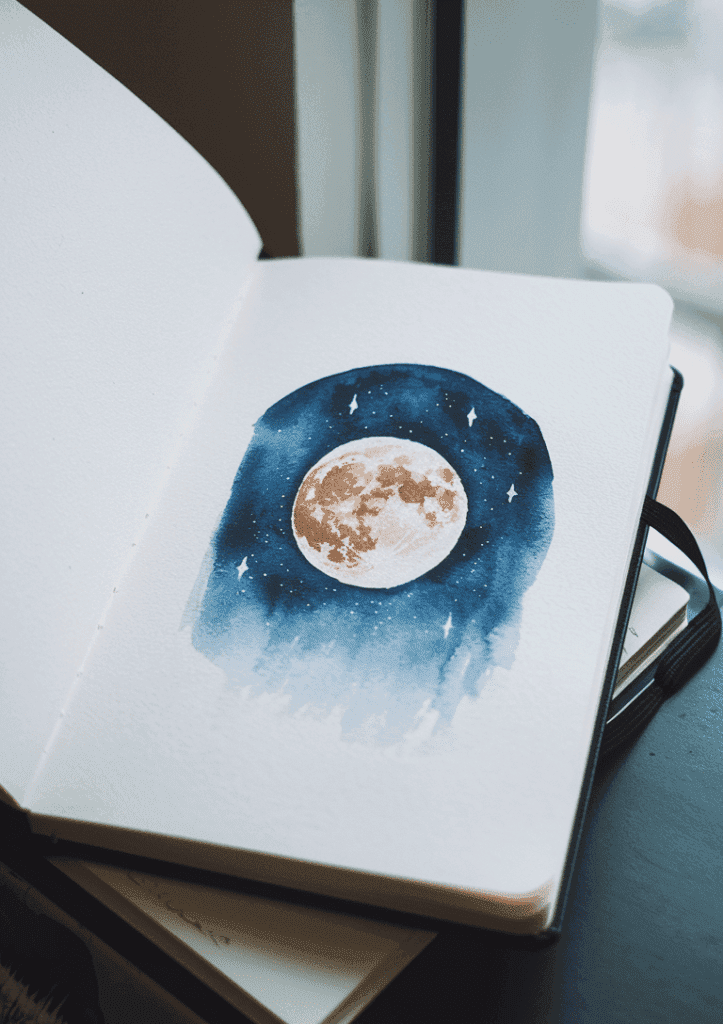
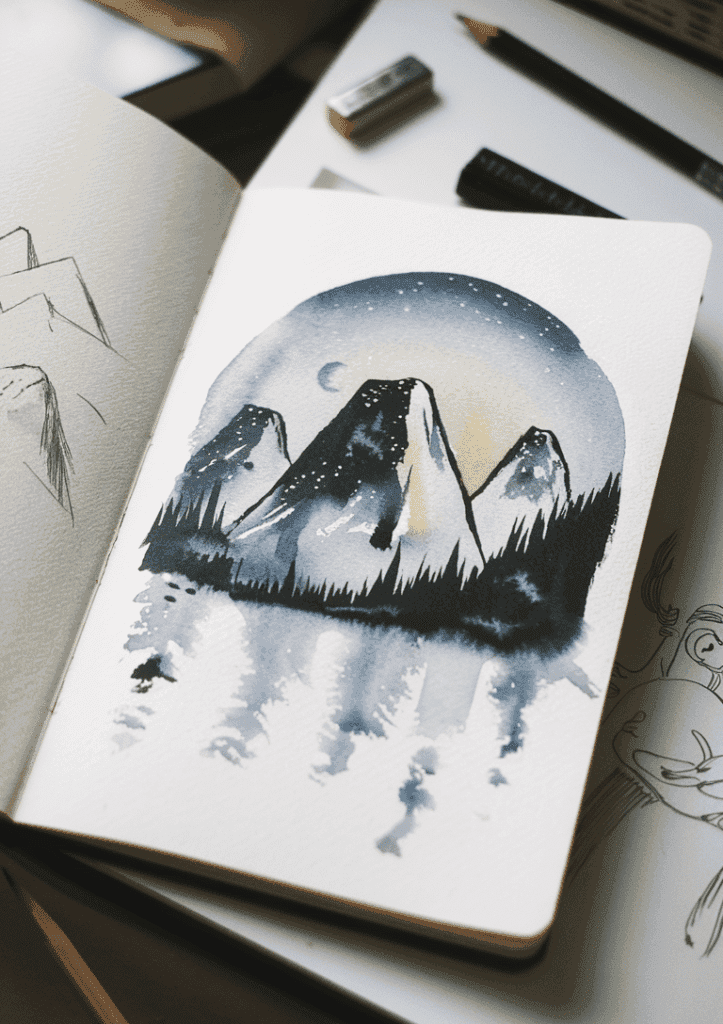
Painting moonlit mountains in your watercolor sketchbook can create a mesmerizing and atmospheric scene. Start by sketching the mountain silhouettes lightly with a pencil.
Choose a limited color palette, focusing on cool blues and purples for the night sky. Mix in some dark grays for the mountains themselves.
Begin with a wash of blue for the sky, gradually darkening it as you move upwards. Leave some areas lighter to suggest clouds or moonlight peeking through.
Add depth to your mountains by layering darker shades at the base and lighter tones towards the peaks. This creates the illusion of distance and moonlight hitting the slopes.
Don’t forget to include a bright, circular moon as your focal point. You can achieve this by leaving the paper white or using a touch of yellow.
For added interest, try incorporating reflections in a lake at the mountain’s base. Use horizontal brush strokes to suggest still water.
Experiment with salt or splattering techniques to create a starry sky effect. This adds texture and enhances the night-time atmosphere of your sketch.
5) Arctic Icebergs

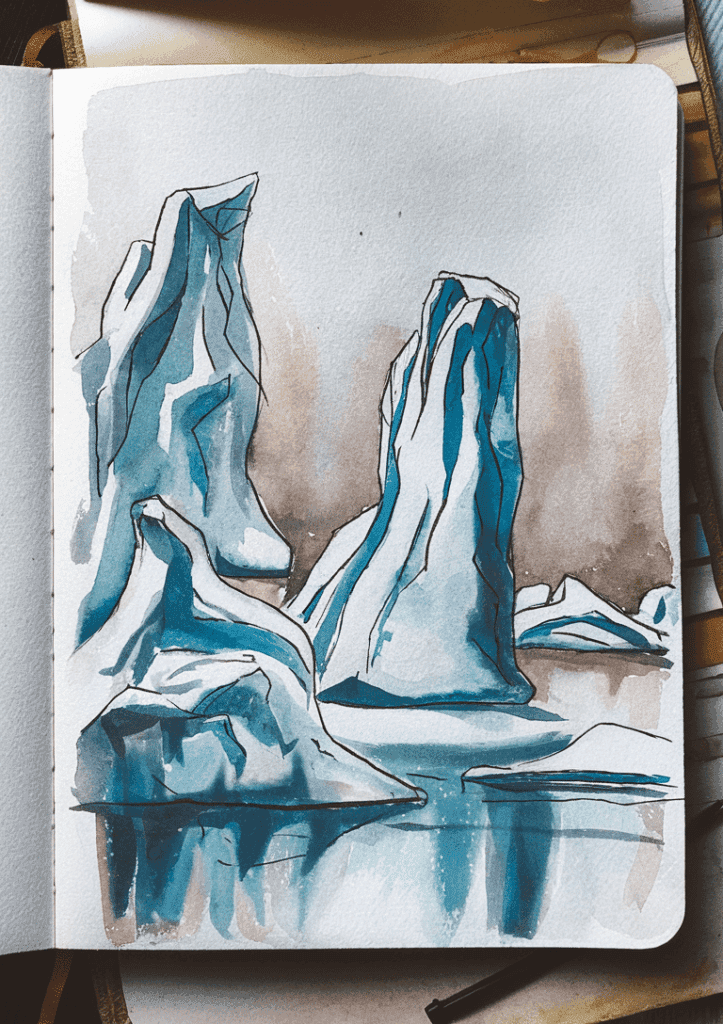


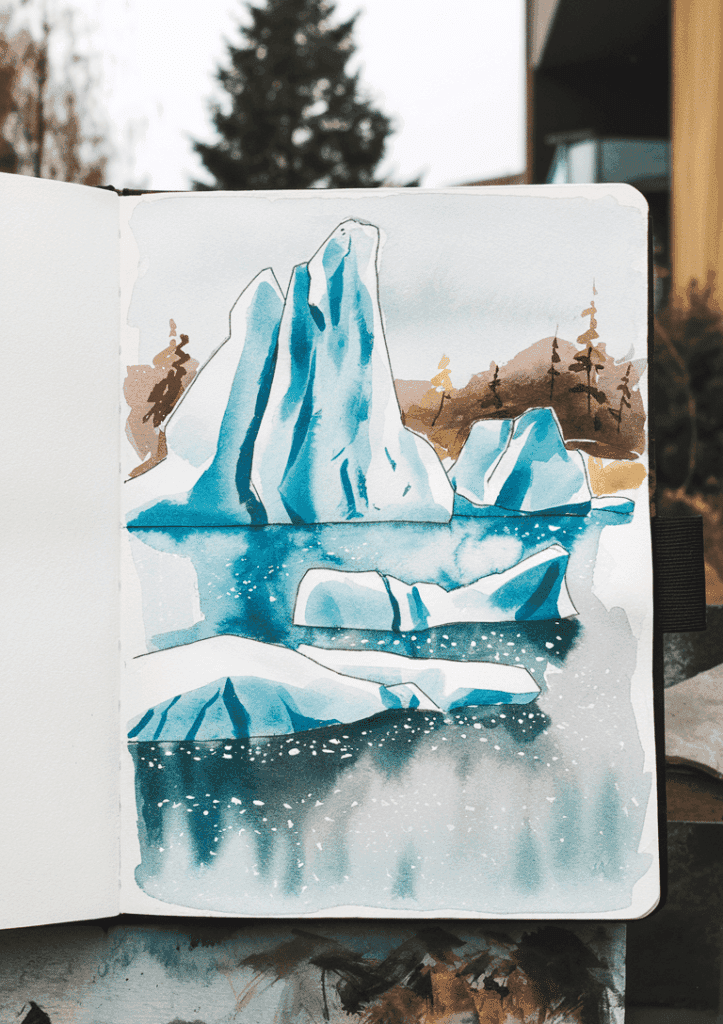
Arctic icebergs offer a stunning subject for your watercolor sketchbook. Their majestic shapes and cool hues can inspire breathtaking paintings.
Start by sketching the basic forms of the icebergs. Observe how they rise from the water, creating unique silhouettes against the sky.
Watercolor techniques can help you capture the translucent quality of ice. Use light washes of blue and white to build up layers and create depth.
Don’t forget to include reflections in the water. A gentle wash of blue with ripples can give your painting a sense of movement and realism.
Add details like cracks and shadows to bring your icebergs to life. Small touches of darker blue or purple can create interesting textures and depth.
Consider the lighting in your scene. Soft pinks and purples can suggest a Arctic sunset, while cool blues and greys can depict a cloudy day.
Remember, you don’t need to paint every detail. Sometimes, a few well-placed brushstrokes can suggest the grandeur of these ice giants more effectively than intricate details.
6) Desert Dunes at Twilight
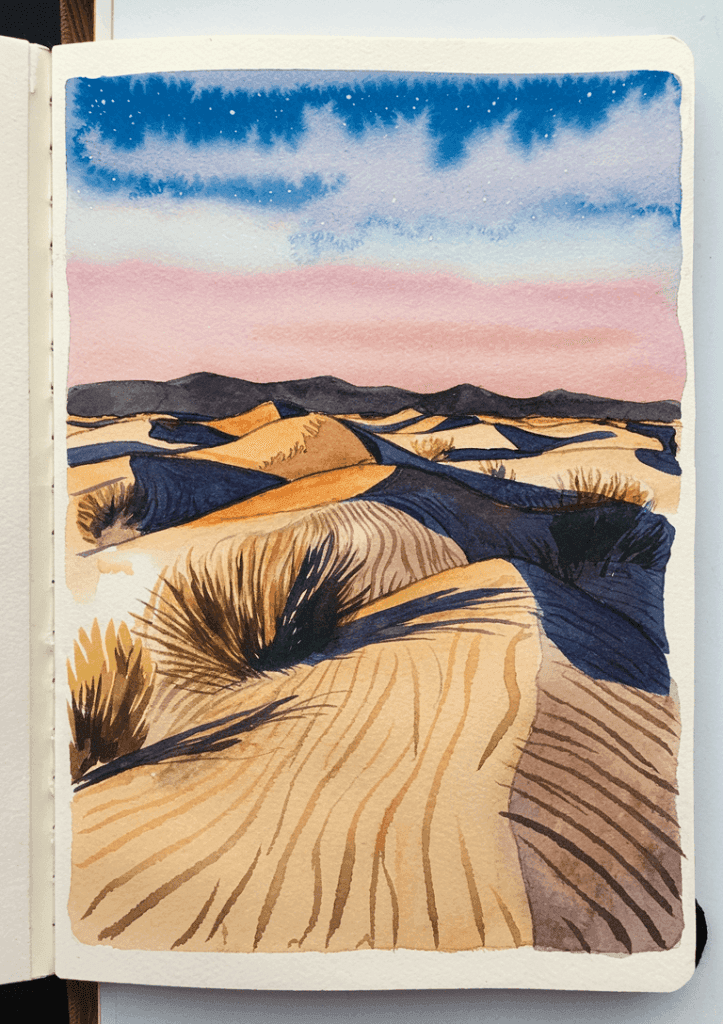
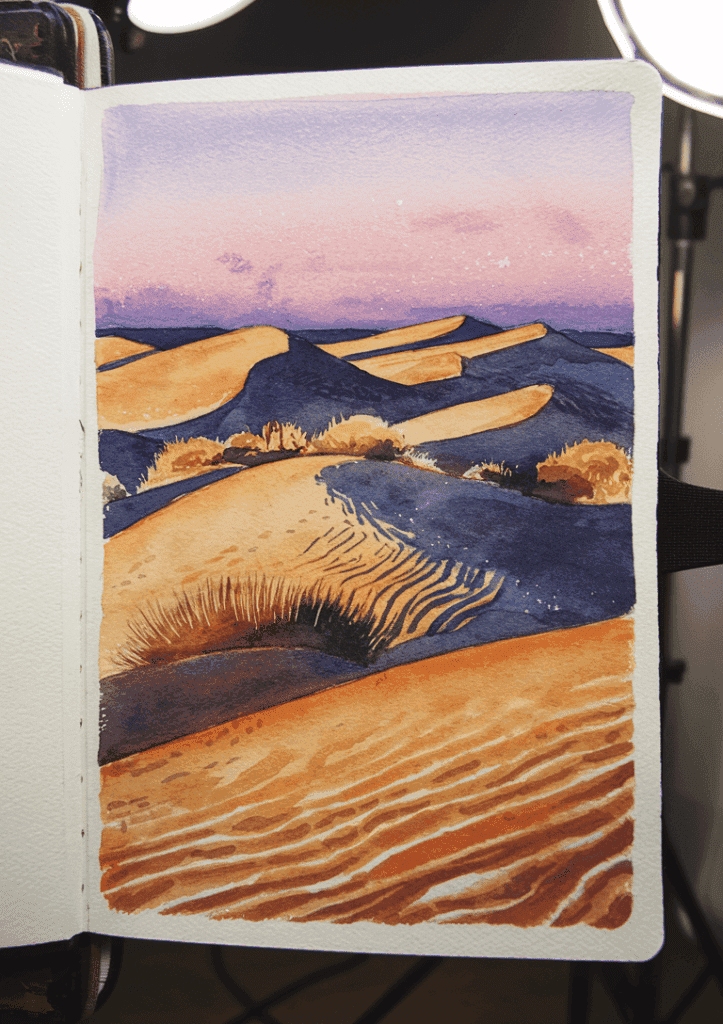
Capture the mesmerizing beauty of desert dunes as the day fades into night. Begin by sketching the gentle curves of the sand dunes with soft pencil strokes. Focus on creating a sense of depth and scale in your composition.
As you transition to watercolors, start with a warm wash for the sky. Use hues of pink, orange, and purple to mimic the fading light. Allow the colors to blend naturally on the paper, creating a soft gradient effect.
For the dunes, use a mix of warm yellows and cool blues to capture the interplay of light and shadow. Pay attention to how the fading sunlight catches the edges of the dunes, creating a golden glow.
Add depth to your scene by introducing darker tones in the foreground. This will help create a sense of distance and draw the viewer’s eye into the painting.
Consider adding small details like desert plants or footprints in the sand to bring your scene to life. These elements can add interest and scale to your watercolor sketch.
Remember to leave some areas of white paper showing through. This technique can create the illusion of light reflecting off the sand, enhancing the twilight atmosphere in your desert scene.
7) Blooming Cherry Blossoms
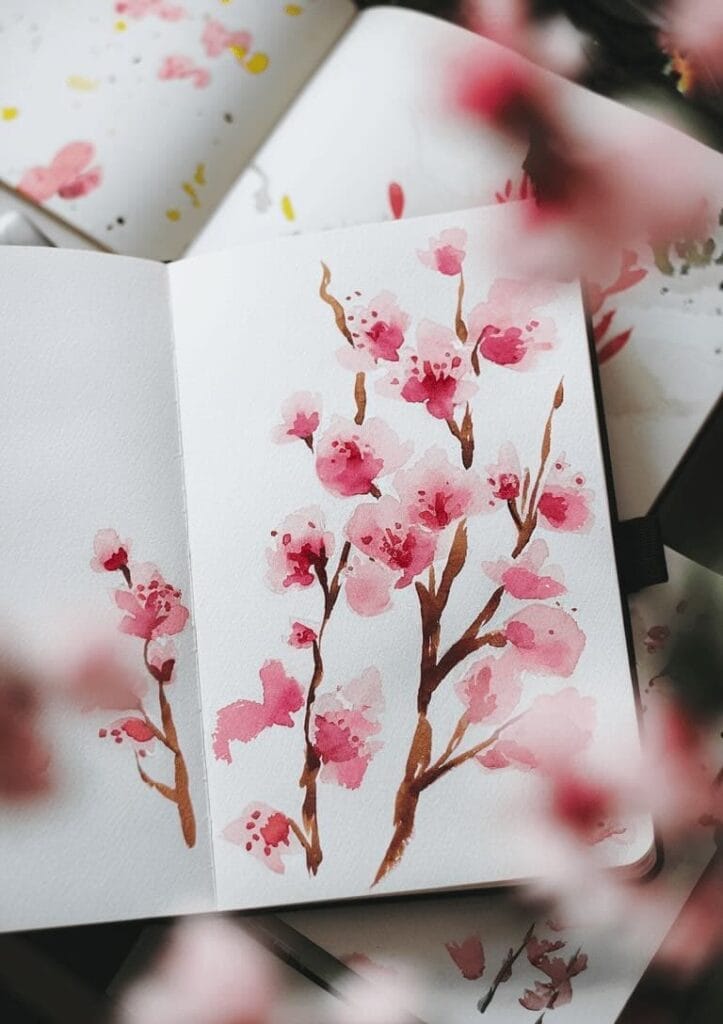


Cherry blossoms are a delightful subject for your sketchbook watercolor ideas. Their delicate pink petals can add a touch of spring to your artwork.
Start by sketching the basic shape of the cherry blossom branches with a light pencil. This will serve as a guide for your watercolor painting.
For the blossoms, use a soft pink watercolor wash. Apply it gently to create the petals, leaving some white spaces for highlights. This technique will give your flowers a natural, ethereal look.
To add depth, mix a slightly darker pink for the centers of the flowers. Dab this color sparingly to create dimension and interest in your painting.
Don’t forget the branches! Use a thin brush to paint delicate brown lines connecting the blossoms. This will ground your painting and make it more realistic.
Experiment with different compositions in your sketchbook. Try a close-up of a single branch or a wider view of multiple trees in full bloom.
Remember, cherry blossoms are fleeting. Capture their ephemeral beauty in your sketchbook to enjoy year-round.
8) Tuscan Vineyard at Sunset


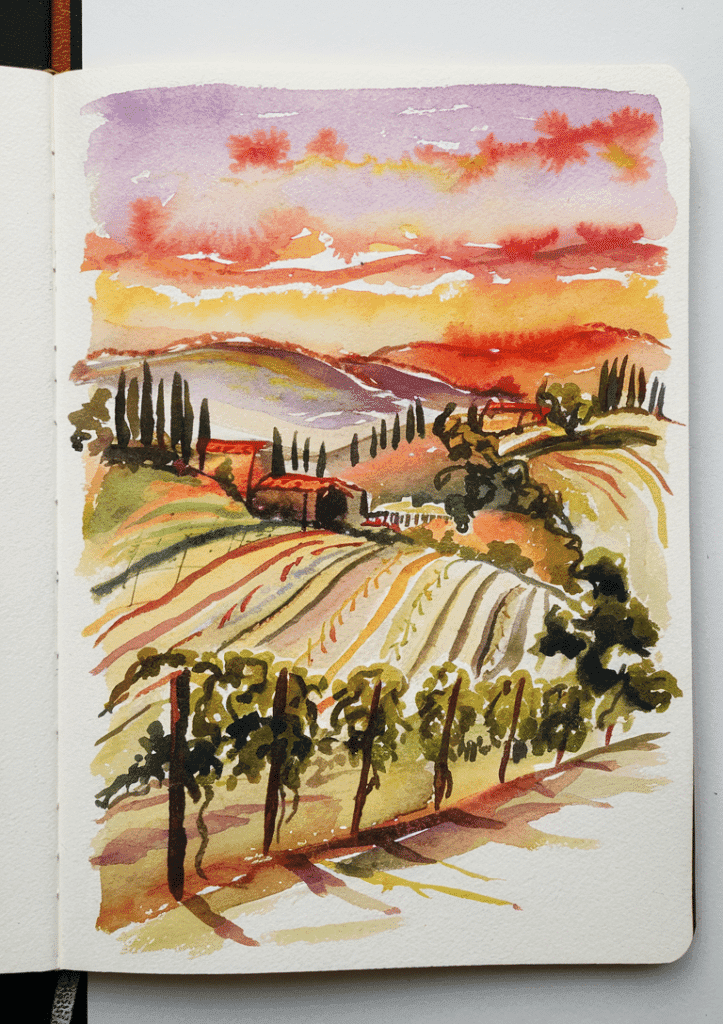
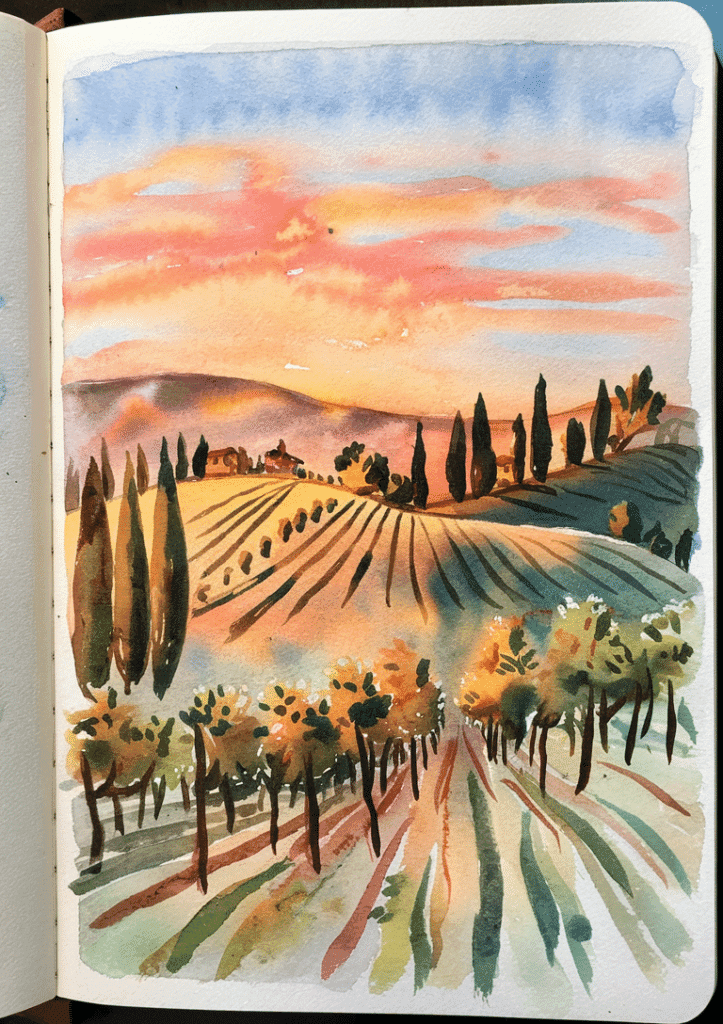
A Tuscan vineyard at sunset offers a stunning subject for your sketchbook watercolor. Picture rows of grapevines stretching across rolling hills, bathed in the warm golden light of the setting sun.
Begin by lightly sketching the landscape’s main elements. Include the undulating hills, vineyard rows, and perhaps a distant villa or cypress trees to add depth and interest to your scene.
For the sky, start with a wash of soft yellows and oranges near the horizon. Gradually blend in pinks and purples as you move upward, creating a vibrant sunset effect.
Use earthy greens and browns for the vineyard, adding touches of gold to capture the sunlight on the leaves. Don’t forget to incorporate shadows, which will be longer and more dramatic at this time of day.
Consider adding a focal point, such as a rustic wooden gate or a charming stone path winding through the vines. These details can help draw the viewer’s eye and create a sense of place.
Experiment with different techniques to create texture. Try dabbing with a sponge for foliage or using salt on wet paint for interesting effects in the sky or on the ground.
9) Venetian Canal Reflections
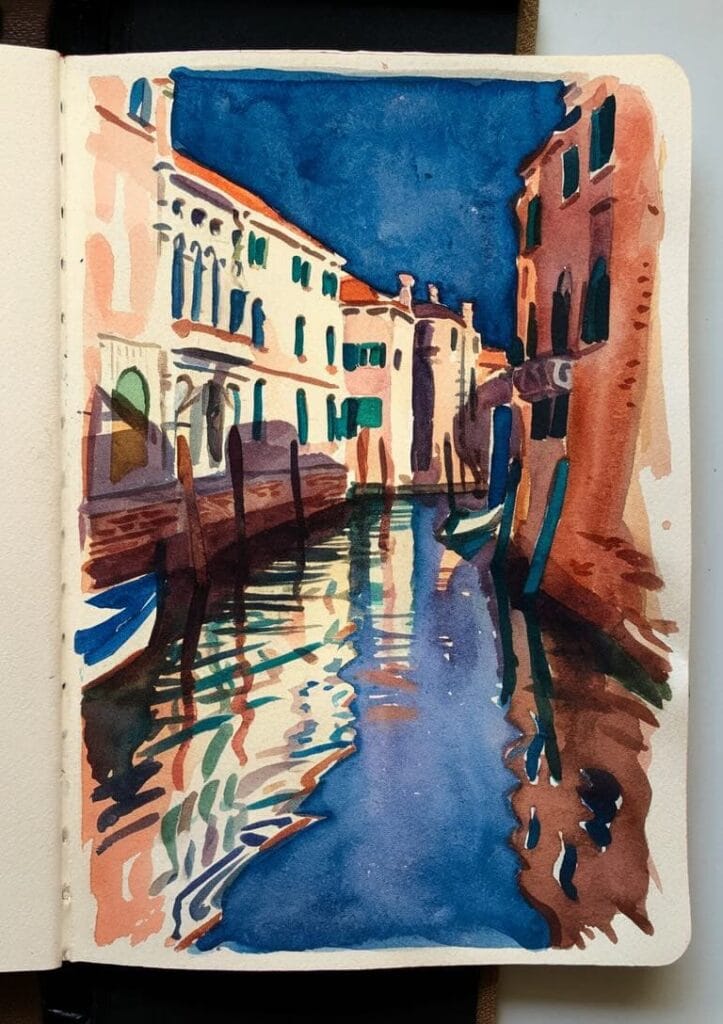
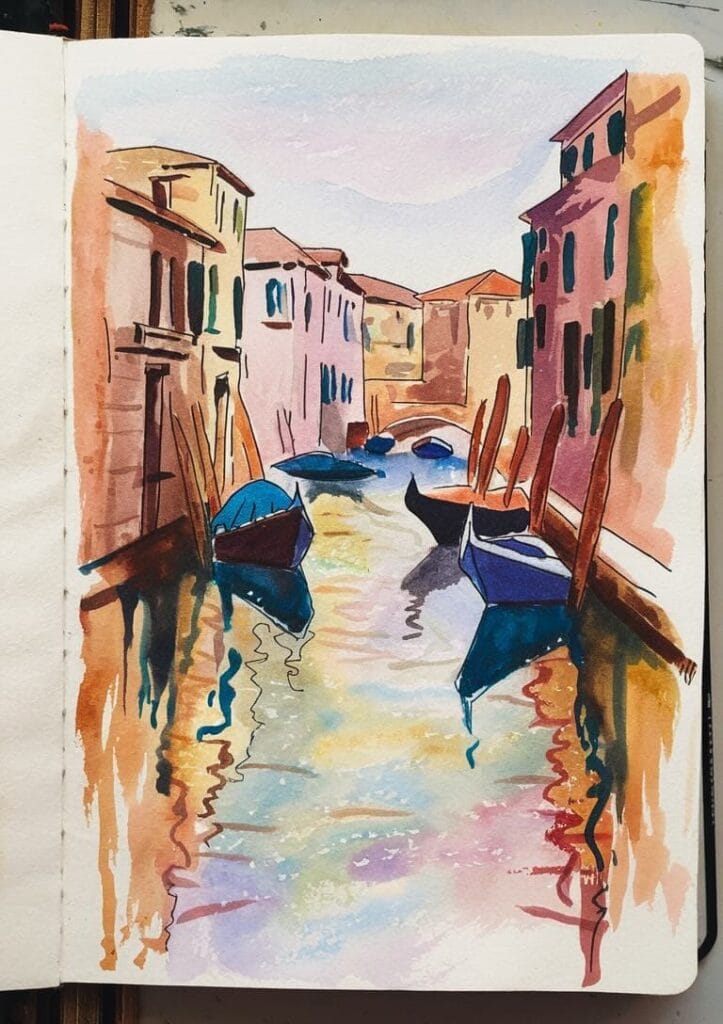
Capturing the magic of Venice’s canals in your sketchbook is a must for any watercolor enthusiast. The city’s iconic waterways offer endless inspiration for your artistic endeavors.
Start by sketching the basic outlines of the buildings and gondolas along the canal. Pay attention to the unique architectural features that make Venice so distinctive.
When painting the water, remember that reflections should occur roughly vertically from the objects they’re reflecting. This creates a mirror-like effect that’s characteristic of calm canal waters.
Don’t forget to include the iconic gondolas in your sketch. These elegant boats add a touch of romance and authenticity to your Venetian scene.
Consider using a limited color palette to capture the soft, muted tones of Venice. Warm yellows, soft pinks, and various shades of blue can effectively convey the city’s unique atmosphere.
Experiment with different reflection shapes in the water. Ripples can distort reflections, creating interesting patterns that add depth to your painting.
Try sketching at different times of day to capture how the changing light affects the reflections on the water. Early morning or late afternoon can provide especially beautiful lighting conditions.
10) Golden Wheat Fields
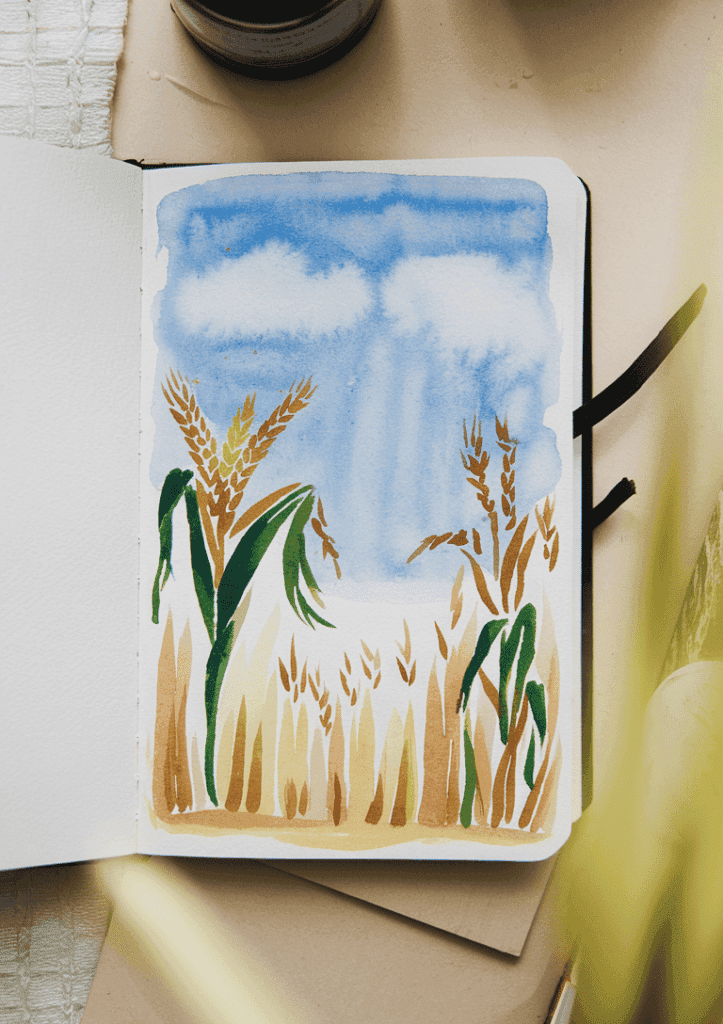
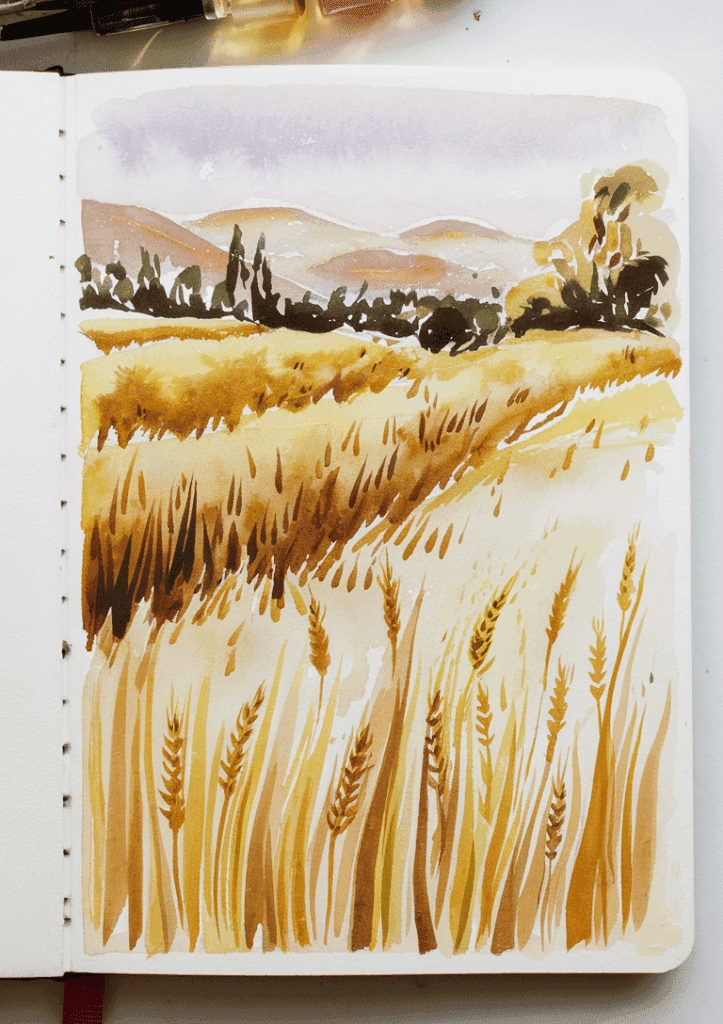

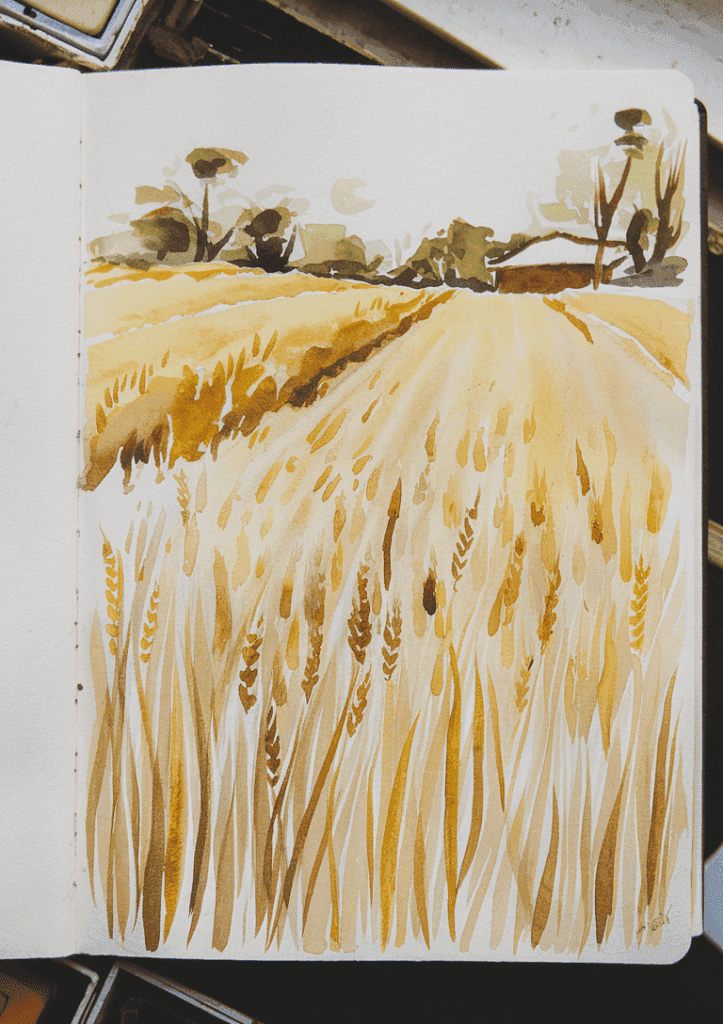
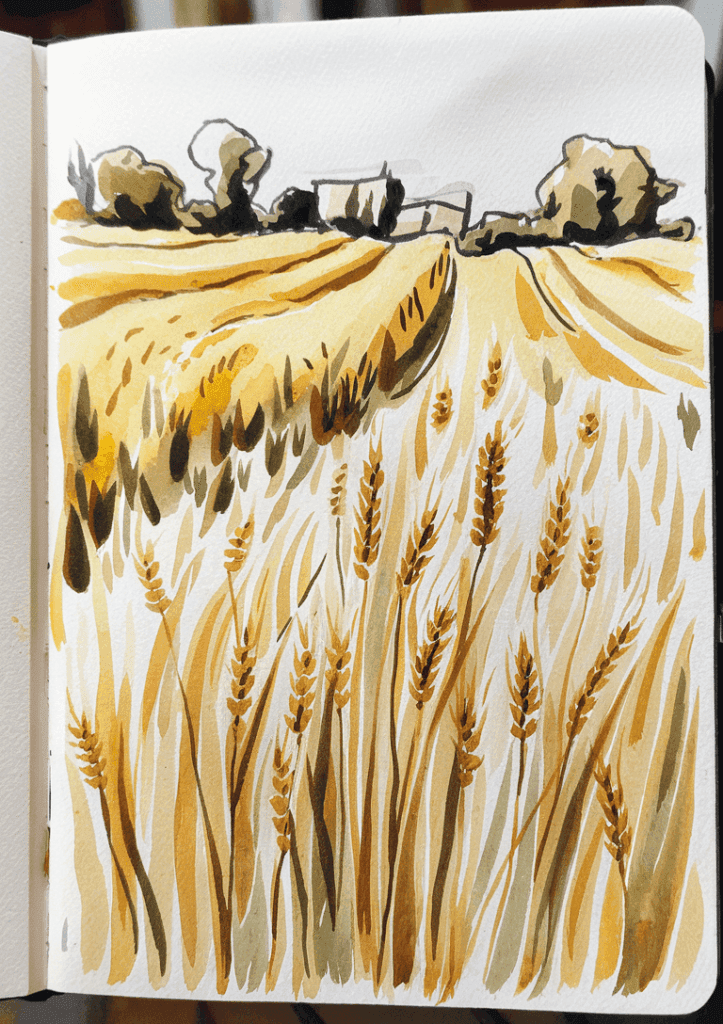
Capture the essence of rural beauty with golden wheat fields in your sketchbook. You can start by lightly sketching the horizon line and basic shapes of the wheat stalks.
Use a warm yellow ochre as your base color for the wheat. Paint the sky with a mixture of soft blues and purples to create a stunning contrast.
Add depth to your painting by incorporating darker shades of gold and brown near the bottom of the field. This creates the illusion of distance and perspective.
Don’t forget to include some individual wheat stalks in the foreground. These details will bring your painting to life and add visual interest.
Consider adding a pop of red with a few poppies scattered throughout the field. This unexpected touch of color can make your painting more dynamic.
Experiment with different brush techniques to create texture in your wheat field. Try using dry brush strokes or splattering paint for a more organic feel.
Remember, the key to a beautiful wheat field painting is capturing the warm, golden light. Play with highlights and shadows to convey the time of day and create a sense of atmosphere in your sketch.
11) Mystical Underwater World

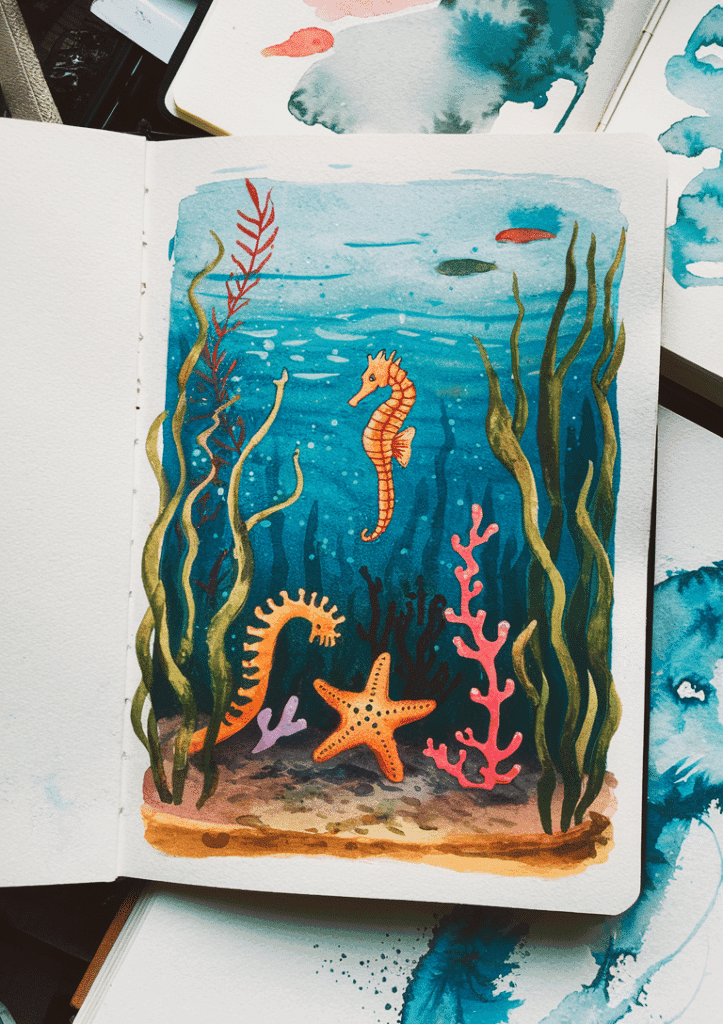
Dive into a magical realm beneath the waves with your watercolor sketchbook. Let your imagination run wild as you create a mystical underwater world filled with fantastical creatures and ethereal landscapes.
Start by painting shimmering, translucent jellyfish drifting through currents of blue and green. Add delicate tendrils and luminescent spots to give them an otherworldly glow.
Next, sketch mysterious merfolk with flowing hair and iridescent tails. Blend cool colors to capture the play of light filtering through the water around them.
Don’t forget to include enchanted coral reefs teeming with colorful fish. Use vibrant hues and intricate patterns to bring these underwater gardens to life.
For a touch of magic, paint ancient underwater ruins covered in glowing algae and surrounded by schools of bioluminescent fish. Let your brush dance across the page to create swirling eddies and bubbles.
Finally, add some whimsical elements like sunken pirate ships, hidden treasure chests, or even a majestic sea dragon gliding through the depths. Your watercolors will bring this captivating underwater world to life in your sketchbook.
12) Enchanted Magic Forest


Dive into the mystical realm of enchanted forests with your watercolors. Start by creating a misty background using soft, muted greens and blues. Layer in darker shades to add depth and mystery to your forest scene.
Add tall, slender trees with twisting branches reaching towards an imaginary sky. Use watercolor pencils to create delicate leaves and intricate bark textures.
Sprinkle in magical elements like glowing fireflies, fairy houses nestled in tree roots, or shimmering mushroom circles. Let your imagination run wild as you bring this whimsical woodland to life.
Experiment with liquid watercolors to create ethereal, flowing effects that enhance the magical atmosphere. Try splattering or dripping techniques for added texture and interest.
Don’t forget to include a winding path or a babbling brook to lead the viewer’s eye through your enchanted scene. Add tiny woodland creatures peeking out from behind trees or flowers for an extra touch of whimsy.
Remember, there’s no right or wrong way to create your magical forest. Let your creativity flow and enjoy the process of bringing this enchanting world to life in your sketchbook.
13) Wildflower Meadow
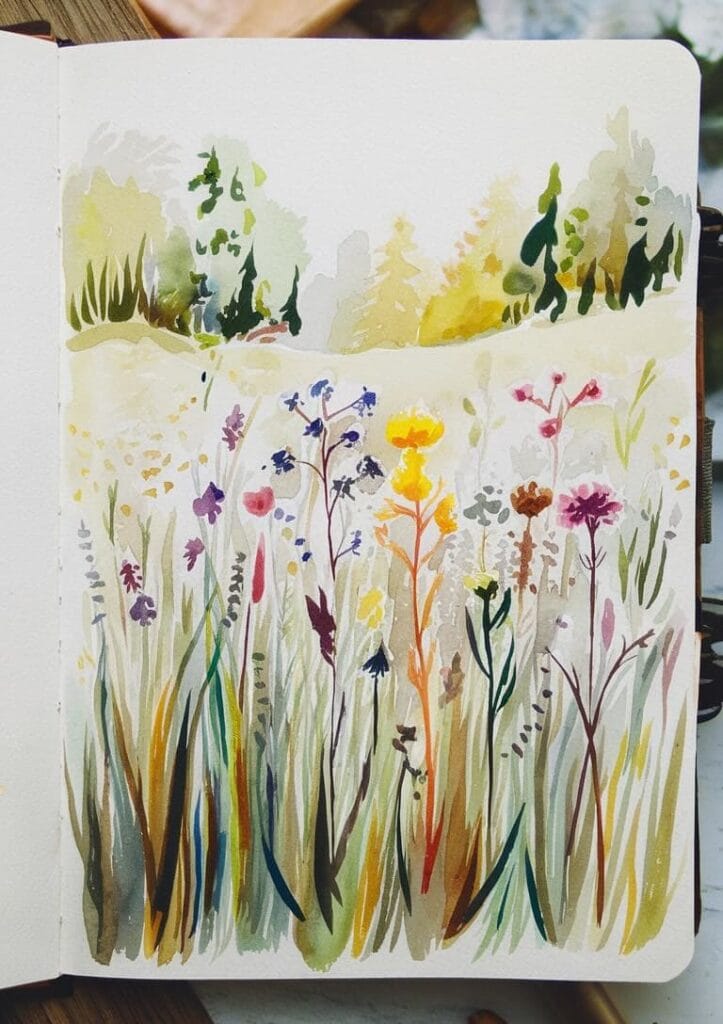
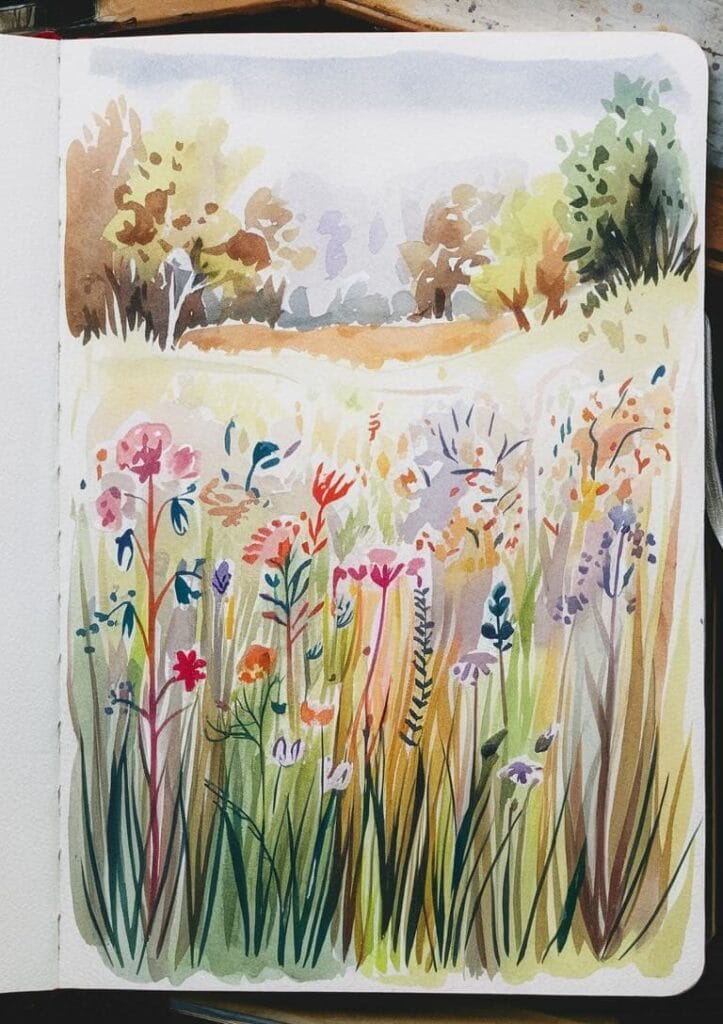

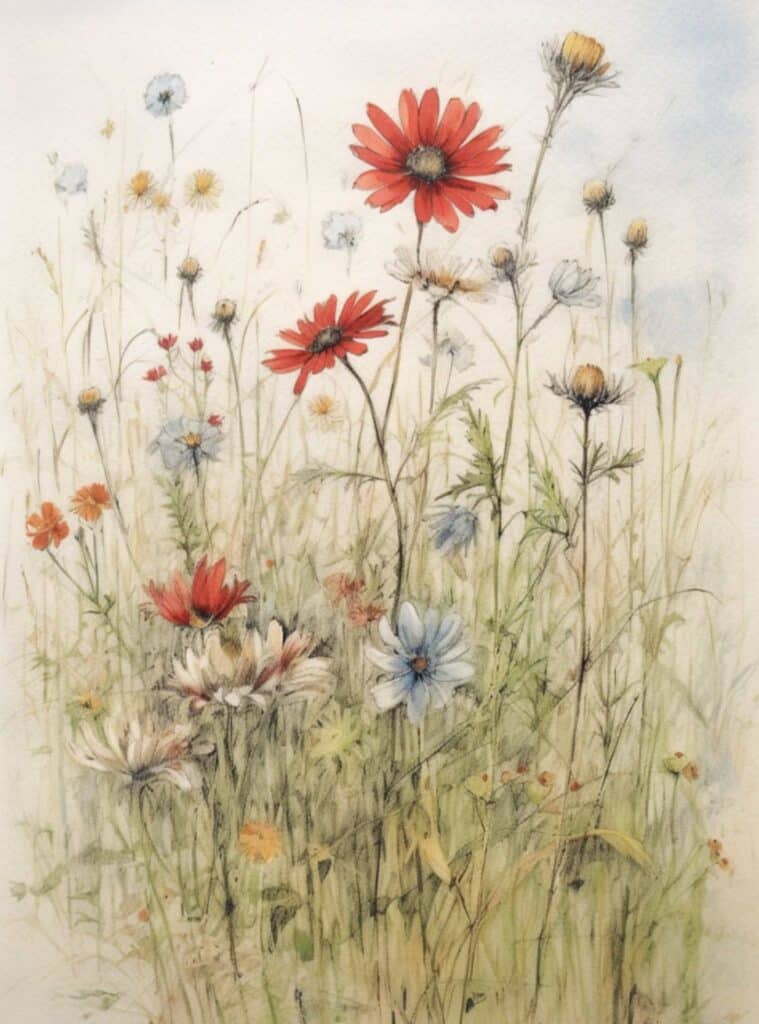
Capture the beauty of nature in your sketchbook with a vibrant wildflower meadow. This delightful subject allows you to experiment with various watercolor techniques and colors.
Start by lightly sketching the basic shapes of different flowers and grasses. Don’t worry about perfection – wildflowers are naturally chaotic and diverse.
Choose a color palette that reflects the season you want to depict. Bright yellows, purples, and pinks work well for summer, while softer pastels suit a spring scene.
Use the wet-on-wet technique to create soft, blended backgrounds. This will give your meadow a dreamy, atmospheric quality.
Add details to your flowers using a finer brush. Paint delicate petals, stems, and leaves. Remember, you don’t need to include every single flower – suggest abundance through strategic placement.
For added texture, try splattering paint or using salt to create interesting effects. These techniques can mimic the look of distant flowers or seed heads.
Finish your meadow by adding some darker tones for depth and contrast. This will help your foreground flowers pop and create a sense of perspective.
14) Rainy Parisian Street


Capture the romance of Paris on a rainy day in your sketchbook. Start with a light pencil outline of iconic Parisian architecture, like charming cafes and wrought-iron balconies.
Use a wet-on-wet technique to create a misty atmosphere. Apply a pale blue wash for the sky, letting it bleed into the buildings below.
Add depth with darker washes for shadows and reflections on the wet streets. Don’t forget to include iconic Parisian elements like streetlamps and cobblestone roads.
Paint figures with umbrellas using quick, loose strokes. These silhouettes will add life to your scene without needing intricate details.
Experiment with splattering techniques to create raindrops. Use a toothbrush or flick your brush for varied effects.
Finally, add pops of warm colors for cafe awnings or shop windows to contrast with the cool, rainy tones. This will make your Parisian street scene come alive with a cozy, inviting feel despite the weather.
15) Sunny Coastal Cliffs
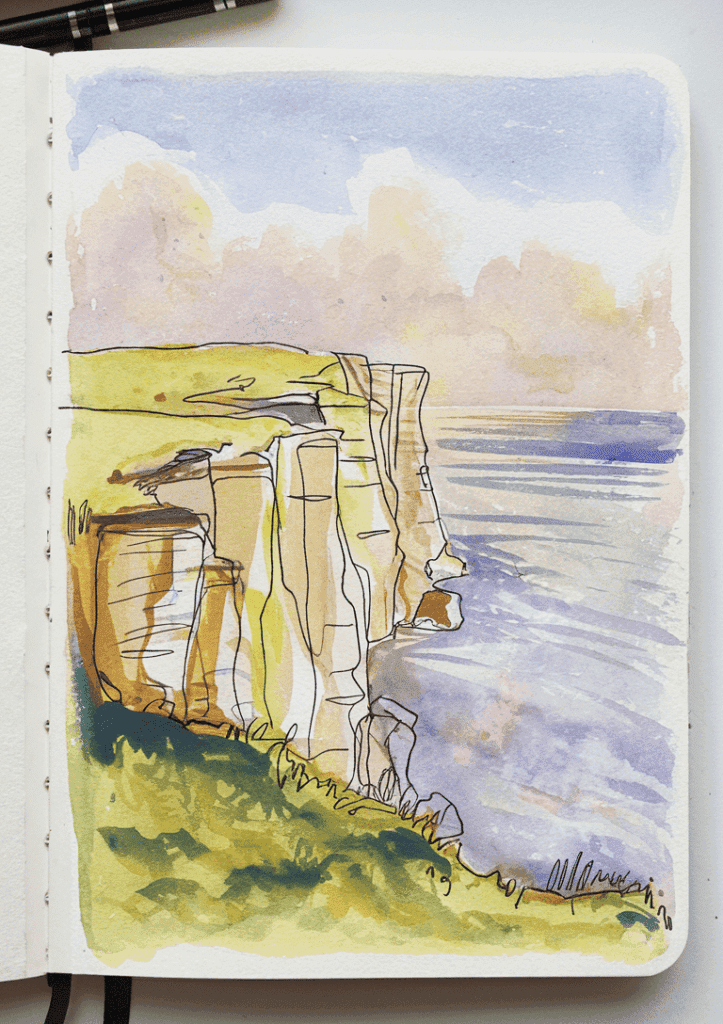
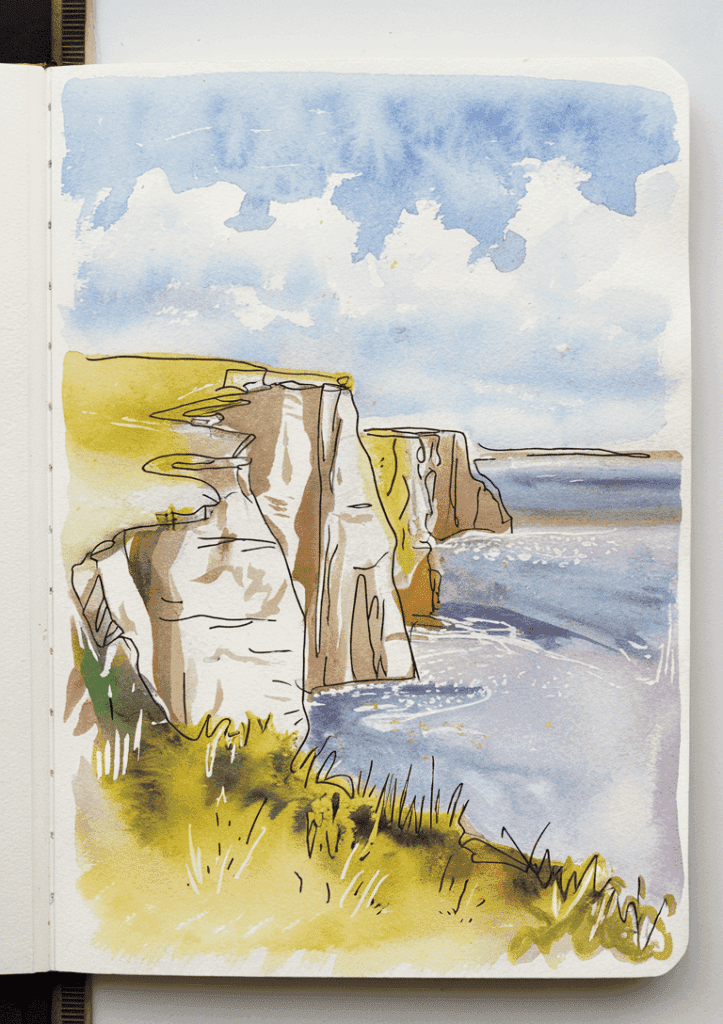


Capture the majestic beauty of sunny coastal cliffs in your watercolor sketchbook. Begin by sketching the rugged outline of the cliffs with a light pencil. Focus on the jagged edges and rocky formations that make each cliff unique.
Add a wash of warm yellows and oranges to represent the sunlight hitting the cliff faces. You can use a dryish brush to create texture and highlight the rocky surface.
Don’t forget to include the brilliant blue sea below. Paint gentle waves lapping at the base of the cliffs, using varying shades of blue and turquoise. Add some white foam where the waves meet the rocks for a realistic touch.
Consider adding seabirds soaring above the cliffs or perched on rocky outcrops. These small details can bring your scene to life and add movement to your painting.
Experiment with different lighting conditions. Try painting the cliffs at sunset for a dramatic effect, using deep oranges and purples in the sky. You can also attempt a stormy scene with dark, brooding clouds looming over the cliffs.
16) Mountainous Waterfalls
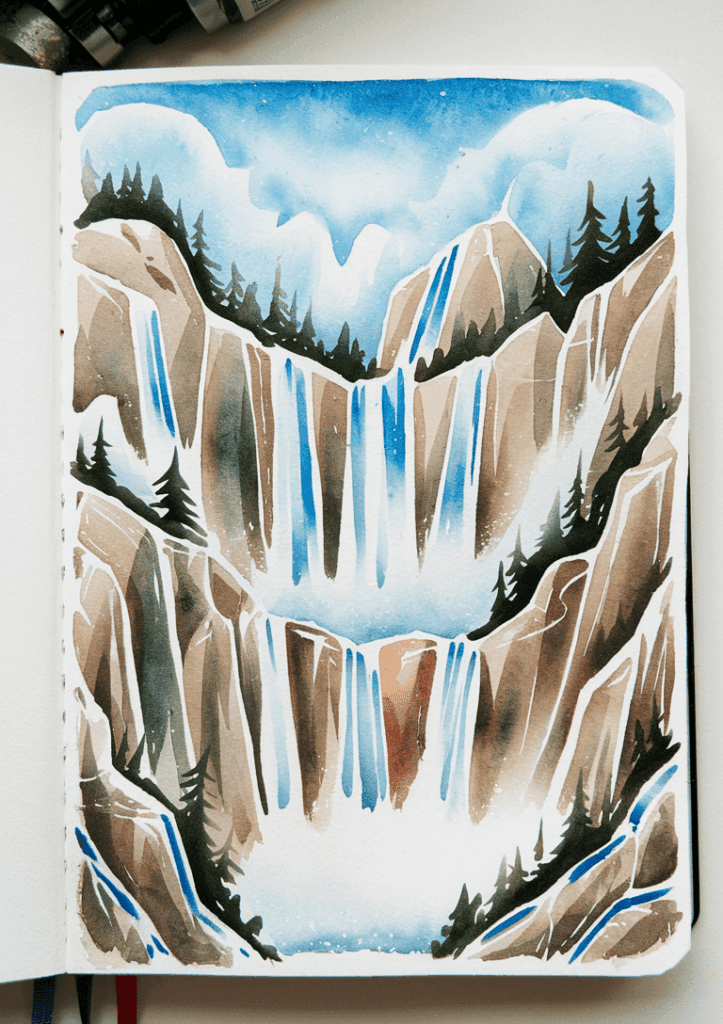
Capturing the raw power and beauty of mountainous waterfalls in your sketchbook can be an exhilarating experience. Start by sketching the basic mountain shapes using light pencil lines, focusing on the contours and rocky outcrops.
Next, add the waterfall cascading down the mountain face. Use vertical lines to indicate the flow of water, varying the thickness to show volume and force.
For the watercolor application, begin with a light blue wash for the sky. Once dry, layer in darker tones for the mountain, using a mix of blues, purples, and greys to create depth and shadow.
To paint the waterfall, leave areas of white paper for highlights. Use a mixture of blue and white to create a misty effect at the base of the falls.
Add details like trees or vegetation around the waterfall to enhance the scene. Don’t forget to include some darker shades for recessed areas of the mountain to create a sense of dimension.
Remember, you don’t need to capture every detail. Focus on conveying the energy and atmosphere of the mountainous waterfall in your sketchbook.
17) Silent Winter Woods

Winter woods offer a serene backdrop for your sketchbook watercolors. Capture the stillness of snow-covered trees and frosty landscapes. You can start with a simple sketch of bare trees against a pale sky.
Use soft blues and grays to create a misty atmosphere. Add touches of white for snow on branches and the forest floor. You might include a lone animal or bird to emphasize the quiet solitude.
Consider painting a winter watercolor river winding through the trees. The contrast of dark water against snowy banks can be striking. Don’t forget to leave some white space for snow-covered areas.
Experiment with different techniques to capture the textures of winter. Try spattering white paint for falling snow or using salt on wet paint for a frosty effect. You can also layer washes to build up depth in your forest scene.
Remember, the key is to convey the peaceful silence of a winter woodland. Let your watercolors flow gently, mirroring the quiet beauty of the season.
18) Indian Summer Harvest
Capture the warm glow of an Indian summer in your watercolor sketchbook. Start with a soft wash of golden yellows and oranges across the page to set the mood.
Sketch in some wheat stalks or corn husks with a light pencil. Use thin brushstrokes to paint these in shades of amber and brown. Add touches of green to represent any lingering summer foliage.
Don’t forget the iconic pumpkins! Paint a few in various sizes, using oranges and yellows with hints of green. Watercolor sketchbooks are perfect for practicing these rounded shapes.
Include some harvest tools like a rake or basket to add interest. Use quick, loose strokes to suggest their forms without too much detail.
Try adding a rustic fence or barn in the background. Keep it simple with just a few strokes to maintain the sketch-like quality.
Finish with some falling leaves in reds and oranges. Dab them around the page to create movement and a sense of the changing seasons.
Remember, the goal is to capture the essence of the Indian summer harvest. Focus on warm colors and the abundance of the season in your watercolor sketch.
19) Flowing River Rapids

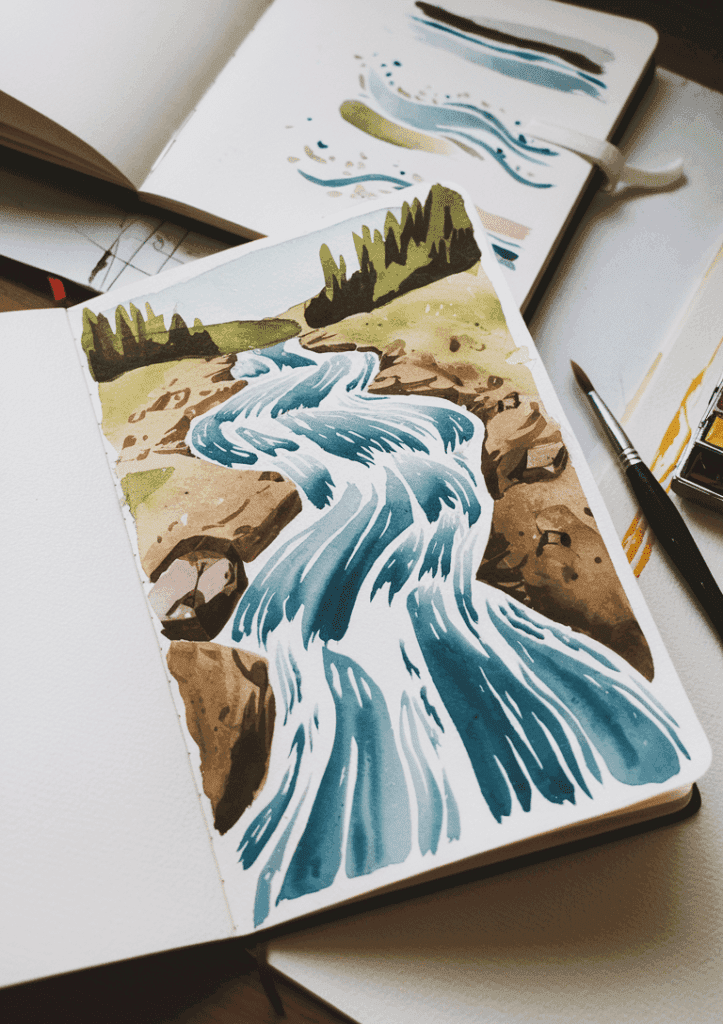
Capture the energy and movement of flowing river rapids in your sketchbook. Use quick, loose brushstrokes to convey the sense of rushing water. Begin with a light blue or turquoise base, then add darker blue accents to represent deeper areas.
Create white highlights with your paper’s natural color or by using masking fluid. This technique will give the impression of foamy, turbulent water. Add some watercolor blobs and let them mix to create interesting patterns.
Incorporate surrounding elements like rocks or vegetation to frame your rapids. Use earthy tones for these features to contrast with the cool blues of the water. Try experimenting with different brush sizes to vary the texture and detail in your sketch.
Remember to let your creativity flow as you paint. Don’t worry about perfect realism – focus on capturing the essence and feeling of the rapids. You can even add splashes of unexpected colors like purple or green to make your sketch more dynamic and expressive.
20) Dreamy Cotton Candy Clouds


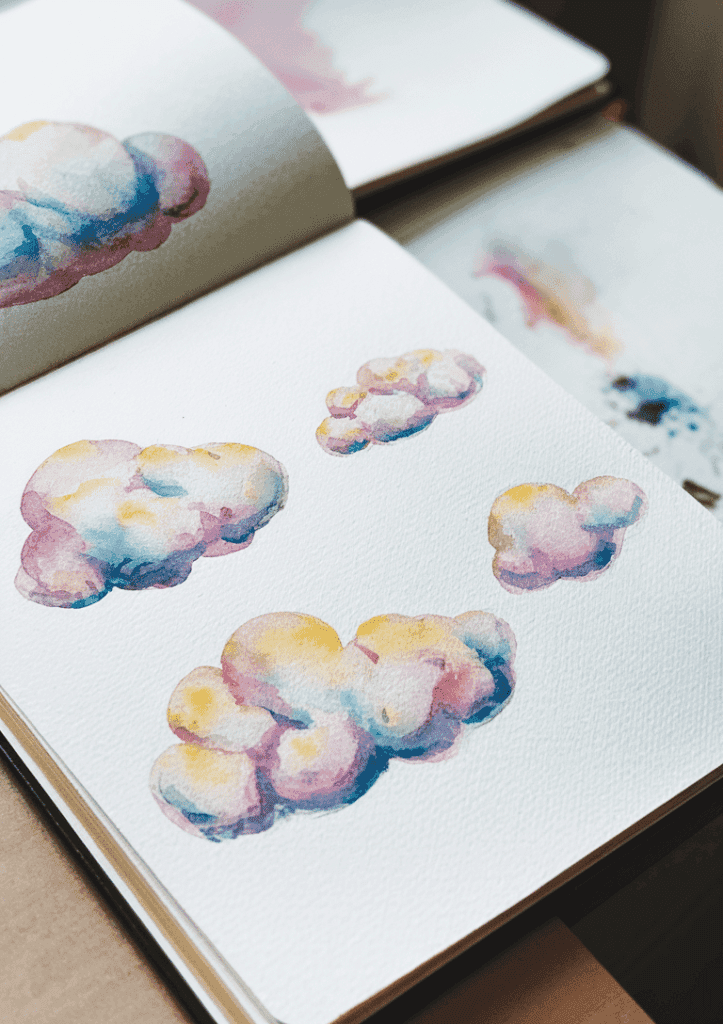
Capture the whimsical beauty of cotton candy clouds in your sketchbook with watercolors. Start by wetting your paper and applying soft pastel hues like pink, lavender, and light blue.
Use a wet-on-wet technique to blend these colors gently, creating a dreamy sky background. Allow the colors to mingle and form soft gradients.
Once the background is dry, start adding fluffy cloud shapes with white watercolor paint. Build up layers gradually, leaving some areas lighter for a soft, ethereal effect.
For extra dimension, add touches of pale yellow or peach to the cloud edges. This will give your cotton candy clouds a sun-kissed glow.
Experiment with different cloud formations and sizes. You can create a single large cloud or fill your sketchbook page with a cluster of smaller ones.
Try incorporating other elements like birds or a distant landscape to enhance the dreamy atmosphere. Remember, the key is to keep your brushstrokes loose and playful for that cotton candy-like texture.
21) Steaming Coffee in a Café


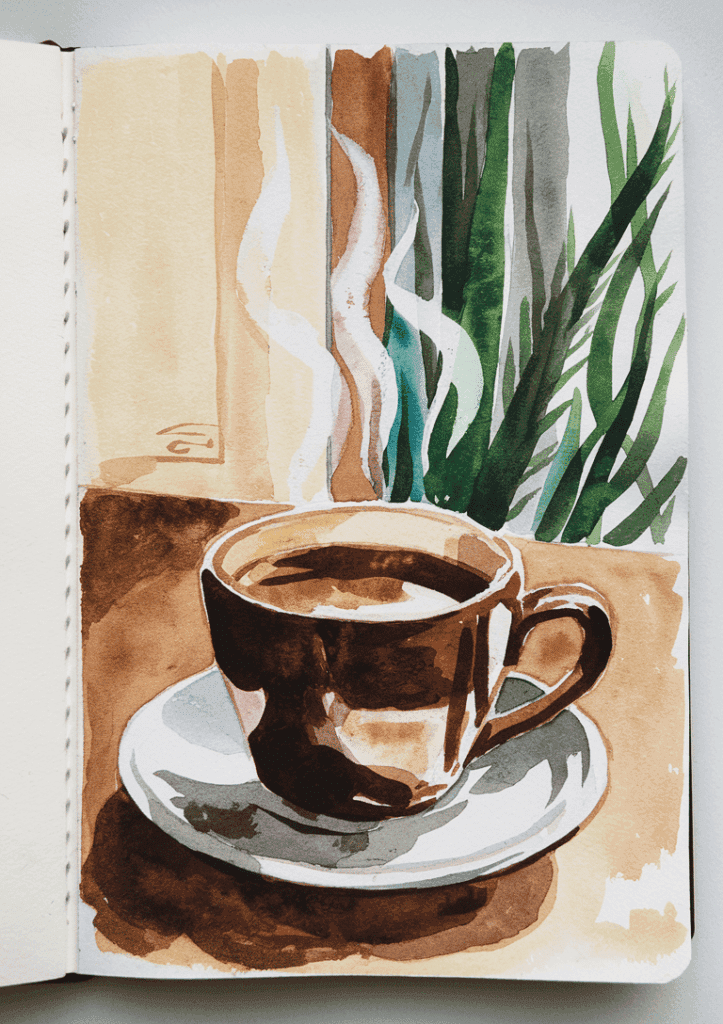
Capturing the essence of a steaming cup of coffee in your watercolor sketchbook can be a delightful challenge. Start by sketching the key features of the scene, including the cup, saucer, and surrounding café ambiance.
Pay special attention to the steam rising from the coffee. To create this effect, use a light wash of pale gray or blue watercolor, building up layers for a soft, ethereal look.
Consider the lighting in the café. Is sunlight streaming through a window, casting shadows? Or is the atmosphere cozy with warm, artificial lighting? Use these elements to add depth and mood to your sketch.
Don’t forget the details that make a café scene come alive. Include a half-eaten pastry, a folded newspaper, or a vase with fresh flowers on the table.
Experiment with different perspectives. Try a close-up of just the coffee cup and saucer, or a wider view of the entire café table. Each angle offers a unique storytelling opportunity in your sketchbook.
Remember, the goal is to capture the spontaneity and vibrancy of the moment. Embrace imperfections and let your watercolors flow freely to create a lively, inviting café scene.
22) Cactus Oasis
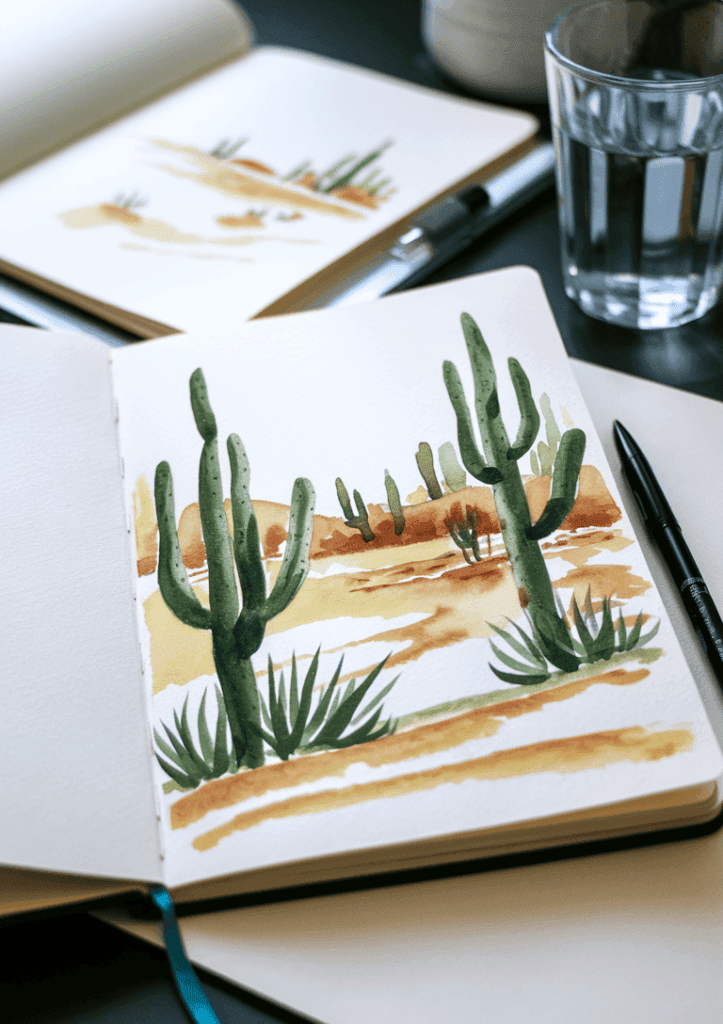

Transform your sketchbook into a desert paradise with a vibrant cactus oasis. Start by sketching various cactus shapes – from tall saguaros to round barrel cacti and flat prickly pears.
Use shades of green to bring your cacti to life. Mix in some blues for a cool undertone or add yellows for a sun-kissed glow. Don’t forget to add some texture with fine lines or dots to represent the spines.
Create depth in your oasis by layering cacti of different sizes. Place larger ones in the foreground and smaller ones in the background. This technique will give your sketch a sense of perspective.
Add pops of color with blooming flowers on your cacti. Pink, yellow, or orange blossoms can really make your watercolor oasis come alive. Consider painting a simple cactus landscape to expand your scene.
Finish your oasis by adding some sandy tones at the base of your cacti. A wash of light brown or orange can suggest the desert floor. You might even include a small water feature to complete your oasis theme.
23) Bustling Farmers Market


Capture the vibrant energy of a bustling farmers market in your sketchbook with watercolors. Start by sketching the basic layout of stalls and people using light pencil lines.
Focus on the colorful produce displays. Paint vibrant reds for tomatoes, greens for leafy vegetables, and yellows for squash. Add pops of color with flower bouquets and fruit baskets.
Include the market vendors and shoppers to bring life to your scene. Use loose brushstrokes to suggest movement and activity. Don’t worry about fine details – aim for an overall impression of a busy market.
Pay attention to lighting. Highlight sunny areas with warmer tones and create depth with cooler shadows. This will enhance the atmosphere of your farmers market sketch.
Add interesting signage or price tags to give your scene authenticity. Small touches like this can really bring your watercolor to life.
Remember, the goal is to convey the lively atmosphere of the market. Have fun experimenting with different techniques to capture the bustling energy and colorful sights of a farmers market in your sketchbook.
24) Ancient Stone Circle
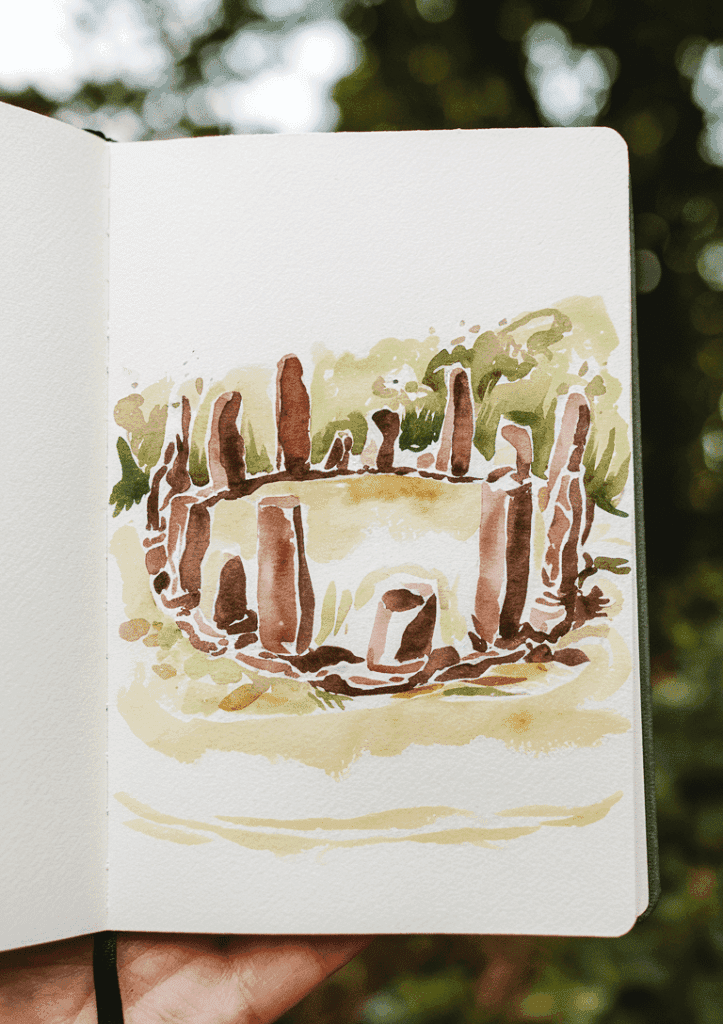
Imagine transporting yourself back in time with a watercolor sketch of an ancient stone circle. You can capture the mystical atmosphere of these prehistoric monuments in your sketchbook.
Start by lightly penciling the basic shapes of the standing stones. Focus on their varied sizes and positions to create an authentic feel. Use a light wash of cool grays and blues for the stones themselves.
Add depth to your scene by incorporating the surrounding landscape. A few quick brushstrokes can suggest rolling hills or a misty forest in the background. This helps set the mood and context for your stone circle.
Don’t forget to play with lighting effects. Perhaps you’d like to depict the circle at sunrise or sunset. Soft pinks and oranges in the sky can create a magical ambiance. Alternatively, a moonlit scene with deep blues and purples can evoke a sense of mystery.
Consider adding small details to bring your sketch to life. A few wildflowers in the foreground or birds circling overhead can add interest. Remember, less is often more in watercolor sketches, so keep these touches subtle.
25) Starry Desert Skies
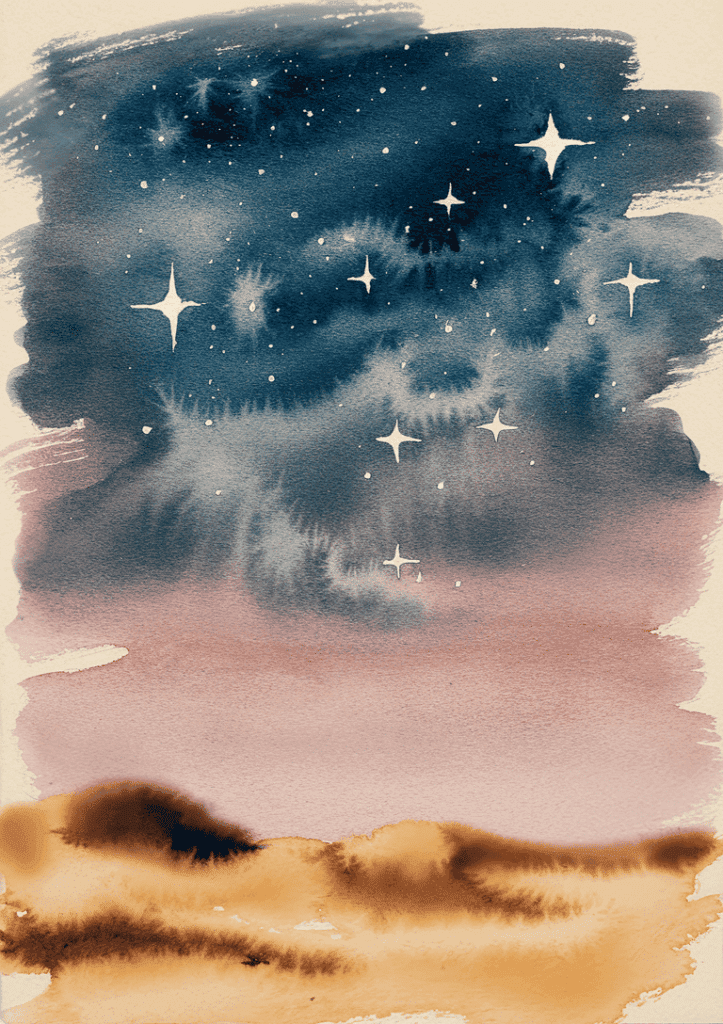


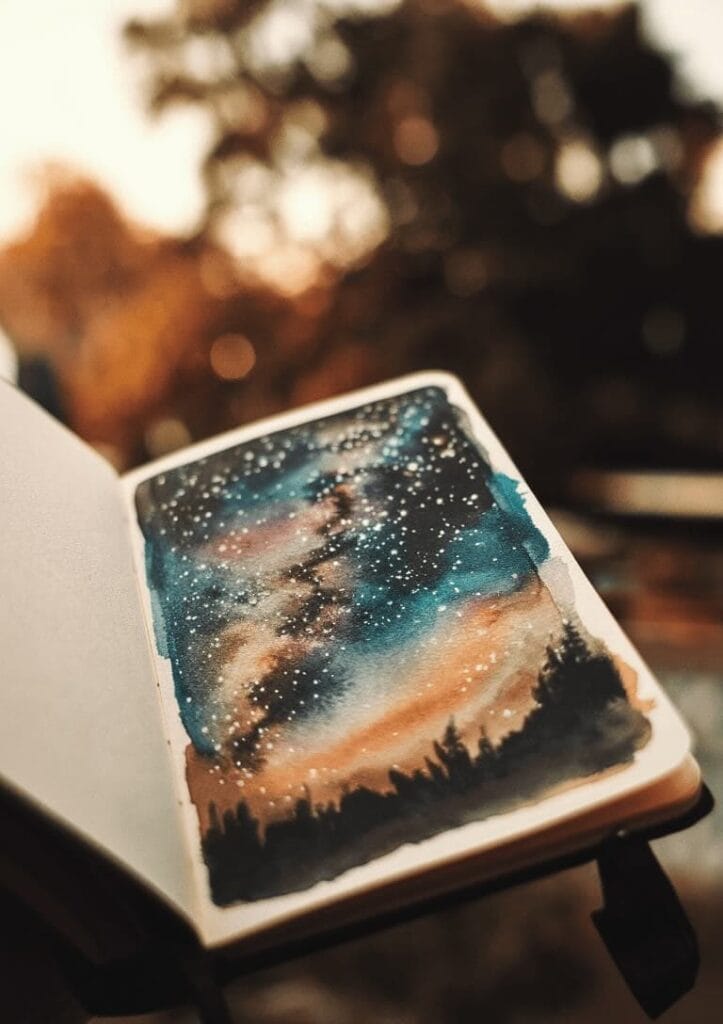
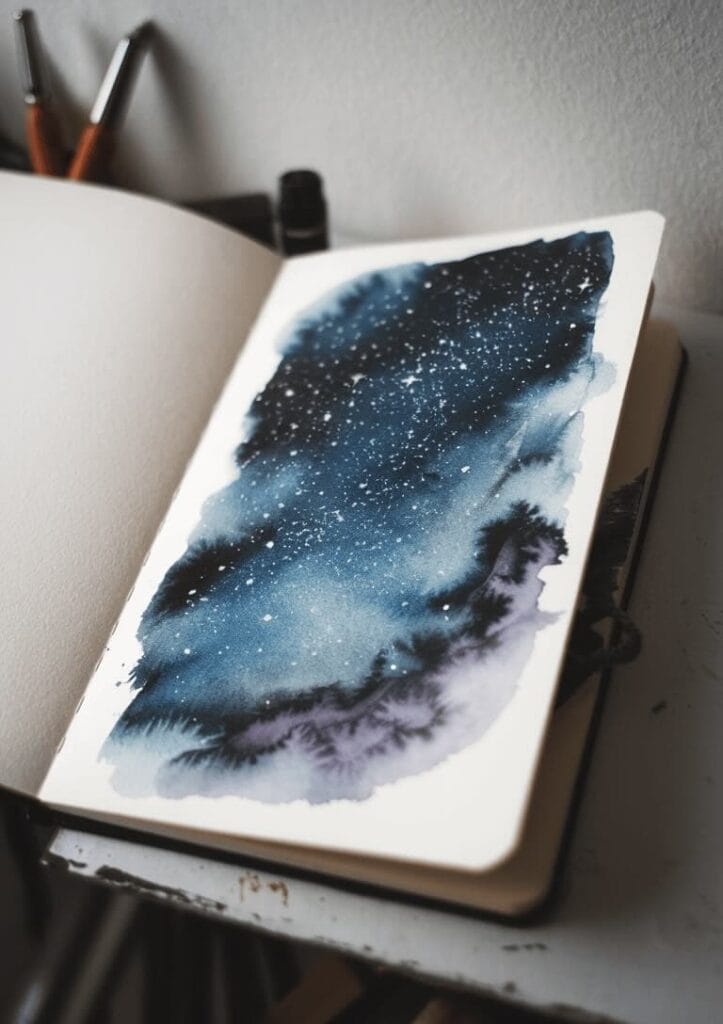

Capture the mesmerizing beauty of a starry desert night in your sketchbook. You can create a stunning watercolor painting of a desert sky filled with twinkling stars and celestial wonders.
Start by wetting your paper and applying a gradient of deep blues and purples for the night sky. Add some warm oranges and yellows near the horizon to represent the last traces of sunset.
Once the base is dry, use a fine brush or white gel pen to add stars of varying sizes. Don’t forget to include larger, brighter stars and perhaps even a constellation or two.
You might want to incorporate the glow of the moon to create a focal point. A soft, luminous circle can add depth and interest to your desert night scene.
Consider adding silhouettes of desert elements like cacti, rock formations, or distant mountains. These dark shapes will contrast beautifully with your starry sky.
For an extra touch of magic, try dabbing in a dotted galaxy using a mix of blues and purples. This technique can create a dreamy, ethereal effect in your night sky.
26) Floating Lantern Festival
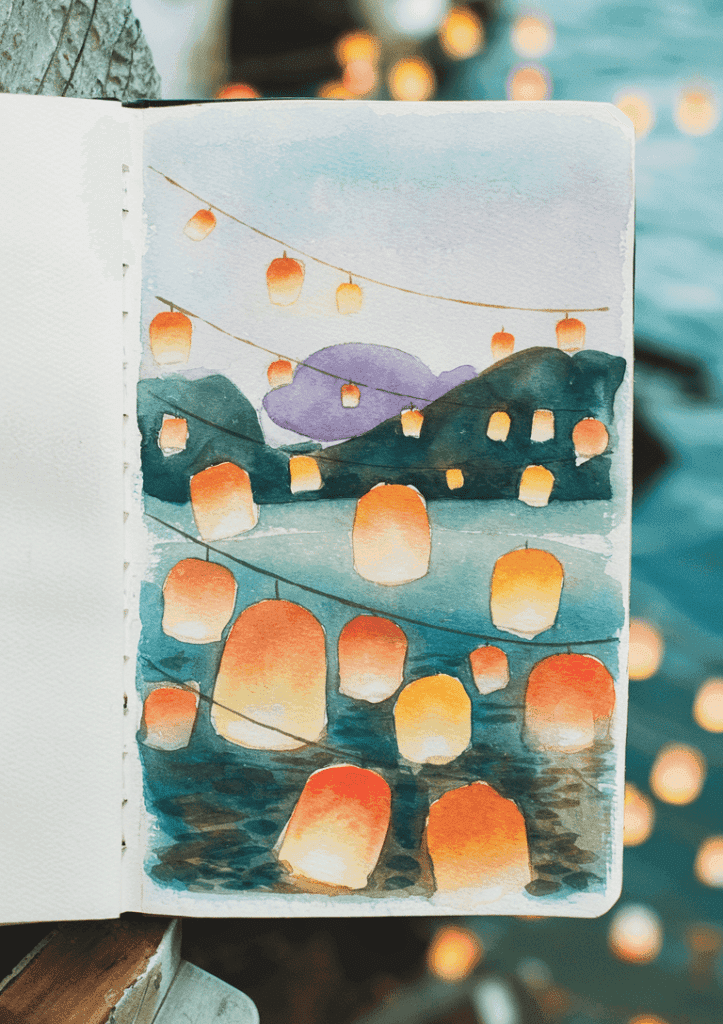
Capture the magic of a floating lantern festival in your sketchbook with watercolors. Start by painting a dark night sky using deep blues and purples. Add a touch of warmth with subtle orange and yellow hues to represent the glow of lanterns.
Sketch out the shapes of paper lanterns in various sizes. Use light pencil strokes to create delicate outlines. Fill these shapes with soft washes of warm colors like yellow, orange, and red.
Remember to leave some white space within the lanterns to show their illumination. You can paint watercolor a night ambient scene by adding reflections on water below the lanterns.
Include silhouettes of people releasing lanterns into the sky. This adds depth and human interest to your sketch. Use a fine brush to add details like strings and flames to your lanterns.
Experiment with different brush techniques to create a dreamy atmosphere. Try splattering tiny white dots for stars or distant lanterns. You can find more floating lanterns drawing ideas online for inspiration.
Don’t forget to add some landscape elements like trees or buildings in the background. This helps to ground your scene and provide scale to your floating lanterns.
27) Autumn Leaves Swirling

Capture the dynamic beauty of fall with swirling autumn leaves in your sketchbook. Start by sketching a light background of trees or a park scene. Use loose, fluid strokes to create this base.
Next, focus on the leaves themselves. Draw various leaf shapes – maples, oaks, and birches – in different sizes. Arrange them in a sweeping, circular pattern across your page to convey movement.
Create a mesmerizing autumn scene by adding watercolor to your sketch. Choose warm hues like oranges, reds, and yellows for your leaves. Apply the paint in light washes, allowing colors to blend naturally.
To enhance the swirling effect, use a small brush to add darker tones along the edges of some leaves. This creates depth and helps distinguish individual leaves within the whirlwind.
Consider adding a focal point to your composition, such as a pumpkin or a park bench. This element can anchor your swirling leaves and provide context to your autumn scene.
Remember to leave some white space in your sketch. This technique helps maintain a sense of lightness and movement in your artwork.
28) Victorian Garden Maze

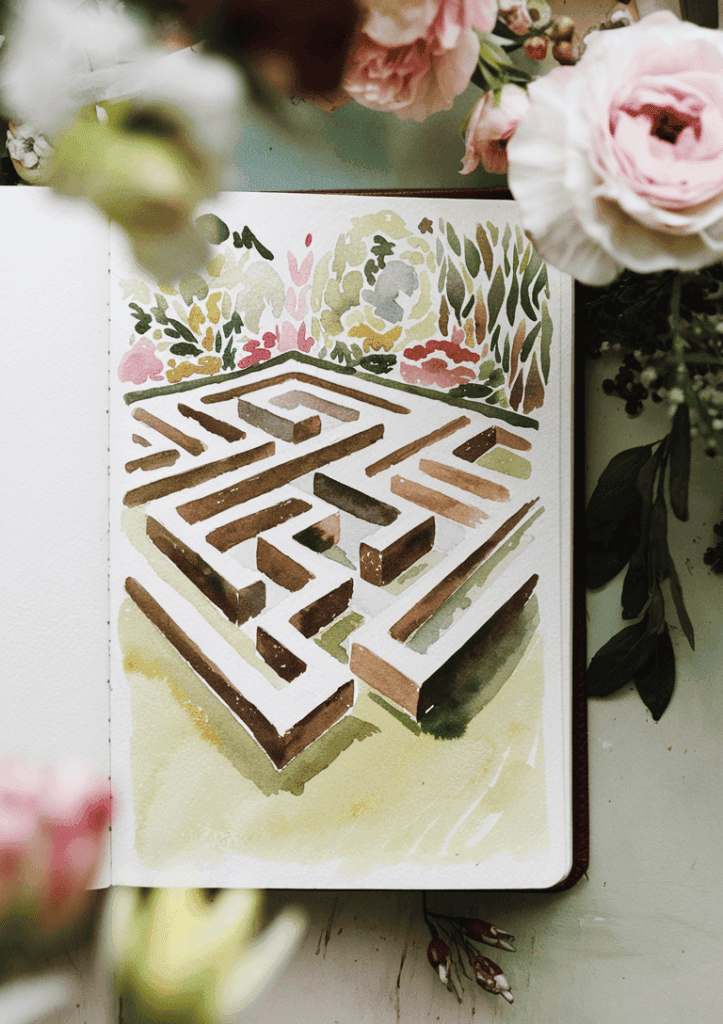

Imagine stepping into a whimsical world of intricate pathways and lush greenery. Victorian garden mazes offer a perfect subject for your watercolor sketchbook.
Start by lightly sketching the maze’s layout with pencil. Focus on the winding paths and geometric patterns typical of these elaborate designs.
Add depth to your sketch by painting the hedges in varying shades of green. Use darker tones for shadowed areas and lighter hues for sun-kissed foliage.
Don’t forget to include charming garden elements like fountains, statues, or gazebos. These features add interest and authenticity to your Victorian maze scene.
Consider painting figures in period dress strolling through the maze. This touch of human presence can bring your watercolor to life.
Experiment with different perspectives. Try a bird’s-eye view to capture the maze’s intricate design, or paint from ground level for a more immersive feel.
Play with light and shadow to create a sense of mystery and adventure. Dappled sunlight filtering through trees can add a magical quality to your watercolor.
Remember, the goal is to capture the essence of a Victorian garden maze in your unique style. Let your imagination guide your brush as you explore this enchanting subject.
29) Vintage Bicycle Parked


Capture the charm of a bygone era with a watercolor sketch of a vintage bicycle parked against a rustic wall. This nostalgic scene offers a perfect opportunity to practice your watercolor techniques.
Start by lightly sketching the bicycle’s frame and wheels. Pay attention to the unique details that make it vintage, such as the curved handlebars or leather seat.
Add character to your sketch by including a woven basket on the front or back of the bike. You might even paint a floral arrangement spilling out of the basket for a pop of color.
Consider the surroundings. Is the bike leaning against a weathered brick wall or a sun-bleached wooden fence? These elements can add depth and context to your painting.
Don’t forget to include shadows to ground the bicycle and create a sense of dimension. Experiment with different washes to achieve the right balance of light and shadow.
You can enhance the vintage feel by using a muted color palette. Think soft pastels or earthy tones to evoke a sense of nostalgia in your watercolor sketch.
30) Snow-Covered Hilltop
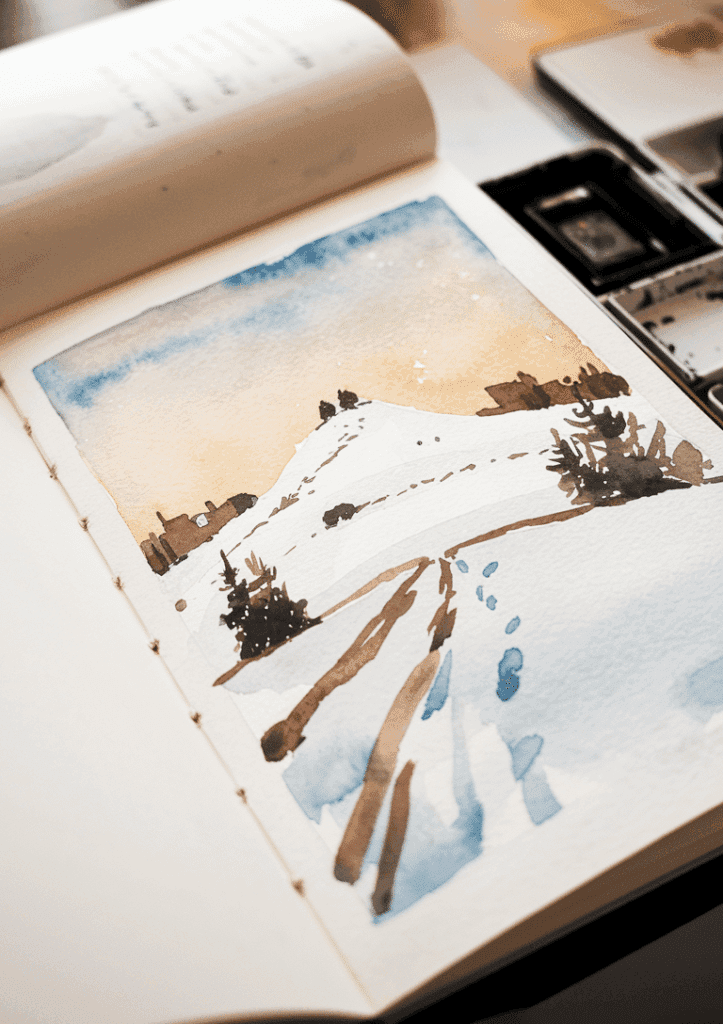
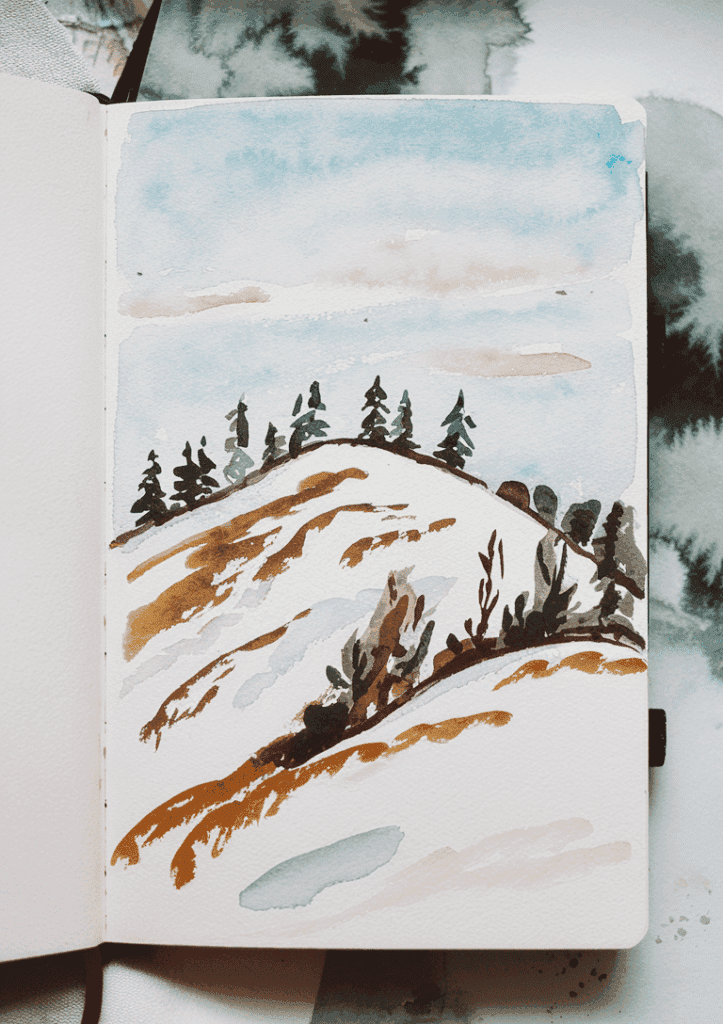

Capture the serene beauty of a snow-covered hilltop in your watercolor sketchbook. This peaceful winter scene offers a perfect opportunity to explore various shades of white and blue.
Start by lightly sketching the outline of your hilltop. Use a pale blue wash for the sky, allowing it to blend seamlessly with the white of the paper for the snow-covered areas.
Add depth to your scene by incorporating shadows. Mix a touch of gray or purple with your blue to create subtle shading on the hillside. This will give your painting a three-dimensional feel.
Don’t forget to include some details that bring the scene to life. Paint snow-covered trees using a dry brush technique for texture. You can also add footprints or animal tracks in the snow for added interest.
Experiment with different techniques to create texture in your snow. Try spattering white paint or using salt on wet paint to create a sparkly effect, mimicking freshly fallen snow.
Remember, less is often more when painting snow scenes. Allow the white of your paper to shine through, creating a sense of brightness and purity in your winter landscape.
31) Rustic Barn in Countryside


Capture the charm of rural life with a rustic barn sketch in your watercolor book. Start by lightly penciling the basic structure of the barn, including its weathered wooden walls and sloping roof.
Add details like crooked boards, a slightly askew door, and maybe a small loft window. Don’t forget to sketch in some surrounding elements like tall grass, wildflowers, or a split-rail fence to set the scene.
When you’re ready to paint, choose a warm palette of earthy reds, browns, and golds for the barn itself. Use a dry brush technique to create the texture of old wood grain.
For the countryside, opt for soft greens and yellows to represent fields and meadows. You can add a touch of gray to your sky wash to suggest an overcast day, enhancing the rustic mood.
Remember to leave some white spaces for highlights and to create the illusion of sunlight hitting the barn’s surfaces. This will give your painting depth and dimension.
Consider adding small details like a rusty weathervane or some chickens scratching in the yard to bring your rural scene to life.
32) Tropical Beach at Dawn


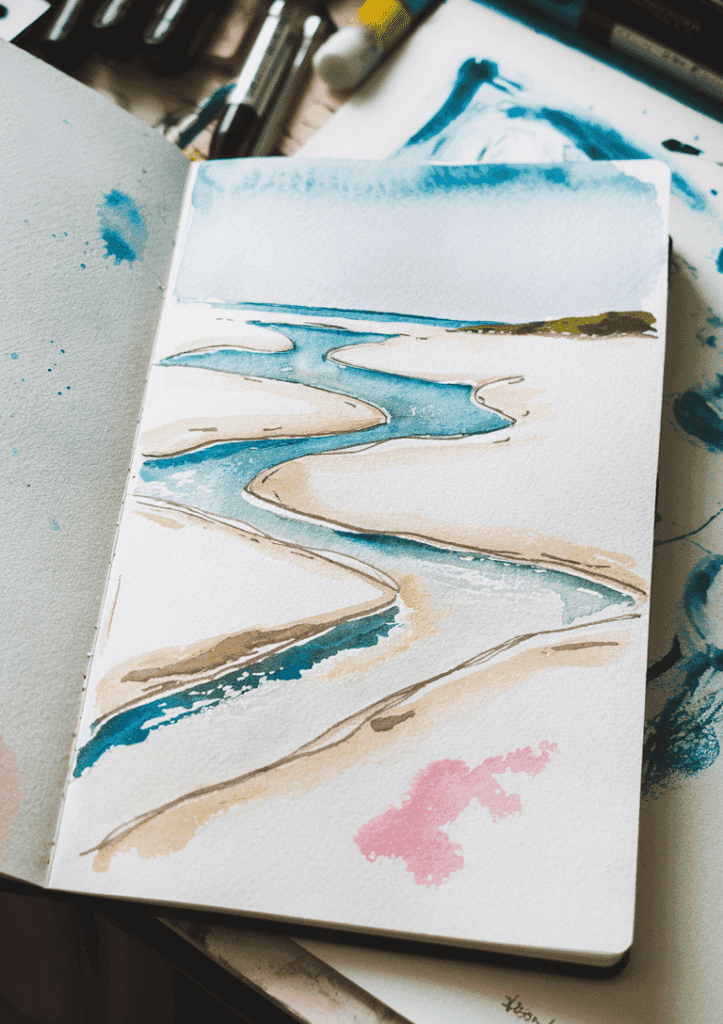
Imagine yourself sitting on a soft, sandy beach as the first rays of sunlight peek over the horizon. This serene scene is perfect for your watercolor sketchbook.
Start by painting a soft gradient for the sky, blending warm oranges and pinks into cooler purples and blues. This will create a stunning backdrop for your tropical paradise.
Add some wispy clouds using a dry brush technique. These will catch the early morning light and add depth to your sky.
Next, focus on the ocean. Paint gentle waves using various shades of blue and teal. Don’t forget to add some reflections of the sky colors on the water’s surface.
In the foreground, sketch the silhouettes of palm trees. Use a darker color to make them stand out against the brightening sky.
Finally, add some texture to the sand with light washes of yellow and beige. You can even include some seashells or driftwood for extra detail.
Remember, watercolor beach paintings are all about capturing the atmosphere. Keep your strokes loose and let the colors blend naturally to evoke the peaceful mood of a tropical dawn.
33) Japanese Zen Garden

A Japanese Zen garden in your sketchbook can transport you to a world of tranquility. Start by lightly sketching the basic layout of rocks, sand, and plants. Use soft pencil strokes to capture the essence of simplicity and balance.
Add watercolor washes in muted tones to bring your garden to life. Pale greens and browns work well for moss and stones. For the raked sand patterns, leave areas of white paper showing through.
Don’t forget to include a few carefully placed elements like a stone lantern or a small bridge. These focal points can add interest to your composition.
Try experimenting with different brush techniques to create texture. Dry brushing can mimic the rough surface of rocks, while wet-on-wet can suggest soft moss or distant foliage.
Remember, less is more in a Zen garden. Let the empty spaces in your painting speak as loudly as the elements you include. This approach will help capture the serene atmosphere of these special gardens.
Your watercolor Zen garden can be a peaceful retreat whenever you open your sketchbook. It’s a wonderful way to practice mindfulness and improve your painting skills at the same time.
34) Colorful City Street Art


Bring the vibrant energy of urban landscapes to your sketchbook with colorful city street art. Start by sketching a Parisian street scene using a mix of acrylic gouache and watercolors.
Experiment with bold, eye-catching hues to capture the lively atmosphere of bustling city streets. Try adding pops of neon for street signs or storefront displays.
You can use washi tape to block out areas representing streets or buildings, then fill in the spaces with vibrant watercolors. This technique creates clean lines and defined shapes in your urban scene.
Don’t forget to include interesting architectural details like ornate balconies, colorful awnings, or unique shop signs. These elements add character to your city street art.
Consider incorporating people or vehicles to bring life to your street scene. Quick, loose brushstrokes can suggest movement and activity.
For added interest, try painting the same street scene at different times of day. Capture the warm glow of sunrise, the harsh midday sun, or the soft colors of twilight.
35) Pine Forest After Rain
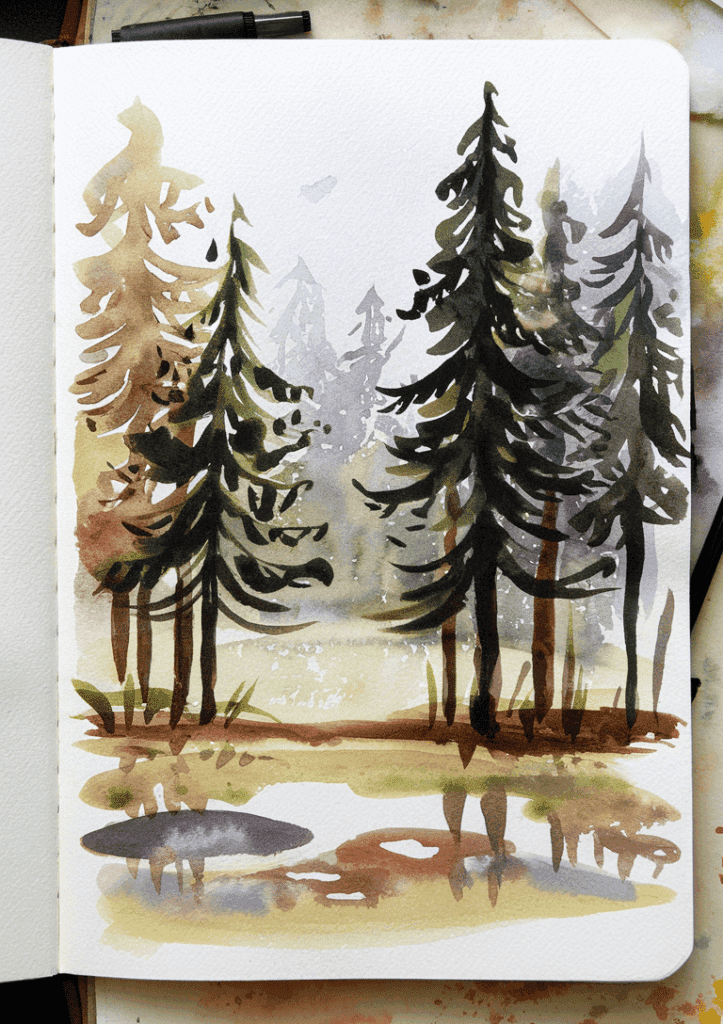


Capture the serene beauty of a pine forest after a refreshing rain in your sketchbook. Start by lightly sketching the basic shapes of tall pine trees with their distinctive triangular forms.
Use a mix of greens and browns for the tree trunks and branches. Add texture by dabbing your brush to create the appearance of pine needles. Remember to vary the shades to add depth and dimension to your forest scene.
For the wet ground, apply a light wash of browns and greens. Paint mist rising from the forest floor by using diluted white or pale blue watercolor.
Don’t forget to include puddles reflecting the trees. Use a combination of the sky and tree colors for these reflections. Add some fallen pine needles or small branches on the forest floor for extra detail.
To capture the post-rain atmosphere, paint droplets on pine needles and tree trunks. Use tiny white or light blue dots to represent water clinging to surfaces. You can also add a soft rainbow in the background for a magical touch.
Experiment with different techniques to create a misty forest landscape. Try wet-on-wet method for a softer, more atmospheric look. This will help you achieve that dreamy, just-after-rain feel in your pine forest sketch.
36) Retro Diner Scenes


Transport yourself back to the 1950s with retro diner scenes in your sketchbook. Capture the essence of classic Americana with watercolor illustrations of vintage diners.
Start by sketching the iconic diner exterior with its neon signs and chrome accents. Use vibrant colors to bring the scene to life.
Move inside and depict the checkered floors, red vinyl booths, and chrome-edged tables. Don’t forget the vintage jukebox in the corner!
Paint cheerful waitresses in their crisp uniforms, complete with aprons and name tags. Add smiling customers enjoying milkshakes and burgers.
Recreate the bustling atmosphere by including a busy counter with chrome bar stools. Sketch patrons chatting over steaming cups of coffee.
Include classic diner staples in your paintings, like milkshakes, soda fountains, and retro food art. Use soft watercolors to capture the nostalgia of these timeless scenes.
Experiment with different perspectives. Try a bird’s-eye view of the diner layout or focus on small details like a slice of cherry pie.
Your retro diner sketches will transport you to a bygone era, full of charm and character.
37) Mystical Fairy Glade

Imagine a moonlit clearing in an enchanted forest, where delicate fairies dance among glowing mushrooms and sparkling dewdrops. Your watercolor sketchbook is the perfect place to bring this magical scene to life.
Start with a soft wash of blues and purples for the night sky. Add touches of silvery white to represent moonlight filtering through the trees.
Paint an enchanting castle in the distance, its towers barely visible through the misty forest. Use light, ethereal strokes to capture the mystical atmosphere.
Now focus on the glade itself. Create luminous toadstools in various sizes, using warm oranges and yellows to make them glow against the cool background.
Sketch in your fairies with light pencil lines before adding color. Give them translucent wings and flowing gowns in pastel hues.
Don’t forget the details that bring the scene to life. Add fireflies with tiny dots of bright yellow, and sprinkle fairy dust using a splatter technique with watered-down metallic paint.
Your mystical fairy glade will transport you to a world of magic and wonder every time you open your sketchbook.
38) Golden Sunset Over Ocean
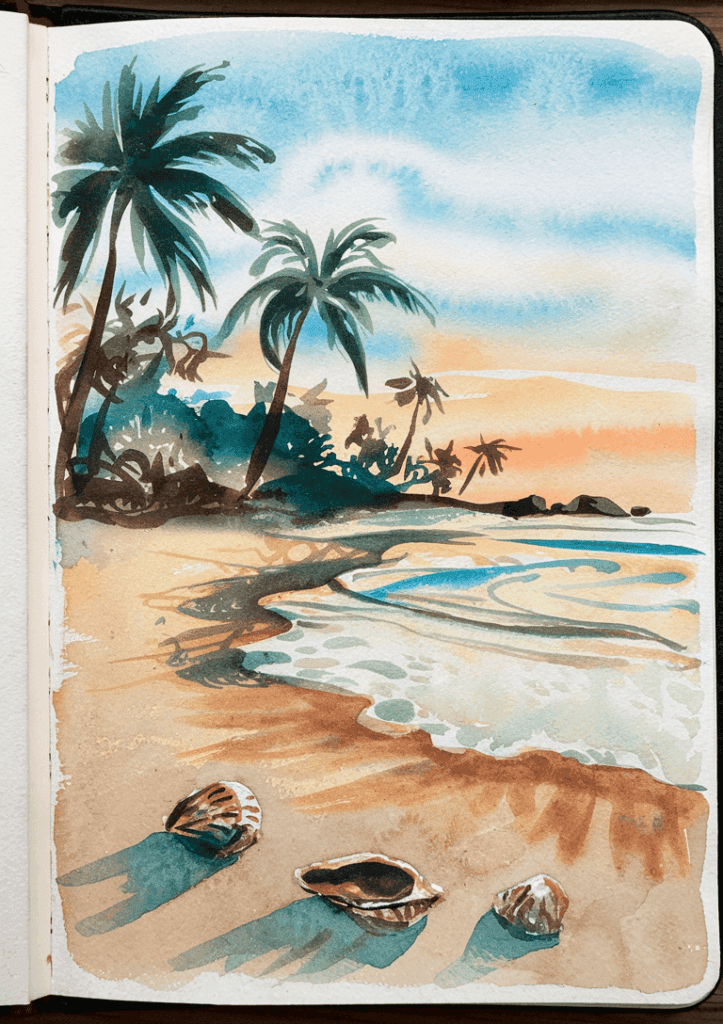


Capturing a golden sunset over the ocean in your sketchbook can be a magical experience. Start by laying a wash of clean water over your paper to create a smooth base for your painting.
Mix a light wash of quinacridone gold and paint a horizontal stripe across the center of your paper. This will form the foundation of your sunset’s warm glow.
Next, blend in some soft oranges and pinks above and below the golden stripe. These colors will create the gradual transition from the bright sun to the cooler sky and water.
For the ocean, use a mix of blues and purples, adding darker tones as you move towards the bottom of the page. This will give depth to your seascape.
Don’t forget to add some reflections of the sunset colors on the water’s surface. Use quick, horizontal brushstrokes to suggest ripples and waves.
Finally, consider adding silhouettes of boats or seabirds to enhance the composition. These dark shapes will contrast beautifully with the vibrant sunset hues.
39) Candlelit Dinner Table

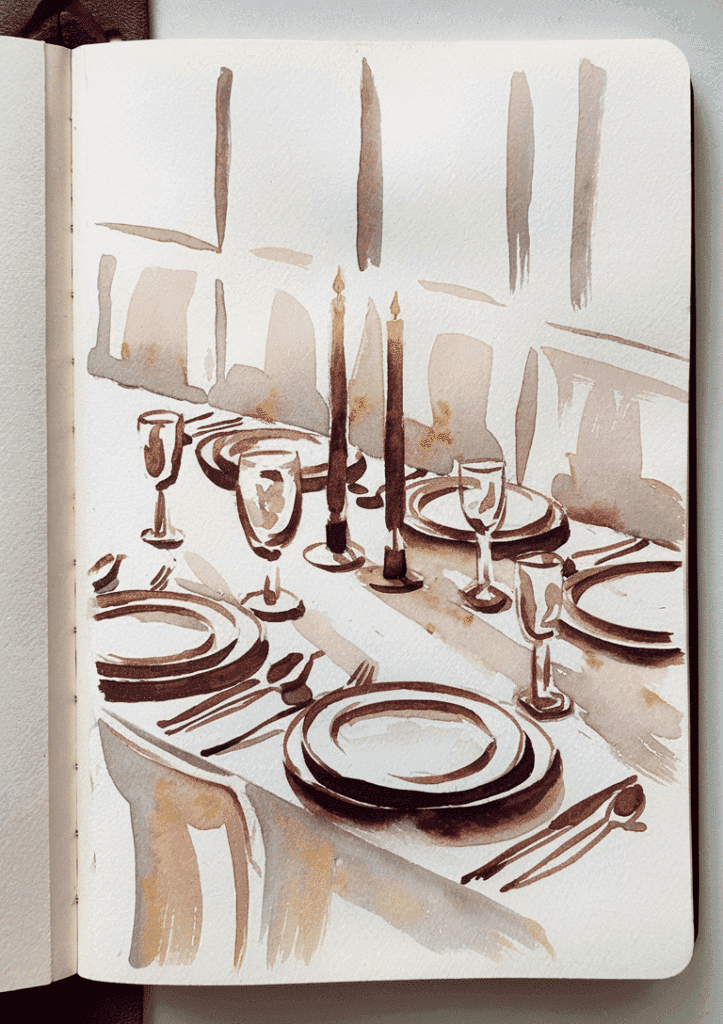
A candlelit dinner table offers a perfect subject for your watercolor sketchbook. You can capture the warm glow of candles and the intimate atmosphere they create.
Start by lightly sketching the table setting with pencil. Include plates, glasses, cutlery, and of course, the candles themselves. Pay attention to the placement of each item to create an inviting composition.
Focus on the play of light and shadow across the scene. The soft illumination from the candles will create interesting highlights and deep shadows. Use warm, soft lighting to evoke a cozy and intimate atmosphere in your painting.
Consider adding some romantic touches to your sketch. Rose petals scattered on the table or a small vase of flowers can enhance the mood of your painting.
Don’t forget to include some food elements in your sketch. A partially eaten meal or a dessert waiting to be enjoyed can add interest and realism to your scene.
Experiment with different watercolor techniques to capture the ambiance. Try wet-on-wet for soft, glowing effects or dry brush for texture in the tablecloth or napkins.
40) Whale Breaching Waves
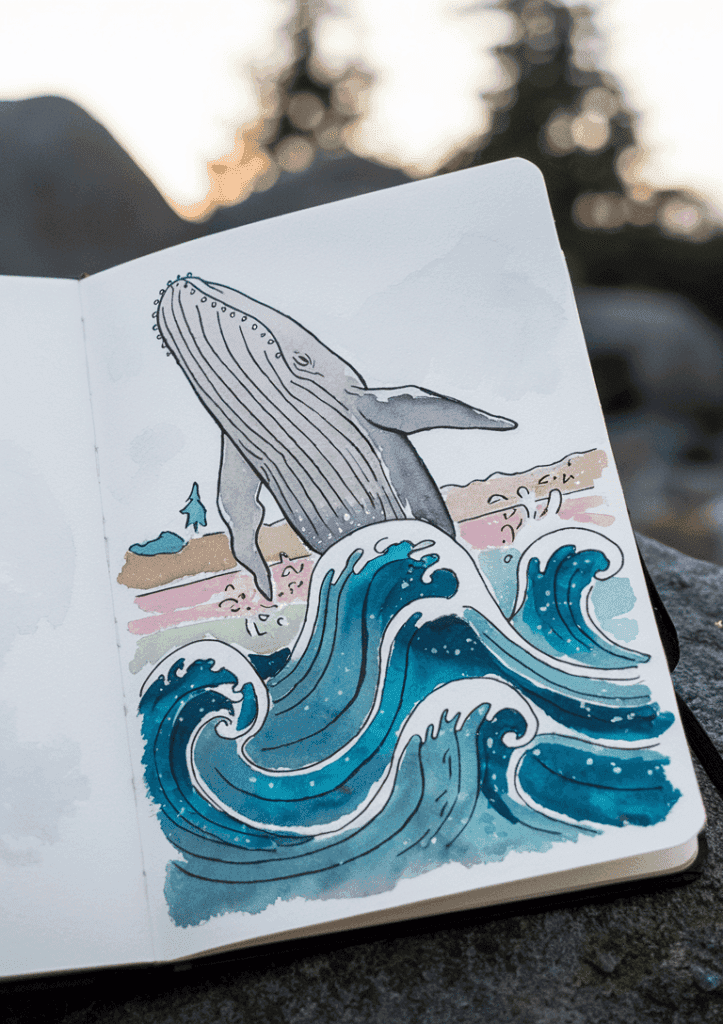


Capture the awe-inspiring moment of a whale breaching the ocean’s surface in your sketchbook. This dynamic scene offers a perfect opportunity to practice your watercolor skills and create a stunning visual impact.
Start by lightly sketching the whale’s outline as it emerges from the waves. Focus on the powerful curve of its body and the splash of water around it. You can find inspiration for whale breaching drawings to help you get started.
Use a mix of blue and green hues to paint the ocean, creating depth and movement. Add white highlights to represent the foam and spray around the breaching whale. This contrast will make your subject stand out.
For the whale itself, choose darker tones to emphasize its massive form against the lighter water. Pay attention to the texture of its skin and the graceful lines of its fins.
Don’t forget to include some dramatic waves in your composition. This will enhance the sense of motion and energy in your sketch. Experiment with different brush techniques to create the illusion of water splashing and flowing.
41) Soft Field of Lavender
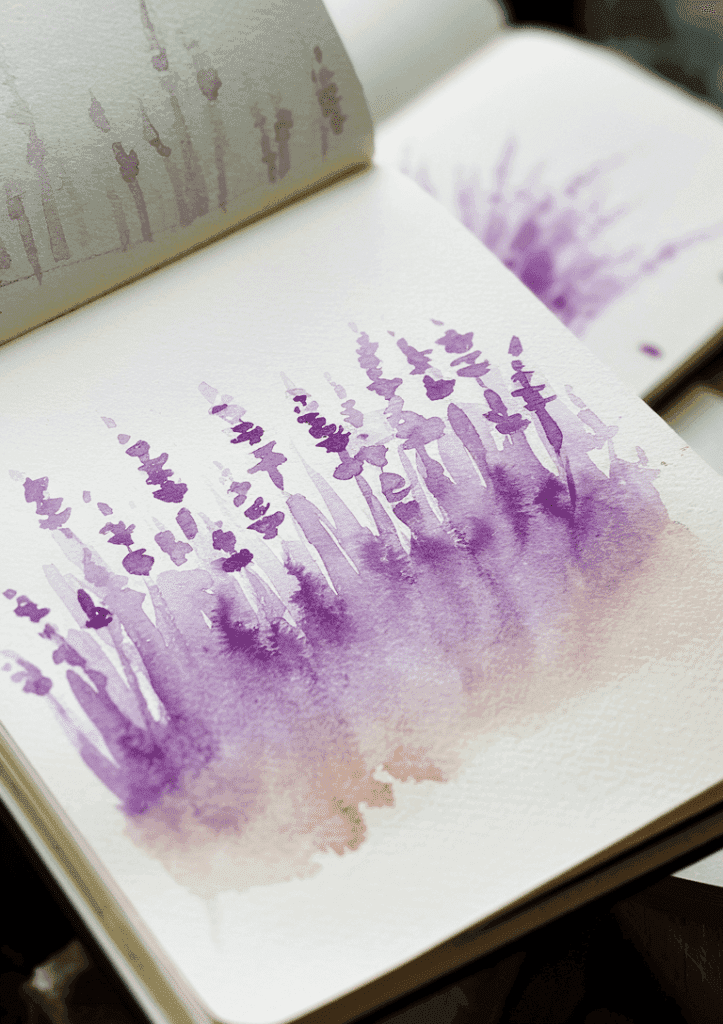
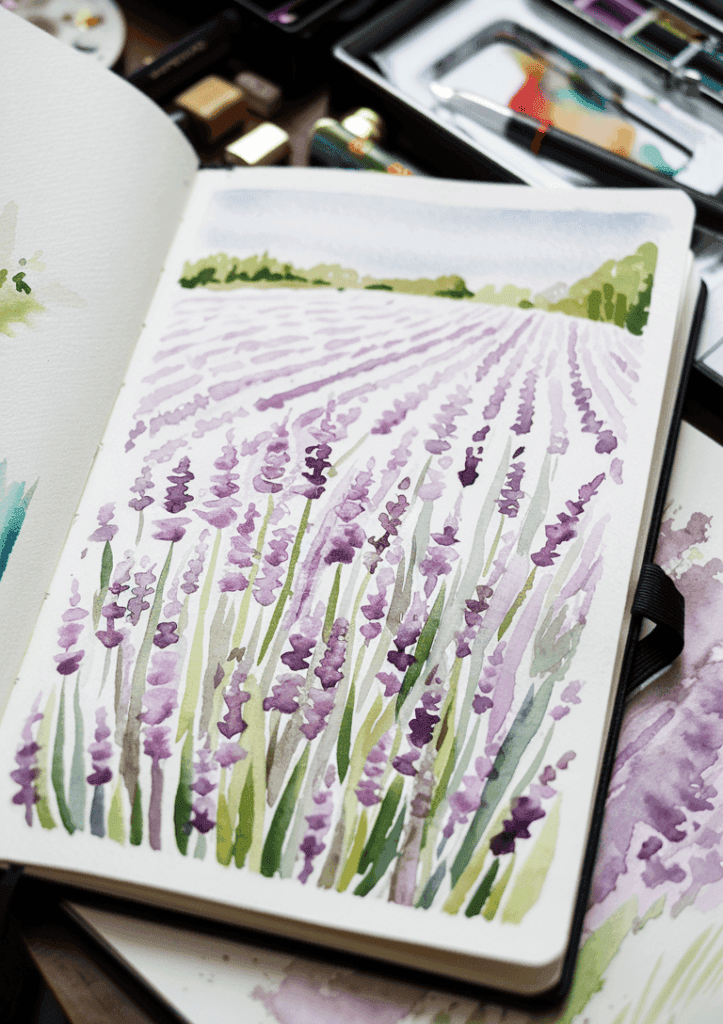


A soft field of lavender makes for a delightful watercolor subject in your sketchbook. You can create a dreamy, ethereal scene that captures the essence of Provence.
Start by sketching the basic layout of your lavender field. Use light pencil strokes to indicate the rolling hills and rows of lavender.
For the sky, apply a pale wash of blue or purple. This will set the mood for your painting and provide a beautiful backdrop for the lavender.
Next, focus on the lavender itself. Use shades of purple,
42) August Harvest Moon

The August Harvest Moon is a captivating subject for your sketchbook watercolor project. This celestial event occurs when the full moon rises close to the autumn equinox, typically in late September or early October.
To capture its essence, start with a warm orange or golden yellow wash for the moon. Blend in touches of red or deep orange to create a rich, glowing effect. You can use masking fluid to preserve the moon’s shape while painting the surrounding sky.
For the sky, choose deep blues and purples to contrast with the moon’s warmth. Add touches of lighter blue or even pink near the horizon to mimic the sunset’s fading light.
Consider including silhouettes in your foreground. Bare tree branches, cornstalks, or a distant barn can add depth and reinforce the harvest theme. Use a fine brush or pen to create these crisp, dark shapes against the luminous sky.
Don’t forget to experiment with different moon textures. You can dab salt on wet paint for a cratered effect or use a dry brush technique to create subtle shadowing.
Remember, the Harvest Moon often appears larger due to an optical illusion. Play with this perception in your painting by making the moon slightly larger than usual, filling your page with its mesmerizing glow.
43) Early Morning Dew


Capture the magical moments of dawn with early morning dew in your watercolor sketchbook. This delicate subject offers a perfect opportunity to practice your watercolor techniques.
Start by sketching light pencil outlines of leaves, grass blades, or flower petals. Use a wet-on-wet technique to create soft, misty backgrounds that evoke the early morning atmosphere.
For the dew drops, mix a tiny amount of white gouache with your watercolors. Apply small, rounded shapes to your subject matter, varying their sizes for a natural look. Remember to leave some white spaces on your paper for highlights.
Try experimenting with different surfaces. Capture dew on a spider’s web or on the petals of a delicate flower. These subjects allow you to explore transparency and reflection in your paintings.
Don’t forget to include some context in your sketch. Add hints of the surrounding landscape or garden to set the scene. This will help convey the peaceful, fresh feeling of an early morning.
44) Lush Jungle Pathway


Imagine yourself on a winding path through a dense, verdant jungle. This is your chance to bring that lush scene to life in your sketchbook using watercolors.
Start by lightly sketching the path’s curve and the outlines of towering trees. Use a mix of greens for the foliage, layering different shades to create depth and texture.
Add splashes of bright colors for tropical flowers peeking through the greenery. Dab in reds, oranges, and pinks to represent exotic blooms.
Don’t forget the dappled sunlight filtering through the canopy. Leave some areas white or use a light yellow wash to create this effect.
For the pathway, use earthy browns and tans. Add texture by dabbing salt on wet paint or using a dry brush technique.
Watercolor jungle paintings can be a great source of inspiration for your own creation. Let your imagination run wild as you bring this lush scene to life on paper.
45) Bustling Cityscape

Capture the energy of a vibrant urban scene in your sketchbook with a bustling cityscape watercolor. Start by lightly sketching the basic shapes of buildings, streets, and vehicles with a pencil.
Choose a limited color palette to maintain cohesion. Warm yellows and oranges can evoke a sunny day, while cool blues and grays suggest an evening atmosphere.
Apply a light wash for the sky and background buildings. Let this layer dry before adding details.
Use vertical strokes to create the illusion of tall structures. Add windows and architectural details with a fine brush or pen.
Incorporate movement by painting blurred figures or vehicles. This technique brings life to your cityscape and conveys the hustle and bustle.
Don’t forget to include shadows to add depth and dimension. Use darker tones beneath buildings and in alleyways.
Finally, add splashes of bright color for traffic lights, signs, or clothing to draw the eye and complete your lively urban scene.
46) Cozy Fireside Moments


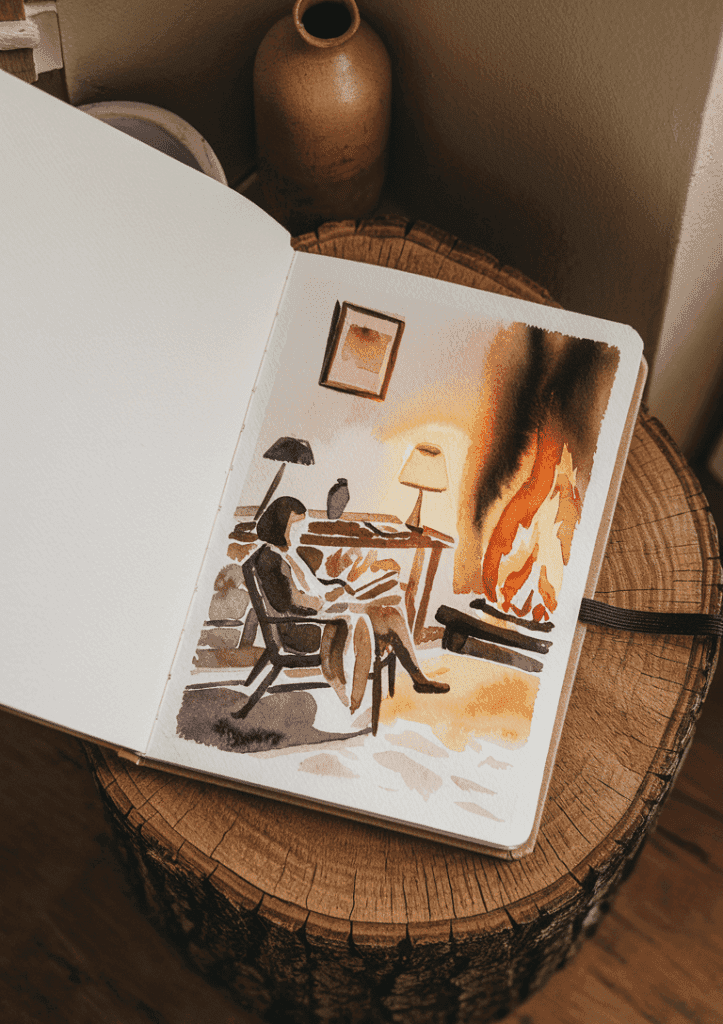
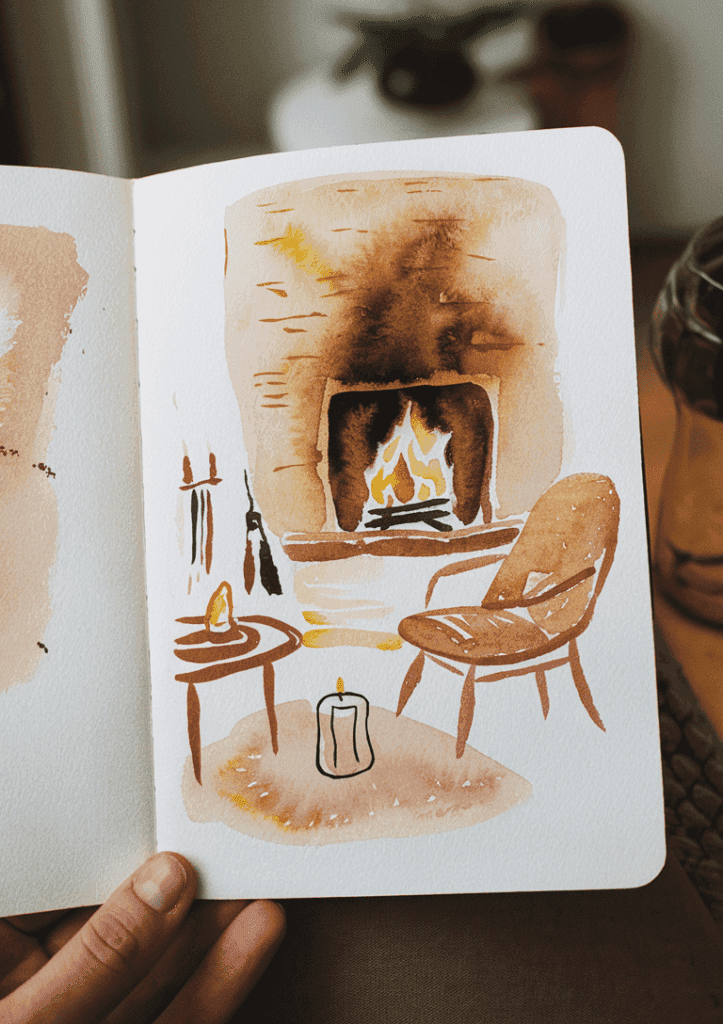
Capture the warmth and comfort of a fireside scene in your sketchbook. Use watercolors to bring the glow of flickering flames to life on paper.
Start with a loose sketch of a fireplace or campfire. Focus on the shapes and shadows cast by the fire’s light. Add details like logs, embers, and surrounding furniture or nature elements.
Mix warm oranges, reds, and yellows for the fire itself. Experiment with wet-on-wet techniques to create soft, blended edges that mimic the fire’s movement.
Don’t forget the cozy atmosphere around the fire. Paint soft, muted tones for comfortable chairs, blankets, or even a mug of hot cocoa nearby.
Use darker shades to create depth and contrast in the background. This will make the fire’s glow stand out even more.
Add final touches with white or light yellow to highlight sparks or particularly bright areas of the flame. These small details can really bring your fireside scene to life.
Remember, the goal is to evoke that sense of warmth and comfort. Let your brushstrokes be loose and expressive to capture the dynamic nature of fire.
47) Charming Cottage by Lake


Imagine a quaint cottage nestled by a serene lake. This idyllic scene is perfect for your sketchbook watercolor project. Begin with a light pencil outline of the cottage, capturing its cozy structure and unique architectural details.
Add some trees and shrubs around the cottage to create a natural, secluded setting. Don’t forget to include the lake in the foreground, reflecting the sky and surrounding landscape.
Start with a watercolor wash for the sky and lake, using soft blues and purples. Layer in darker shades for depth and texture in the water. Paint the cottage with warm, inviting colors like creams, browns, and soft reds for the roof.
Add details to bring your scene to life. Paint flowers in the garden, smoke curling from the chimney, or a small boat tied to a dock. These elements will enhance the charming, cozy atmosphere of your cottage sketch.
Finally, use small brushstrokes to add texture to the trees and grass. Dab in some white highlights on the lake to create a sparkle effect. Your charming cottage by the lake will now be a delightful addition to your watercolor sketchbook.
48) White Sand Beaches

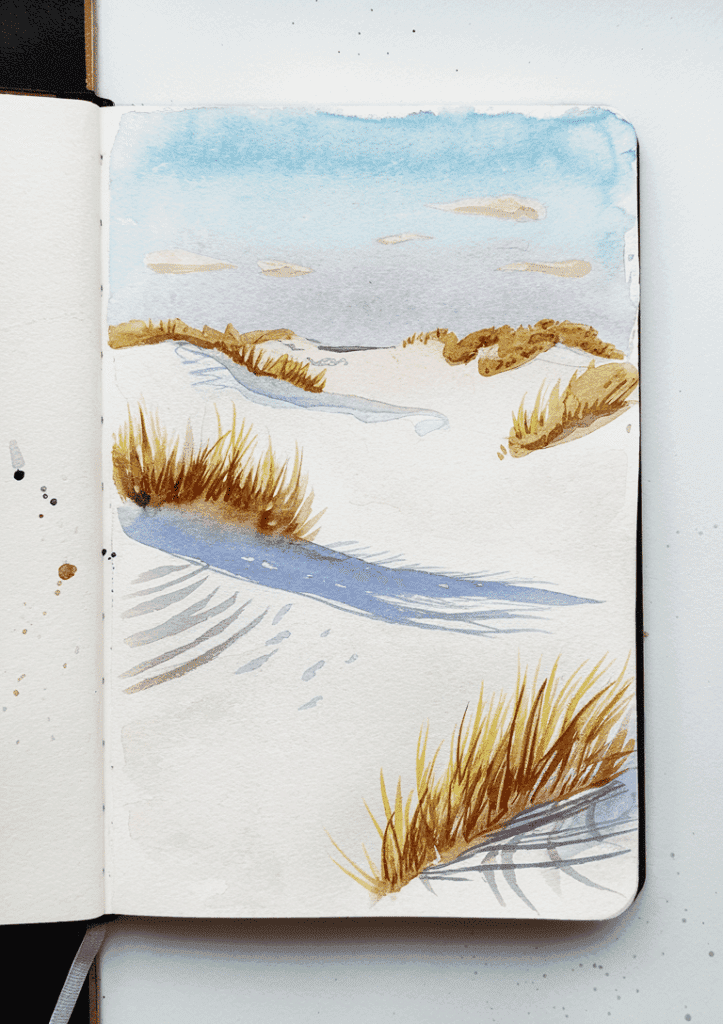



Capturing the serene beauty of white sand beaches in your sketchbook can transport you to a tropical paradise. Start with a light wash of pale blue for the sky, blending it seamlessly into the horizon.
For the ocean, use varying shades of turquoise and aquamarine. Create texture by adding wet-on-wet techniques to represent gentle waves and reflections on the water’s surface.
When painting the sand, opt for a warm off-white or light beige color. Add subtle shadows and texture using a dry brush technique to capture the fine grains. Don’t forget to include some damp areas near the water’s edge for realism.
Consider adding beach elements like colorful umbrellas, seashells, or footprints in the sand. These details can bring your sketch to life and tell a story.
Try tilting your sketchbook at a 45-degree angle when painting the sky and water. This technique allows the pigments to flow naturally, creating beautiful gradients and textures.
Remember to leave some areas of white paper showing through to represent the bright sunlight reflecting off the sand and water. This will enhance the feeling of a sun-drenched beach day in your watercolor sketch.
49) Train Through Green Hills

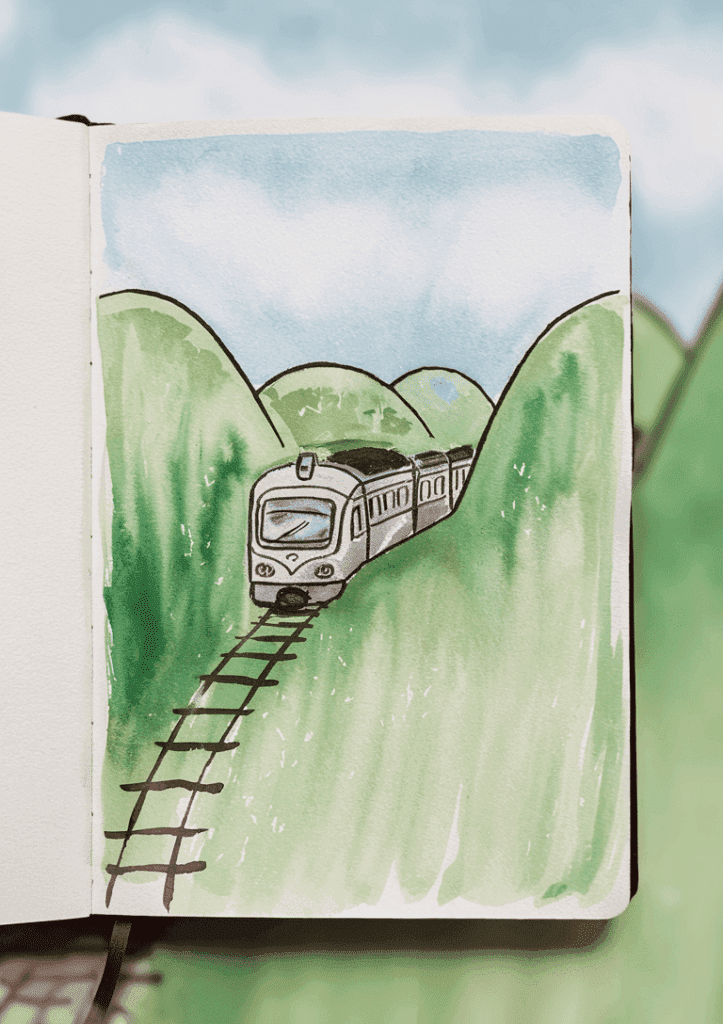
Picture a serene landscape of rolling green hills stretching to the horizon. Now imagine a train winding its way through this picturesque scene. This is your next watercolor challenge.
Start by sketching the basic outline of the hills using light pencil strokes. Add the train tracks curving through the landscape, following the contours of the terrain.
Next, paint the hills using various shades of green. Mix your watercolors to create a range of tones, from light sage to deep forest green. Apply the paint in loose, flowing strokes to capture the natural texture of the grass.
For the train, choose a bright color that contrasts with the green hills. Red or blue works well. Paint the locomotive and cars with careful attention to detail, adding windows and wheels.
Don’t forget the sky! A pale blue wash with wispy white clouds can add depth to your composition. Use a dry brush technique to create texture in the foreground, suggesting grass or wildflowers.
Finally, add some shadows to give your scene depth and dimension. Remember, the train will cast a shadow on the hills as it passes by.
50) Birds in Morning Fog


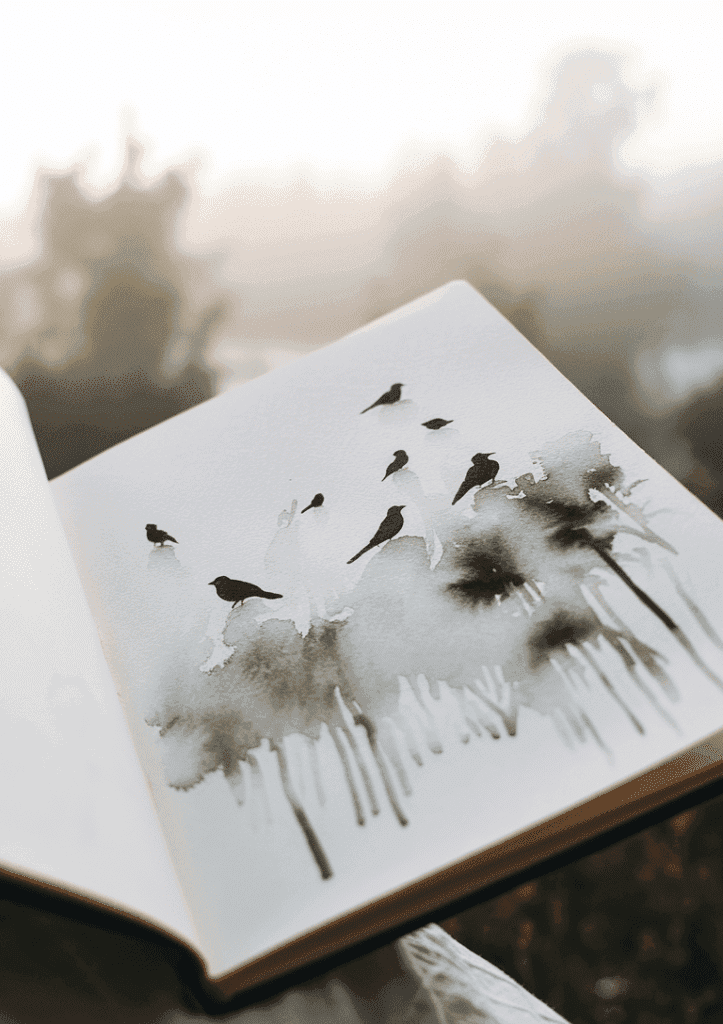
Capturing birds in morning fog offers a unique and ethereal watercolor subject. You can create a magical atmosphere by using soft, muted colors and blending techniques.
Start with a light wash of pale blue or gray to set the foggy backdrop. This will give your painting a dreamy quality right from the start.
Next, sketch in the silhouettes of trees or branches. These will serve as perches for your birds and add depth to the scene.
Watercolor birds can be painted in various styles, from detailed to impressionistic. For a foggy scene, consider using looser brushstrokes to enhance the misty effect.
Add your birds to the composition. You can paint them in darker shades to stand out against the fog, or use lighter tones to make them appear partially obscured.
Don’t forget to include some subtle details like reflections or water droplets. These small touches can bring your foggy bird scene to life.
Experiment with different bird species and poses. You might even try painting a flock of birds emerging from the mist for added drama.
Essential Watercolor Painting Supplies List
This is our go-to list of recommended watercolor painting supplies that we use for all our watercolor art, junk journaling, and art journaling!
**This page may contain affiliate links to products I have used or recommend. If you purchase something from this page, I may receive a small percentage of the sale at no extra cost to you.**
- Watercolors: Windsor & Newton is a reputable brand that offers high-quality watercolor paints. You can choose from their range of professional-grade watercolor tubes or pans, depending on your preference.
- Watercolor Paper: Look for cold-pressed, 140lb (300gsm) watercolor paper for the best results. This type of paper is durable and has a nice texture that’s ideal for watercolor painting.
- Brushes: A selection of round and flat brushes in various sizes will give you the versatility you need for different strokes and details. Sable or synthetic brushes designed for watercolor will give you the best performance.
- Palette: A mixing palette with wells for both mixing and holding your paints is essential. It can be a simple plastic one or a porcelain palette for a more luxurious feel.
- Water Container: Any clean jar or container will do, but having two for clean and dirty water can help keep your colors pure.
- Masking Fluid: This is used to cover areas of your painting that you want to keep white. Make sure to apply it with an old brush or a dedicated masking fluid brush, as it can ruin fine bristles.
- Pencils: A soft pencil, like a 2B, is great for sketching your design before painting.
- Eraser: A kneaded eraser is gentle on watercolor paper and can lift pencil lines without damaging the surface.
- Paper Towels or a Rag: These are useful for blotting your brush to control the amount of water and paint.
- Board: If you’re using watercolor paper from a pad or sheets, you might want to tape your paper down to a board to prevent warping.

Grab the Free Printable Templates for Watercolor HERE (below)!
To access the free in-post printables for this post, you’ll just need to create a free account or login with the Grow.me tool. Then, confirm by email and refresh the page and ALL my free printables will automatically unlock in every post!
Love These Watercolor Templates? Get Even More Exclusive Creative Goodies on My Patreon! 🎨
If you’re enjoying these free printables, why not join my Artsydee Patreon community? As a member, you’ll gain access to exclusive Procreate tutorials, watercolor lessons, and tons of printables like this one—delivered to you monthly (and sometimes even twice a month!). Plus, you’ll get sneak peeks at upcoming projects and have a say in what content I create next. ✨
Join today and unlock premium resources to take your creativity to the next level!


